Necron Cargo Container - Mini Carrier - Warhammer 40K Kill Team
prusaprinters
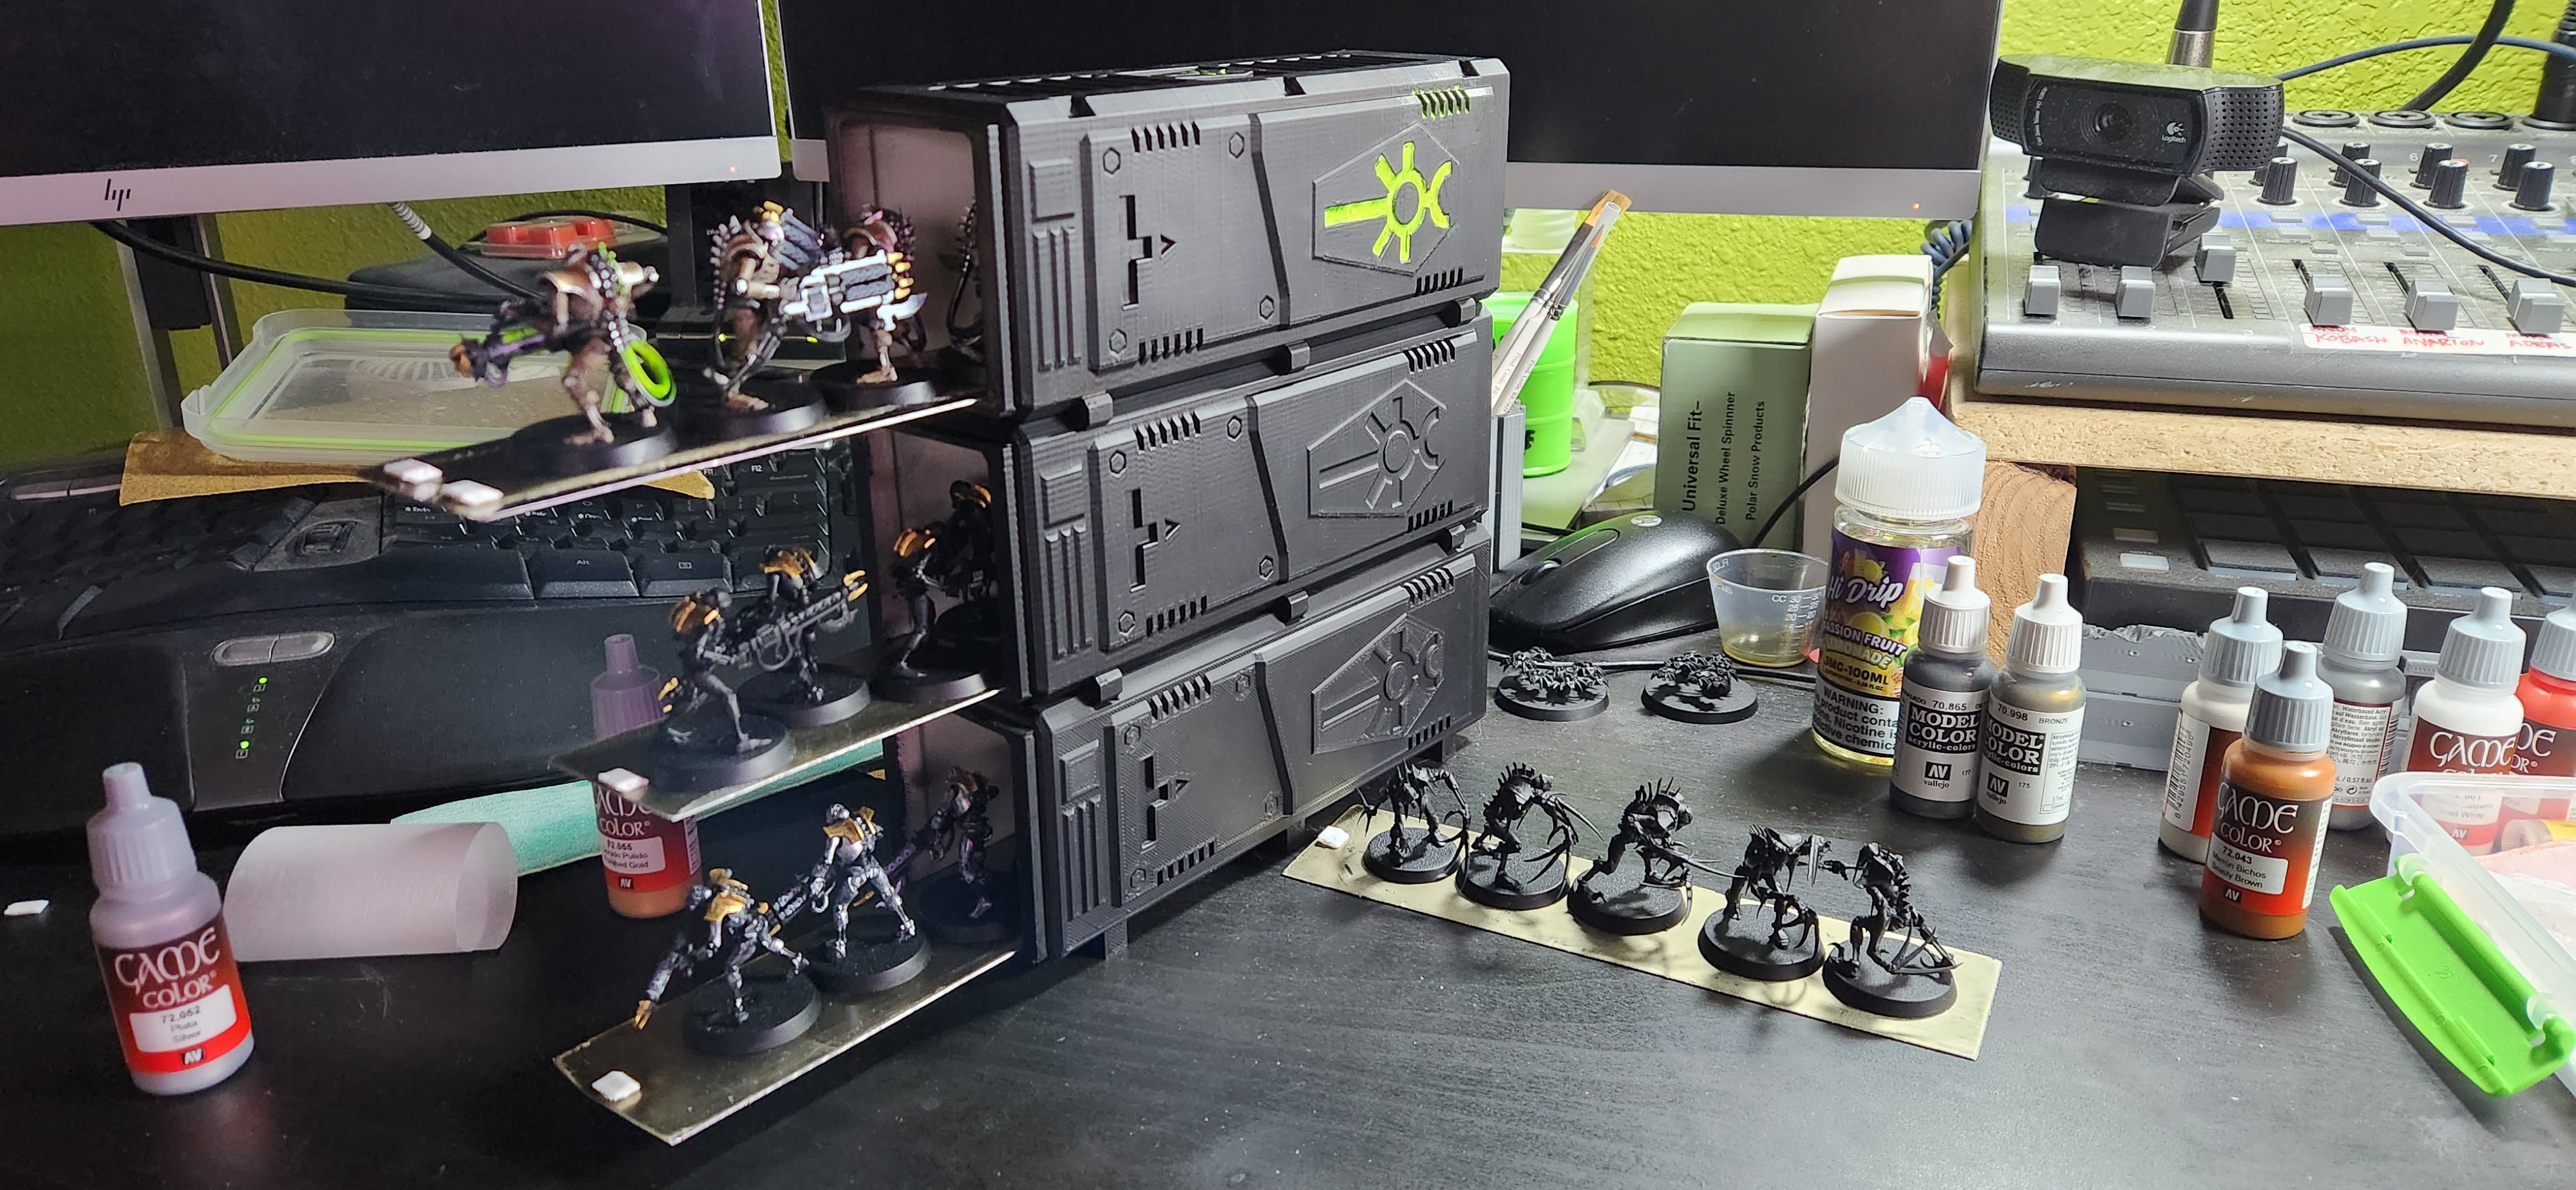
<p>Hello Everyone. </p><p>I designed this shipping container as a way to carry my Necron Kill team to and from the games. The Necron army can be quite fragile, especially the Flayed Ones, and I wanted to make sure that they got to the fight safe.</p><p>Backstory for the print. I had an old PEI magnetic print bed for my Ender 3 Pro, that i had replaced with a glass bed. the print sheet was scratched pretty bad, and so i decided to use it as a place to hold my minis while I was painting them. I put a three 2mm circular magnets on the base of my minis, and they have just the right amount of magnetism to hold the mini's in place but not so much where they are difficult to get off. This served as my basis of the Cargo Container. You can find the PEI sheets for around $15 on amazon, sometimes even cheaper.</p><p><strong>PEI SHEET</strong></p><figure class="image image-style-align-left image_resized" style="width:75%;"><img src="https://media.printables.com/media/prints/316671/rich_content/b54e33a5-a980-40f2-8ec5-478e87b47311/pei_sheet.jpg#%7B%22uuid%22%3A%2274825433-c29c-400b-8d99-6edb0b9591bc%22%2C%22w%22%3A4000%2C%22h%22%3A1848%7D"></figure><p> </p><p> </p><p> </p><p> </p><p> </p><p> </p><p> </p><p> </p><p>You will need to cut the PEI sheets into strips that are 184mm x 48mm. I used a simple metal cutting hacksaw, which was a bit of a workout, and then sanded the edges to make sure they weren't sharp. Try to ensure that these cuts are pretty straight so that the sheet slides smoothly into and out of the container, you can use a file to clean them up a bit if they go to wide. Each container can hold 5-6 minis depending on size, so to hold a full Kill team, you will need a minimum of 2 containers.</p><p><strong>CONTAINER</strong></p><figure class="image image-style-align-left image_resized" style="width:41.17%;"><img src="https://media.printables.com/media/prints/316671/rich_content/1e7886b8-2fc5-4a38-81b0-71d4db1fed42/cura_supports.png#%7B%22uuid%22%3A%22eeb59aa0-d979-427d-bcfb-bfa93a17caa9%22%2C%22w%22%3A674%2C%22h%22%3A1040%7D"></figure><figure class="image image-style-align-left image_resized" style="width:50%;"><img src="https://media.printables.com/media/prints/316671/rich_content/c4d6db42-b62a-4a33-b07b-1f046e492ea1/cura_sliced.png#%7B%22uuid%22%3A%22653a5c58-96d5-4e3e-9997-1082eaaf8103%22%2C%22w%22%3A1073%2C%22h%22%3A1182%7D"></figure><p> </p><p> </p><p> </p><p> </p><p> </p><p> </p><p> </p><p> </p><p> </p><p> </p><p> </p><p> </p><p> </p><figure class="image image_resized" style="width:98.23%;"><img src="https://media.printables.com/media/prints/316671/rich_content/7b3f9f3b-6f19-4893-96a8-9ca182b3ad1c/capture.png#%7B%22uuid%22%3A%2218626dc9-9f16-4b0c-b89d-d7bacc0a4115%22%2C%22w%22%3A978%2C%22h%22%3A317%7D"></figure><p>As for the print, you will print the whole container standing vertically with the closed end on the print bed. I used the <strong>Support blocker</strong> to block all of the supports <strong>EXCEPT </strong>for the ones on the legs and the slots on the top of the container, which the legs slot into for stacking, also make sure to leave the supports around the opening, to have a good clean line for the lid to slide on. Please see the above pictures for clarification.</p><p>These print with minimal clean up, just removing the few supports. The only supports that can be difficult are the ones on the top of the container, where the feet slot into, but they can be pried out pretty easily without damaging the print. Also, I used these top slot supports, by super gluing them onto the PEI sheet as little grips to pull the sheets out. they look pretty neat like that.</p><figure class="image image_resized" style="width:68.07%;"><img src="https://media.printables.com/media/prints/316671/rich_content/62444fbc-c3e4-4bc5-874c-6db48d59d41c/20221113_120001.jpg#%7B%22uuid%22%3A%22bda3e367-3e70-432f-9c3d-344b44254cc4%22%2C%22w%22%3A4000%2C%22h%22%3A1848%7D"></figure><p>I made the slot for the PEI sheet to slot into a bit oversized to allow for any imperfections in cutting up the Sheet, and to allow for differences in sheet thickness, I've seen the PEI sheets range from .75 mm to 1.25mm in thickness, and wanted to make sure that the majority would fit in the slot</p><p><strong>LID</strong></p><figure class="image"><img src="https://media.printables.com/media/prints/316671/rich_content/2273195c-9702-4fd5-af71-4627f5956ecf/lidcapture.png#%7B%22uuid%22%3A%226558cfba-0e0f-4c81-8290-1c2c6b779f1d%22%2C%22w%22%3A968%2C%22h%22%3A424%7D"></figure><figure class="image image-style-align-left image_resized" style="width:50%;"><img src="https://media.printables.com/media/prints/316671/rich_content/8acf6f36-54e0-4f5f-bed5-00de96f24d82/liid2capture.png#%7B%22uuid%22%3A%226a9ef6de-185d-4883-8549-732ba0b2a882%22%2C%22w%22%3A821%2C%22h%22%3A1074%7D"></figure><p> </p><p> </p><p>For the lid, you will print it with the Necron symbol on the bed plate, and use the support blocker to block the supports from the print bed, but you want to make sure to keep the supports in the slot area, where it slots into the container. </p><p>This is meant to be a snug fit between the lid and the container so that the lid doesn't come off on it's own. You will need to use a fine sand paper and ensure there are no snags in the slot on the lid or on the container. It should slot in nicely as long as it is smooth in the slotted area. Sand as needed.</p><p>I Also added a small dice holder that is able to hold 5x 12mm, 6 sided dice. This can be printed with no supports, and is just super glued into the container. See pictures for orientation.</p><p> </p><p> </p><p><strong>PRINT DIMENSIONS</strong></p><p>The Shipping container dimensions are:</p><p>73.6 x 79.9 x 197.0 mm</p><p>The Lid dimensions are:</p><p>65.4 x 73.4 x 10.0 mm</p><p><strong>PRINT SETTINGS</strong></p><p>Layer Height: 0.2</p><p>Infill Density: 15%</p><p>Wall Line Count: 3</p><p>Support Structure: Normal</p><p>Support Placement: Everywhere</p><p>Be sure to use the support blockers to block the supports where mentioned above.</p><p><strong>Thank you</strong></p><p>If you lovely people like this print, I could also upload a few different containers with some of the other factions symbols on them. If you have any questions about the print, please feel free to reach out.</p><p>If you enjoyed this print, or would like to help spawn future 3d prints, there are multiple ways to support me. </p><p>You can donate, through Patreon or Paypal, and you can also head over to my Youtube channel and subscribe over there. Thank you </p>
With this file you will be able to print Necron Cargo Container - Mini Carrier - Warhammer 40K Kill Team with your 3D printer. Click on the button and save the file on your computer to work, edit or customize your design. You can also find more 3D designs for printers on Necron Cargo Container - Mini Carrier - Warhammer 40K Kill Team.