Printer Enclosure
thingiverse
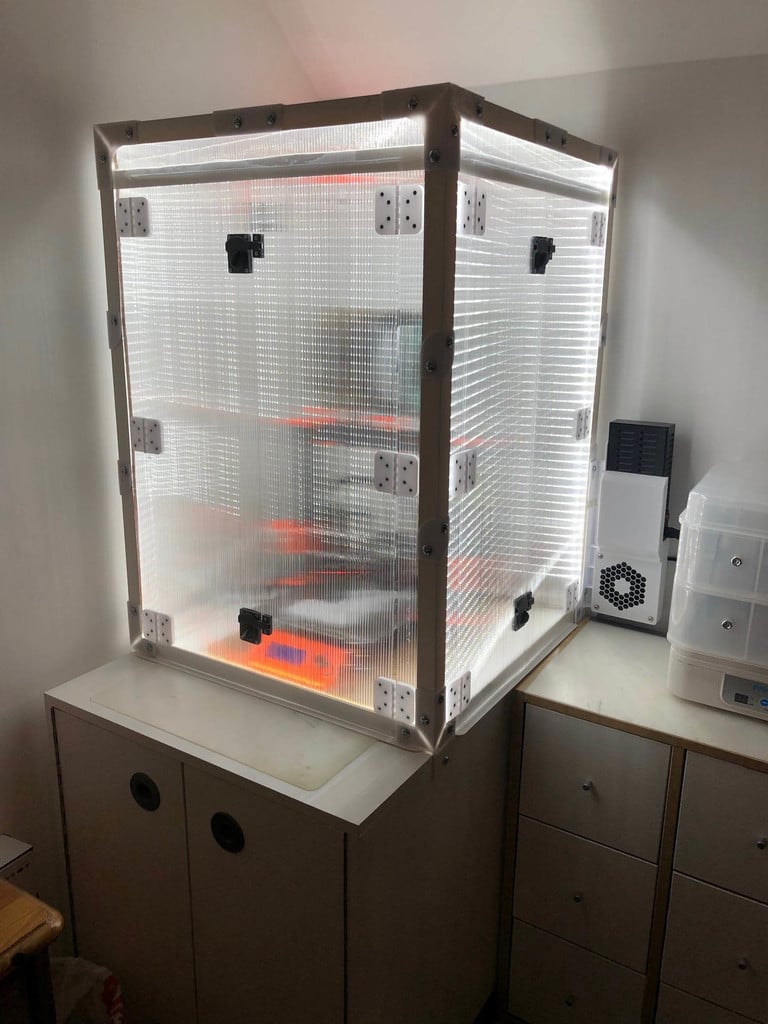
This is a series of printed (PETG) parts that turn 4mm Marlon Corotherm (multi-wall polycarbonate - intended for clear insulated roofing and horticultural construction) into a 600x600x600 (internal) printer enclosure. Before you say it, I know, Prusa printer enclosure is spelt “Lack”. But a Lack-table-based enclosure only gives X50 x Y50 x Z40 (unless you use a top & tale twin table design to get a 50x50x80). That footprint is tight for a Prusa, unworkable for larger footprint printers. Additionally, the Lack is made from honeycomb cardboard and you are going to deliberately heat that up? Polycarbonate offers functional & safety advantages. Polycarbonate certifies as Fire Class B, which means it minimally contributes to fire spread and will produce very little smoke. Corotherm is treated to further improve its fire resistance. With the “Lack” build you then have to add & secure wall panels. This build can be sized for virtually any hobby printer. See example with my Ender 3 S1 Pro inside. By self-printing corners and mids and using 30mm PVC Angled Edge Moulding, you can rigidly mount Corotherm and get a bigger (& lighter) enclosure for little or no extra cost. Corotherm ticks many boxes: light, highly insulating (for both heat and sound), easily worked, strong and cheap. Screw everything together with very cheap M6 25mm panhead roofing bolts and nuts (using the self-print backing washers). Build time is an afternoon, drill 6.5mm holes and don’t over-tighten, this would compress the Corotherm. Parts self-print time is probably a cumulative couple of days. Use this time to cut your sheets? Both Corotherm & PVC extruded angle edge cut easily and smoothly with a jigsaw. If you would like doors (I have included two sets in my build), then simply cut them out where you want them and re-attach. To do this also print [per set of doors] 6 x PiP hinges (incl backing plates) [ here < https://www.thingiverse.com/thing:5658860/edit > ] and 2 x Lock sets (incl backing plates) [ here < https://www.thingiverse.com/thing:5658873 > ]. The door furniture is secured with Flathead M3 12mm bolts and nylocs and additional PVC angle has been used to provide a lower door frame. For a freestanding enclosure use 8 x Full corners and 12 x Mids (I printed in PETG) For a base-attached enclosure use any combination of the front, rear and mid bases (with extended side plates) to attach to the base cabinet/table at your point(s) of choice (using M4 panhead self-tappers) For a X610 x Y610 x Z610 Enclosure use 3 x 610x1220 Corotherm sheets @£5.95 each & 2 x PVC 30mm Angled edge Mouldings (L)2.4m @ £5.95 each. Total £30 + nuts&bolts (Nov2022). For monitoring and safety, print and use the included mounts for a mini Smoke Detector, Wi-fi humidity/temperature sender and local Temperature/humidity display. You could easily add a wi-fi camera to another bolt point if you wish. Lighting was simply a 5m strip of self-adhesive (2300 lumin) LED’s run around the internal edges on their own transformer (£5) If you wish to relocate your power supply unit external to the enclosure, then see the sister project [ here < https://www.thingiverse.com/thing:5659055 > ]. This secures the PSU and incorporates a (variable rate) 120mm blower fan. It bolts to an upright of the enclosure, sized for existing bolt positions (would also attach to a LACK enclosure on one leg). The pictured enclosure is Z850 to accommodate other printers such as the Creality E3 S1Pro. With a Prusa i3 in the cabinet (but the PSU moved outside the cabinet), harvesting & retaining print bed and hot end waste energy keeps it at between 32&35'C under 20'C ambient conditions. Humidity is relative to ambient conditions, but it is a wet UK autumn @ > 98% and the cabinet currently stabilizes at circa 25% so I am also using it to condition filament for future use (whilst printing) Not yet used in summer. If necessary, a roof rotary exhaust port will be fitted to allow air turn-over to control over-heating. All costs as at Nov22 (UK)
With this file you will be able to print Printer Enclosure with your 3D printer. Click on the button and save the file on your computer to work, edit or customize your design. You can also find more 3D designs for printers on Printer Enclosure.