NERF Scout IX3 triggering mechanism
thingiverse
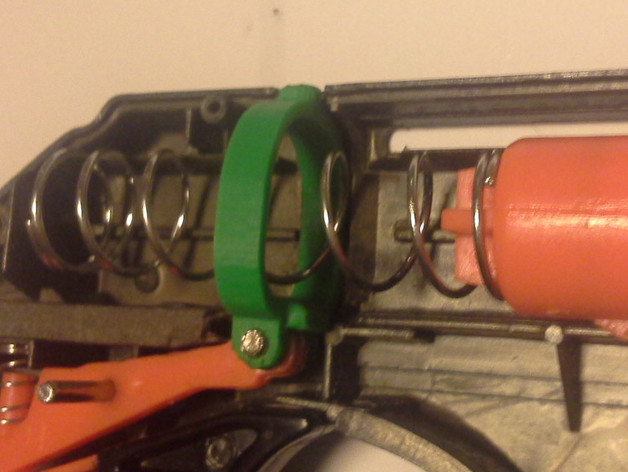
Replacement for internal trigger mechanism of NERF blaster Scout IX3. Back part of this piece within my blaster got worn out over time, pulling carriage no longer armed the blaster. Post-Printing: Part where piston tooth slides is slightly bigger than necessary on purpose. This is to ensure a smooth surface after sanding with fine sandpaper and minimize friction. You may also need to drill larger holes for metal pivot connecting to rest of triggering mechanism. To replace part: Remove four screws on slide and gently pry open two halves. Make sure not to lose any small pieces like springs or plastic bits, or the metal pivot. Remove remaining screws - about 10. Note that not all screws are equal; remember which one goes where. Gently pry open two halves of blaster body. Remove barrel, then trigger mechanism with single screw and couple of springs. Push out short metal pivot from trigger mechanism to access piece to be replaced. Replace with new 3D printed part, ensuring correct orientation. Reassemble in reverse order. Apply grease to grooves on both sides when reinstalling barrel; I used GL2 lithium grease. To check repair success before reassembling slide, manually load main spring by pulling barrel loading tooth with screwdriver shaft. If everything is fine, blaster should arm and you can test trigger pull fires. Have fun shooting friends with foam darts!
With this file you will be able to print NERF Scout IX3 triggering mechanism with your 3D printer. Click on the button and save the file on your computer to work, edit or customize your design. You can also find more 3D designs for printers on NERF Scout IX3 triggering mechanism.