Nest Protect Adapter
thingiverse
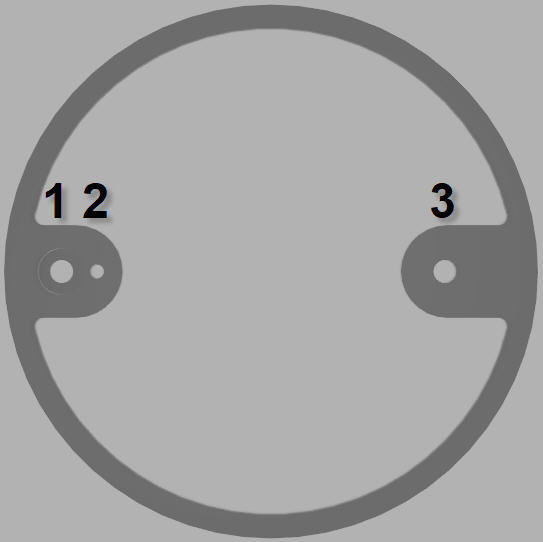
While replacing a smoke detector with a new Nest Protect battery powered smoke detector I noticed that the holes in the mounting plate do not line up with the holes in the electrical box so I designed this adapter in Fusion 360. Holes 1 and 2 line up with the holes in the Nest mounting plate and holes 1 and 3 line up with the holes in the electrical box. This was designed for US electrical boxes with a distance of 3.28 inches (83.3mm) between holes. This might work for Canada and Mexico. I printed this in PETG, but you can use PLA or ABS. If it gets hot enough to deform then your house is probably almost burnt down anyway. If your electrical box is metal the screws for holes 1 and 3 will need to be the appropriate machine screw, otherwise you can use one of the screws that came with the Nest. Installation: Install a screw through hole 1 and into the electrical box. I temporarily put a screw into hole 3 to align the adapter. If you do this remove it now. Now install a screw through one of the holes in the mounting plate, through hole 3, and into the electrical box. Finally, install a screw through the mounting plate and into hole 2 of the adapter. Now continue the rest of the installation in the Nest instructions.
With this file you will be able to print Nest Protect Adapter with your 3D printer. Click on the button and save the file on your computer to work, edit or customize your design. You can also find more 3D designs for printers on Nest Protect Adapter.