Netatmo wind gauge mount for flagpole top cap
prusaprinters
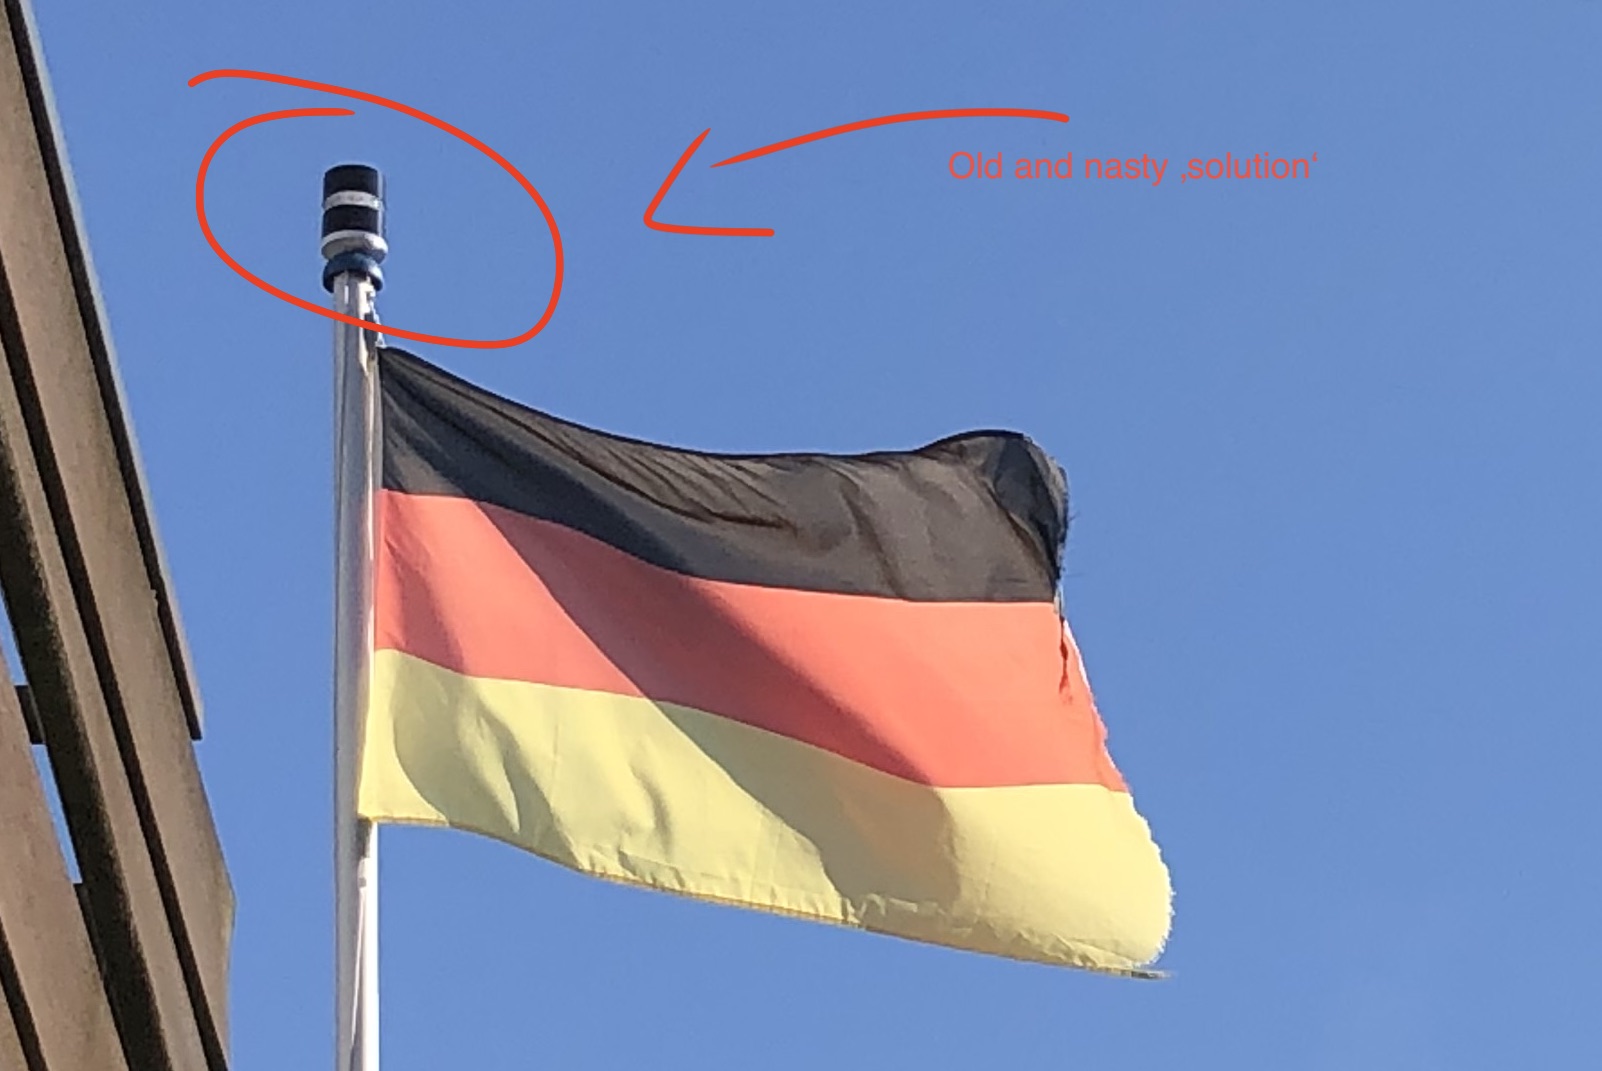
<p>When I got my Netatmo wind gauge I immediately wanted to mount it. So I just drilled a hole in the standard top cap of my flagpole, put a screw in and put the wind gauge on top of it. This ‘solution’ worked for a while, but it looked really nasty…..and I wanted to do it properly this time.</p><p>I tried a bunch of different approaches and iterations. All of them work so you can decide, which one you like best. </p><p>V1: Since the wind gauge is sensitive to UV radiation, I wanted to design the mount in a way that protects the gauge. </p><p>V2: Same as V1 but with added drain holes on the bottom.</p><p>V3: A rather simple solution that uses a lot less material.</p><p>V4: Same approach as with V3 but with holes for a rope.</p><p>V5: Redesigned the bottom part, so the rain can drain better and added a top cap to also protect the top of the wind gauge. Should be used in combination with V3/4 and a long screw.</p><p>V6: My latest iteration. A lot less material is needed. but it also doesn't protect the wind gauge. You can add a 608 bearing to the bolt if you want to.</p><p> </p><p>Settings: </p><p>Print with 0.2 or 0.3mm and PETG. PLA should also work but doesn't last as long as PETG.</p>
With this file you will be able to print Netatmo wind gauge mount for flagpole top cap with your 3D printer. Click on the button and save the file on your computer to work, edit or customize your design. You can also find more 3D designs for printers on Netatmo wind gauge mount for flagpole top cap.