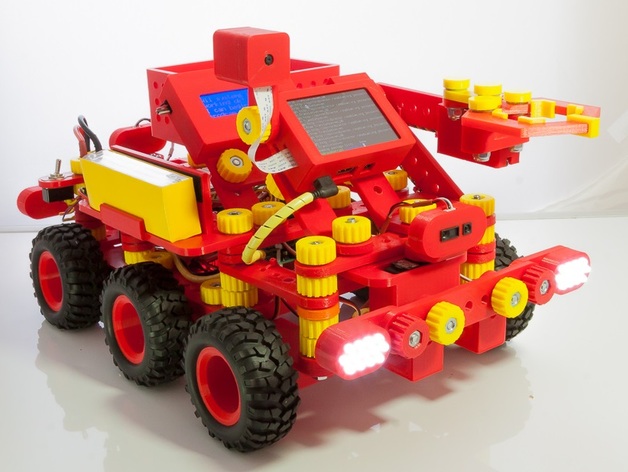
"Neurobot 1" - Arduino, Raspberry Pi, Linux and ROS educational robotics kit
thingiverse
This text appears to be a document generated by a 3D printing software or a platform, likely a community-driven project. It includes various settings for a 3D printer model called "Robo 3D R1 ABS + PLA Model" and provides tips on how to use the printer, including: * Using thin aluminum sheet clipped down to the bed * Applying double layer of hairspray to prevent part adhesion * Printing with specific settings such as resolution, infill, and extrusion multiplier The document also includes references to various online resources related to robotics and artificial intelligence, which suggests that this project may be related to creating a robot or autonomous vehicle. Some interesting points: * The author mentions using only green, red, and yellow Hatchbox PLA for printing, with specific color combinations recommended. * The use of Taulman Nylon 910 is mentioned as an alternative material that provides flexible parts. * The document includes a reference to a tutorial on ROS (Robot Operating System) by Justin Huang, suggesting that the project may involve robotics or autonomous vehicle development. Overall, this text appears to be a collection of tips and settings for a specific 3D printing project, with some additional information on related topics such as robotics and artificial intelligence.
With this file you will be able to print "Neurobot 1" - Arduino, Raspberry Pi, Linux and ROS educational robotics kit with your 3D printer. Click on the button and save the file on your computer to work, edit or customize your design. You can also find more 3D designs for printers on "Neurobot 1" - Arduino, Raspberry Pi, Linux and ROS educational robotics kit.