Never too hot tea again
prusaprinters
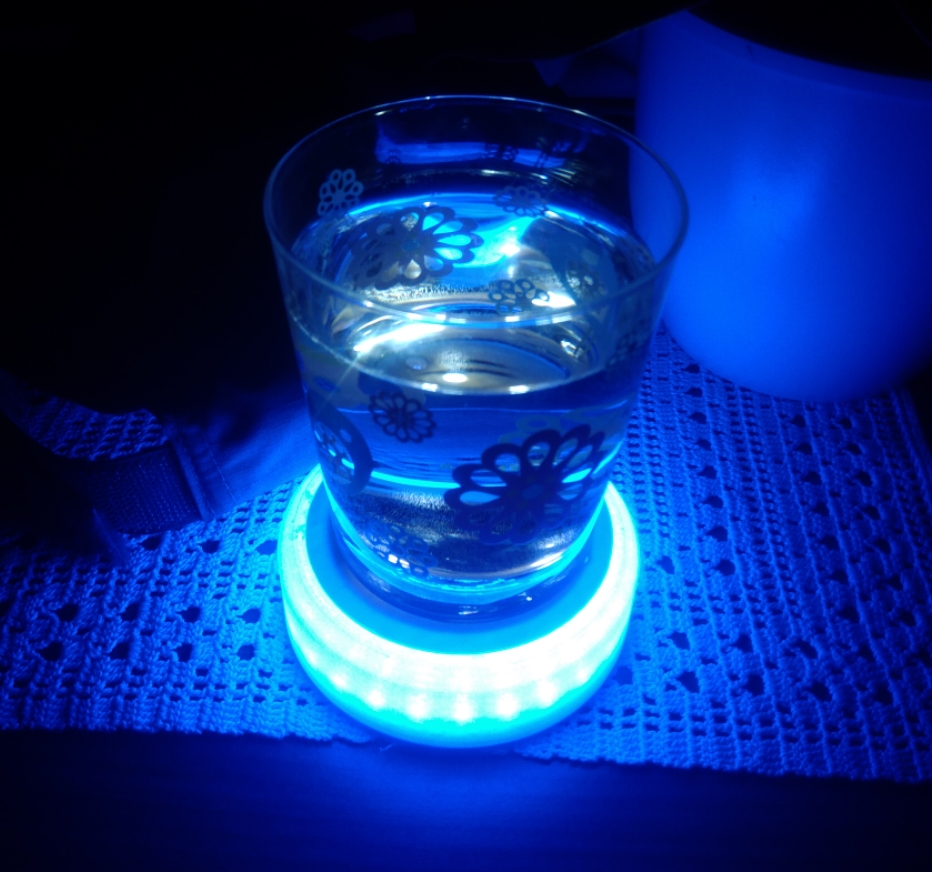
<p>What it does?<br/> In simply words, it detects, when you will put on it your favourite cup with your favourite tea (or other hot drink) and it waits till the drink will have best for you (your favourite) temperature. So - you can make other thinks (work, watching the movie, take care your kid...) and you'll be informed, that tea still waits for you to drink.</p> <p>How it shines?</p> <ol> <li>It has super-bright leds at the top, so if the cup is transparent, the drink will simply shine. When you put the drink - the led's will turn on, when you take it away - they will slowly dimm and turn off. </li> <li>There are inside 24 adressable RGB LEDS (mounted on a circle PCB), so you will be informed with colors what's going on:</li> </ol> <ul> <li>when there is nothing on it - everything is turned off,</li> <li>when you initially put the hot cup for the first time, proximity sensor will measure the distance to the bottom of the cup and starts the RGB LED - there will be nice moving pattern till the time, when the temperature sensor will detect the peak of the measurement (max temp).</li> <li>when the temperature os sensor is highest - the LED starts to shine in RED color - informing, that the tea is too hot. The device will wait until temperature will fall to the proper value, corresponding preffered temperature by the user,</li> <li>when temperature falls to the proper value - the LED's swiyching to GREEN color and shine till the user get the cup away. After that RGB LED automaticaly turn off and the top-super bright LEDs are turning on every moment the user put's the cup back on the device. But when the cup is still laying on the device and it's cold - LEDs are turning BLUE and shine for a few minutes till the cup temperature falls to the room temperature (detected before putting the hot cup on the device).<br/> It's in few words - principle of operation.<br/> The code is written in Ardino - actuall versions will be putted on the Github right away the tests results will be ok.</li> </ul> <p>Required components:</p> <ol> <li>Battery - it should be Lithium accu, I recommend the accu with minimum capacity 0.5Ah with PCM build inside and with external wires (normally you can't safe solder the pins of lithium battery - it's not safe. Maximum dimensions of battery are: 50mm x 36mm x 8,5mm.<br/> Connected to the charger/step-up.</li> <li>Charger/step-up (1 EUR):<br/> <a href="https://sklep.avt.pl/modul-ladowania-i-ochrony-ogniw-2xusb-5v-do-budowy-power-banku-li-po-li-ion.html">https://sklep.avt.pl/modul-ladowania-i-ochrony-ogniw-2xusb-5v-do-budowy-power-banku-li-po-li-ion.html</a><br/> 5V from USB plug is connected directly to Arduino and proto board, where GND and 5V is distributed to DS18B20, distance sensor, LEDs and WS2812B circle.</li> <li>Arduino:<br/> <a href="https://sklep.avt.pl/modul-nano-3-0-atmega328p-au-do-arduino.html?gclid=EAIaIQobChMI--ThmIuK7AIVirWyCh0mFgOeEAYYAiABEgJ6bvD_BwE">https://sklep.avt.pl/modul-nano-3-0-atmega328p-au-do-arduino.html?gclid=EAIaIQobChMI--ThmIuK7AIVirWyCh0mFgOeEAYYAiABEgJ6bvD_BwE</a></li> <li>Protptype PCB:<br/> <a href="https://allegro.pl/oferta/plytka-uniwersalna-prototypowa-2x8-cm-20x80mm-7394769702">https://allegro.pl/oferta/plytka-uniwersalna-prototypowa-2x8-cm-20x80mm-7394769702</a><br/> you have simply cut it to right (needed) length, by Dremell </li> <li>LED 5mm ultra bright, cold white x 3.<br/> Connected through BC547 resistor to port DIGITAL6 in Arduino. Powered from 5V through 100 Ohm resistor connected to the collector of BC547 (each diode). </li> <li>Distance sensor:<br/> <a href="https://botland.com.pl/pl/czujniki-odbiciowe/918-czujnik-odbiciowy-ktir0711s-modul.html">https://botland.com.pl/pl/czujniki-odbiciowe/918-czujnik-odbiciowy-ktir0711s-modul.html</a><br/> Output connected to ANALOG 4 of Arduino through 400 Ohm resistor. Powered from 5V.</li> <li>Temperature sensor:<br/> <a href="https://botland.com.pl/pl/cyfrowe-czujniki-temperatury/165-czujnik-temperatury-ds18b20-cyfrowy-1-wire-tht.html?search_query=DS18B20&results=30">https://botland.com.pl/pl/cyfrowe-czujniki-temperatury/165-czujnik-temperatury-ds18b20-cyfrowy-1-wire-tht.html?search_query=DS18B20&results=30</a><br/> Powered from 5V, connected to DIGITAL 2 pin of Arduino. 4k7 Resistor pulls up the DQ pin to 5V.</li> <li>[4k7 Ohm resistor] x 1</li> <li>[400 Ohm resistor] x 1<br/> 10.[1k resistor] x 1<br/> 11.[100 Ohm resistor] x 3<br/> 12.On/off switch:<br/> <a href="https://botland.com.pl/pl/przelaczniki-suwakowe/6157-przelacznik-suwakowy-sm12f11g7-2-pozycyjny-10-szt.html?search_query=przelacznik&results=282">https://botland.com.pl/pl/przelaczniki-suwakowe/6157-przelacznik-suwakowy-sm12f11g7-2-pozycyjny-10-szt.html?search_query=przelacznik&results=282</a><br/> Switches on and off battery.</li> <li>3 screws:<br/> <a href="https://botland.com.pl/pl/srubki-i-nakretki/6454-srubki-m3-dlugosc-20mm-z-podkladkami-10szt.html">https://botland.com.pl/pl/srubki-i-nakretki/6454-srubki-m3-dlugosc-20mm-z-podkladkami-10szt.html</a><br/> I recommend 25mm length, minimum is 20mm.</li> <li>m3 nuts x 3:<br/> <a href="https://botland.com.pl/en/screws-and-nuts/806-m3-nuts-10-pcs.html">https://botland.com.pl/en/screws-and-nuts/806-m3-nuts-10-pcs.html</a></li> <li>Few wires.</li> <li>LED strip:<br/> <a href="https://botland.com.pl/en/the-chain-and-matrix-led/6246-ring-led-rgb-ws2812b-5050-x-24-diodes-86mm.html?search_query=WS2812B&results=42">https://botland.com.pl/en/the-chain-and-matrix-led/6246-ring-led-rgb-ws2812b-5050-x-24-diodes-86mm.html?search_query=WS2812B&results=42</a><br/> LED strip powered by 5V and connected (DIN) through 400 Ohm resistor to ANALOG5 pin of Arduino. </li> </ol> <p>Instruction, how to connect everything is in text above, but soon will be available on my github (made with FRITZING).</p> <p>There are polish www above - if you want to find names of components in english - simply turn the language to english.</p> <p>The filament used for printing:<br/> Everything instead "pet-g-transparent-side.gcode" and "pet-g-usb-cover" is printed in PLA - white. "pet-g-transparent-side.gcode" and "pet-g-usb-cover" are printed in PET-G, transparent. Supports are needed in:<br/> "pla-white-bottom.gcode" (only at the bottom), "_pet-g-transparent-side" (everywhere), "_pla-white-bottom"(bottom only) and "_pla-battery-cover" (bottom only).<br/> Maybe grey PLA will do a good work? It is less transparent than white PLA.<br/> The transparent ring can be printed in SLA/Resin printer. It would look better. My model was FDM printed only.</p> <p>Actual code will be available here:<br/> <a href="https://github.com/Kandzior/NeverHotTeaAgain">https://github.com/Kandzior/NeverHotTeaAgain</a></p> <p>Charging is done by plugging micro-usb cable to the charger module through hole at the side. When you disconnect the plug, you can cover the hole by cove ("pet-g-usb-cover.gcode"). In the future USB plug will be removed and the device will charge wireless.</p> <p>This is the first iteration of the project. After assembly I took some conclusions and in short time this will change:</p> <ol> <li>Shorter distance beween diodes on the top. </li> <li>Hide the screws from above, all enclosure will be screwed from the bottom.</li> <li>Add the EEPROM (AT24C32) to remember settings for few users. Cups will be recognized by different distance to the bottom. It's nice upgrade - when every user will use cup with different bottom profille - the device will recognize users, load they prefferences (preffered temperature, LED's behaviour) and will act according to the user wishes. Programming will be done by using the additional TACT switch. </li> <li>Make a custom PCB - the enclosure will be much shorter.</li> <li>Considering inserting the 18350 battery (LiIon). The energy stored in the battery (accu) is enough to power the device for few hours (with active LEDs).</li> <li>Work under low power modes in Arduino and adding the transistor to switching power consuming devices.</li> <li>Adding the wireless charging device and replacing existing charger. There will be no external plugs. </li> <li>Adding light sensor (<a href="https://kamami.pl/czujniki-swiatla-i-koloru/557798-gy-302-modul-z-czujnikiem-oswietlenia-bh1750.html">https://kamami.pl/czujniki-swiatla-i-koloru/557798-gy-302-modul-z-czujnikiem-oswietlenia-bh1750.html</a>). The device will react on different level of environment brighteness.</li> <li>Replacing the 5mm LEDS by SMD leds or FLUX LEDS. Rather FLUX - they are easier to solder.</li> </ol> <p>The project shines great. It gets 250mA from battery in present configuration (all LEDs are on). By putting there power down modes - when the cup is not there, it will work in standby few weeks. My kid took it to her room and said, she will not give it back.</p> <p>Safety:</p> <ul> <li>don't solder the accu pins directly </li> <li>use accu with PCM build inside</li> <li>always wear glasses, when soldering</li> <li>secure bottom of top-cover by hot glue</li> <li>do not leave charging device alone</li> </ul>
With this file you will be able to print Never too hot tea again with your 3D printer. Click on the button and save the file on your computer to work, edit or customize your design. You can also find more 3D designs for printers on Never too hot tea again.