New Proxxon MF70 CNC Conversion Kit
thingiverse
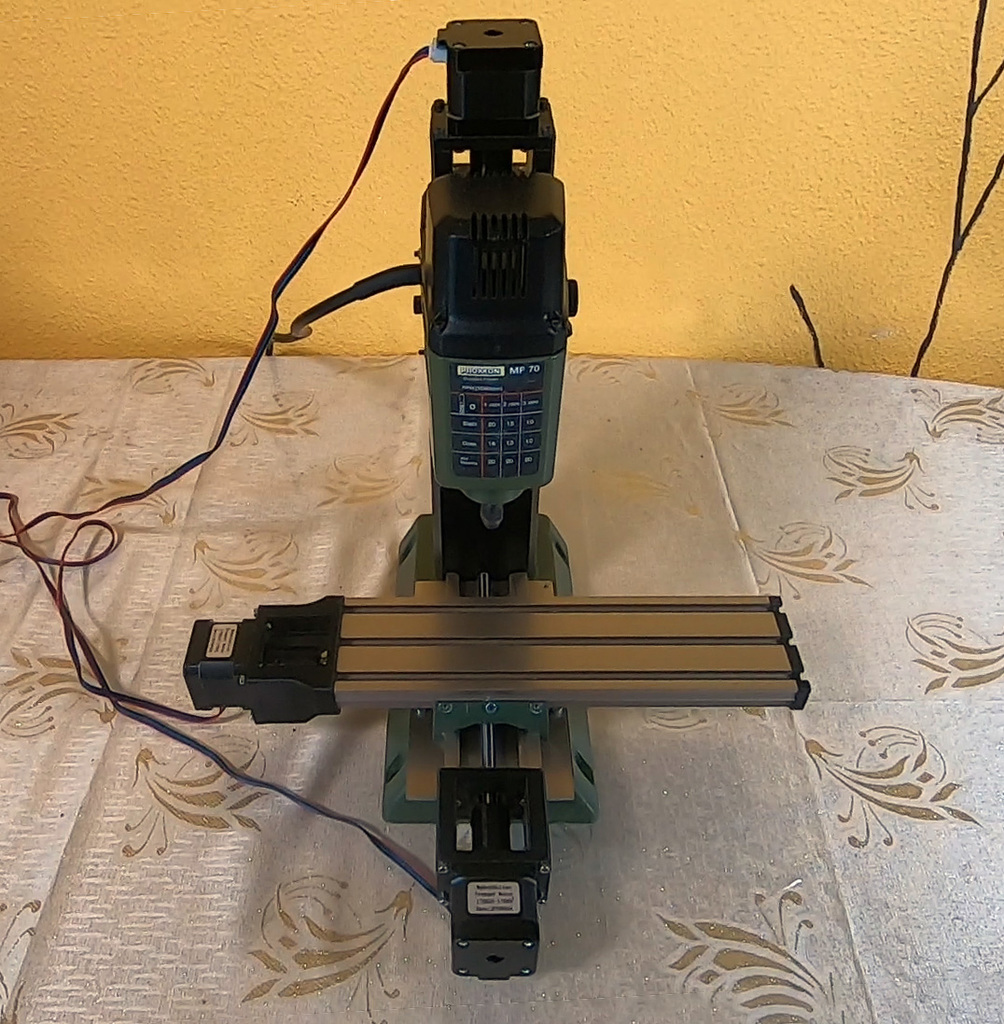
This is my own CNC conversion for a popular Proxxon MF70 micro milling machine that has been modified with significant improvements. By using Nema 17 stepper motors as the fixed point of each axis, backlash has been reduced to around 0.02-0.03mm. The main goal of this project was to get rid of all intermediary bearings and flexible couplings by utilizing the stepper motor as the fixed point for each axis. In my build, I replaced the original nuts with 3D printed parts that were tapped by hand to match the thread of the leadscrew. This modification is optional, as you can use just the mounting assemblies for the motors and couplers while keeping the original nuts if the full assembly appears too complicated. Here are some videos showcasing my build process to help you complete your own conversion: https://www.youtube.com/playlist?list=PLrL54CFyas-dFN4LSHjTCGW8CWj5fjjr9 Below is a list of parts needed for this project, along with explanations. All the parts were printed in PLA using 0.2mm layer height and 100% infill. - Z_Bridge.stl, X_Bridge.stl, Y_Bridge.stl - These are the basic assemblies for each axis. - Nema_17_plate.stl – This part is the same for all three axes and allows you to mount the motor first to a plate, then to the previous assembly - Nema_17_Adjustment_ring.stl - This is a critical part that eliminates axial play in the Nema 17 stepper motor. It replaces the wave washer inside the motor. You will need to remove the wave-washer, measure the play, and print the adjustment ring to the correct height. - Coupler_5_to_4_5mm.stl - Use this for the Z-axis and if you plan on keeping the original M6 leadscrews for the X-Y table. - Coupler_5_to_8mm.stl - Use this if you plan on upgrading to an 8mm leadscrew for the X-Y table. For proper functioning of this project, the leadscrew needs to be reasonably straight and aligned with the motor shaft. If this isn't the case, it can be corrected by hand with a bit of time and patience. This next part is optional. These are the nuts for the Z-axis and X-Y table that you can print in PLA. You need to tap the holes for the leadscrews to the correct thread. - XY_Cross_nut_6mm.stl - If you plan on using the original M6 leadscrews - XY_Cross_nut_8mm.stl - If you plan on upgrading to 8mm ACME leadscrews - XY_Cross_nut_cutting_stencil_.stl - To install the previous part, you need to make a cut in the X-Y table carrier. I made this stencil to facilitate the cut. - Z_nut.stl - This is screwed directly to the milling head. Good luck with your project, and if you have any questions, I'll try to answer them as best as possible.
With this file you will be able to print New Proxxon MF70 CNC Conversion Kit with your 3D printer. Click on the button and save the file on your computer to work, edit or customize your design. You can also find more 3D designs for printers on New Proxxon MF70 CNC Conversion Kit.