New Razor Plane
thingiverse
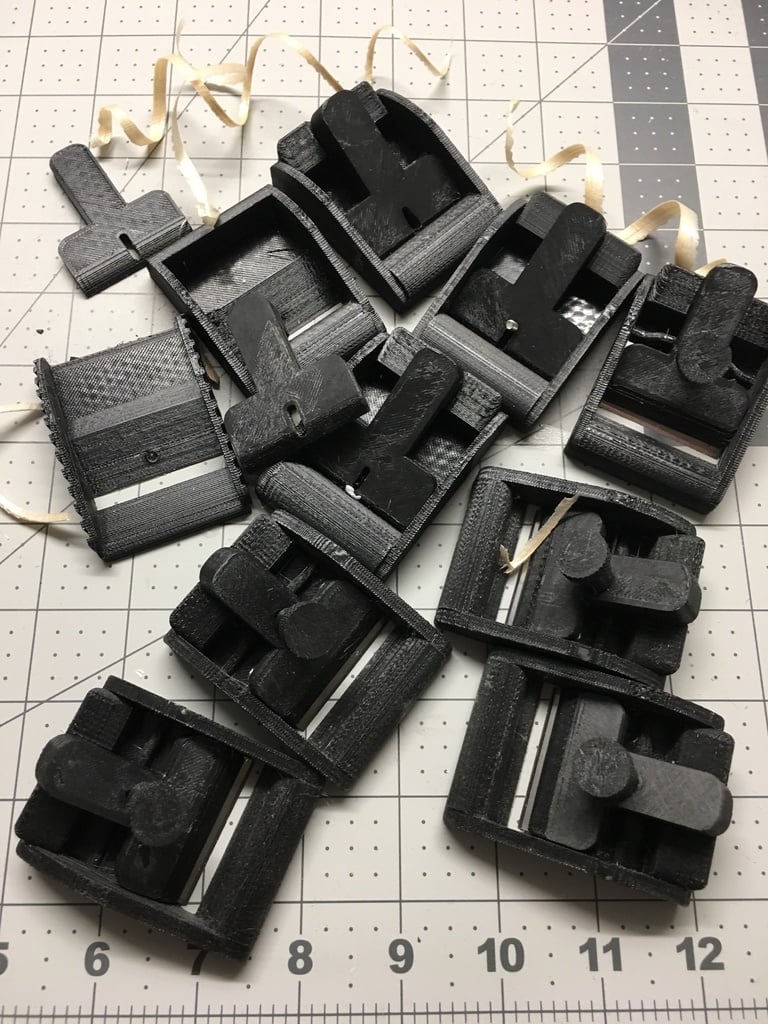
Late one recent night I printed and used the razor plane design by puttezip, which is very similar to the Master Airscrew Razor Plane. It was great. It let me immediately carve a turtledeck rather than wait for a tool in the mail. Then someone directed me to a thread on RCGroups where the Master Airscrew plane, as well as Puttezips design and 3d printed planes in general, had recently been discussed. Based on the discussion there, I thought I might be able to make a slightly more rugged tool that incorporates some of the mods people do to the MA plane. I used the basic dimensions from Puttezip's design, and then, incorporating suggestions from the RCgroups thread (https://www.rcgroups.com/forums/showthread.php?3129311-Tools-that-make-my-life-easier): I added some stiffeners, made the mouth smaller, added blade stop screws to give tight control over the depth of the blade, stiffened and redesigned the cap, moved the screw back so it no longer passes through the blade and has more depth, added a new knurled nut design that uses a captive m3 nut, added some relief behind the blade in the mouth, and added a plug for the hole in the sole of the plane. It took a few iterations to actually get the dimensions right (see photo of all the iterations). But eventually it did work and seems a bit more solid and secure. The new cap presses the thick part of the blade down into the bed and keeps the blade from riding up over the stop screws.This makes for a nice solid connection. Now there are 4 pieces to print: the plane body, the cap, the knurled nut, and the plug for the bottom. The nut requires you to stop at the correct layer and insert an m3 nut before continuing the print. This was not something I had tried before, but my results have been pretty good (only a few failed prints) editing the GCode directly or using an extension in Octoprint. Additional required hardware: 1x m3 nut 1x 16-20mm M3 machine screw 2x 4mm m3 machine screw 1x single sided razor (I have blades from two different manufacturers, with very slightly different sizes and both work). Ideally, the main screw would use a hex-shaped head fitted into a hex shaped hole, filled by a hex shaped plug, but I didnt have any one hand. A round head CAN slip, and once you glue the plug in, you wont be able to tighten the nut if it does. I used some epoxy to glue the plug in, then wicked in some thin CA for good measure from the top, and that seems to be plenty secure. Then I did some sanding of the sole with medium and fine sand paper to make sure the sole was smooth since my bed tends to leave just a little uneven surface. I also used "ironing" and printed the cap upside down, to make sure the part that presses against the blade is smooth.
With this file you will be able to print New Razor Plane with your 3D printer. Click on the button and save the file on your computer to work, edit or customize your design. You can also find more 3D designs for printers on New Razor Plane.