New Ukulele
thingiverse
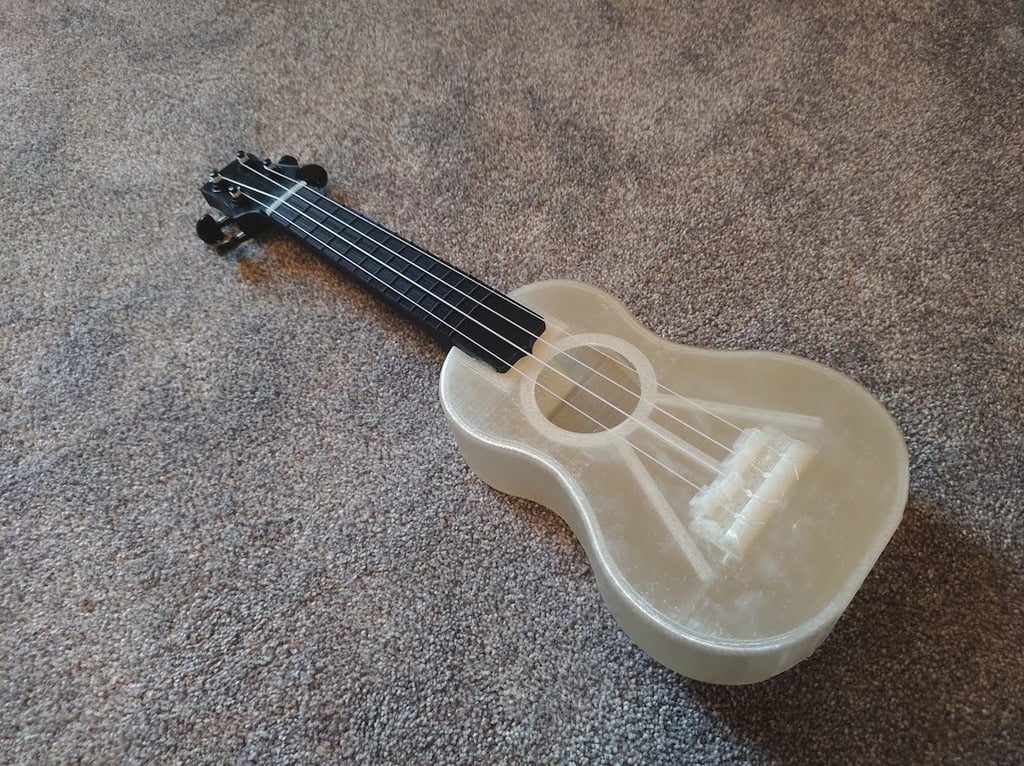
# New 3D Printed Ukulele! There are lots of cool uke's here already! Here are a few issues I tried to solve with this one. - Fits in an Ender 3 sized printer - No supports - Smooth, rounded edges - Radiused Fretboard - Intonation Saddles - Two piece neck with no visible seams - Traditional bracing & body shape https://youtu.be/q41tq2VOZ6k ---- # Versions: 1.0.1 - Updated nut for better string fit 1.1.0 - Added stand ---- # Assembly - Use superglue to glue the headstock surfaces into the neck slot. (Be careful not to get glue in visible spots!) - Glue the fretboard to the neck - Glue the neck into the body - Install guitar tuners into the headstock (Buy a cheap set of 3x3 electric guitar tuners online) - Add the nut into the slot on the neck - Install Soprano Ukulele strings and place saddles under strings (DON'T glue yet). Use tall saddles for the middle strings, and shorter saddles for the outer strings. - Tune strings up. Then check that the pitch between an open string and the same string played at the 12th fret matches. - If the 12th fret pitch sounds too sharp (high) compared to the string played open, move that string's saddle away from the headstock. If the 12th fret is flat (low), move the saddle slightly towards the headstock. - Once everything is tuned and intonated, you can use a small dab of superglue to keep the saddles in place and prevent rattling. Be patient as the strings settle in (they'll go out of tune a lot at first), and have fun! Dig it? <a href="https://www.paypal.com/paypalme/kthornbloom">Buy Me A Coffee?</a>
With this file you will be able to print New Ukulele with your 3D printer. Click on the button and save the file on your computer to work, edit or customize your design. You can also find more 3D designs for printers on New Ukulele.