Night Vapor plane, Elevator repair
thingiverse
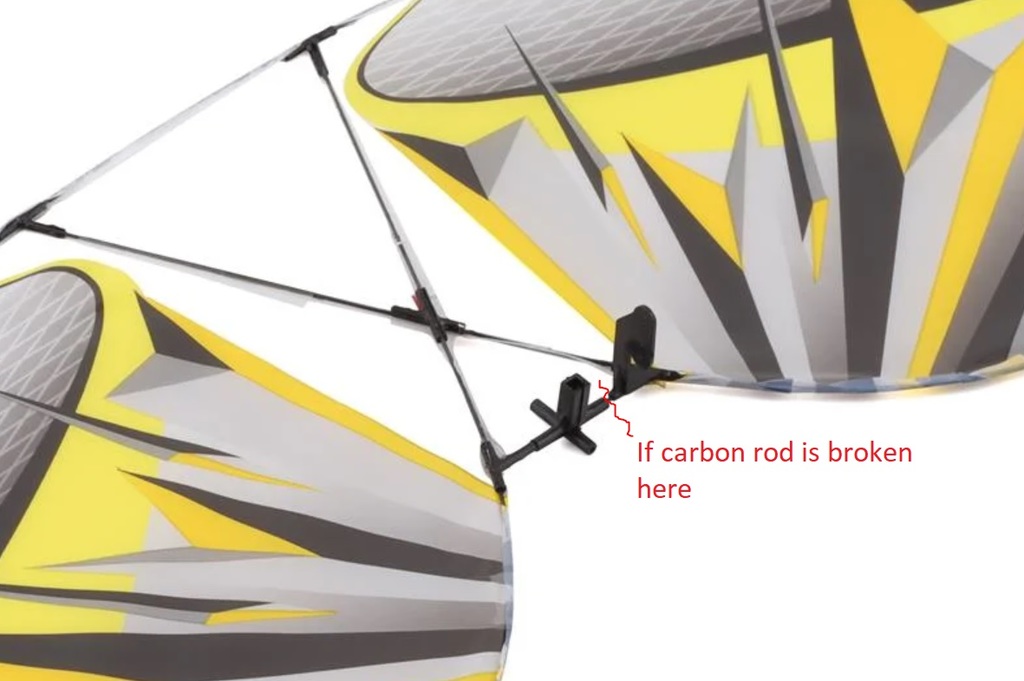
Night Vapor plane, Elevator repair I tried catching the plane mid-flight, but ended up grabbing the horizontal stabilizer instead, snapping the ridiculously small 0.5 mm carbon rod that's used as a shaft at the pivot of the elevator (horizontal stabilizer) Keep in mind, you CAN buy an entire horizontal stabilizer NEW for about $9, or you can print this admittedly dodgy 3D print. (If you have a better concept for a 3D print, please comment) INSTRUCTIONS: Remove the horizontal stabilizer, then cut the remaining (but broken) carbon rod, leaving the plastic bits. 3D Print, and then drill & file holes into the block portions of the 3D print (1.6 mm holes), such that it'll fit over over the existing shaft. Start by fitting it on the shaft. It'll take some bending to do so. Make sure friction is very low in rotation. If not, remove and file a bit. To attach to the horizontal stabilizer, superglue the outer edges to the horizontal stabilizer. Try to glue near the carbon rods along the perimeter of the skin. If you did end up gluing on the plastic skin, try adding a bit of tape to relieve stress and avoid tearing. Last, assuming your control horn isn't broken, add a bit of superglue there (between base of horn and 3D part) to add a bit of rigidity. If your horn is broken, I suppose that could be added to the 3D print. It's held up for quite a few flights for me. Only woopsie is I also let glue drip onto the pivot. Also had to make sure I filed the hole to keep friction down. Good part is that it doesn't damage anything, if I do decide to buy the new stabilizer for $9.
With this file you will be able to print Night Vapor plane, Elevator repair with your 3D printer. Click on the button and save the file on your computer to work, edit or customize your design. You can also find more 3D designs for printers on Night Vapor plane, Elevator repair.