Nintendo Switch Dock Front Panel Retrofit
thingiverse
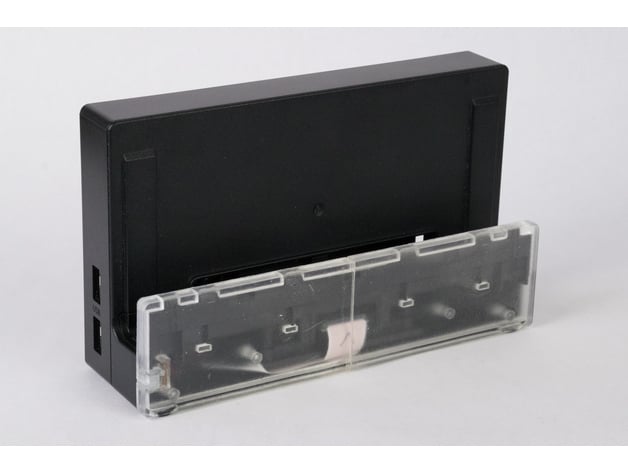
This takes the factory switch dock and applies a replacement front panel that is shorter in height. Its intent is to provide a different look for the dock, make docking easier (lowering required vertical clearance), as well as minimize potential for scratching the screen when docking/undocking (unproven). But mostly it's just for fun. Please read through all the notes, I tried documenting all the nuances and potential issues with this print. It also does not require any modification of the original dock. The dock needs to be disassembled, but is reassembled with the original hardware, and without the need for cutting/drilling/etc. However because I modeled it with 4 screw posts instead of the original 6, it results in having 2 leftover screws. But I haven't found that it affects it structurally. It does not alter the behavior of the dock. It's a cosmetic change. When your switch is docked, it will still output to TV and you will not be able to turn on the built-in screen until you undock. This is not to be confused with a charging dock. NOTES: RightSide.stl, LeftSideNoLED.stl, LeftSide.stl If printed with fairly good precision, these files "should" fit together with minimal sanding. But every 3D printer has its own nuances and you may still need to alter the files or the prints themselves to get the right fit. CombinedSides.stl If your printer's workbed is large enough, I recommend printing it as one solid piece. Screw Posts I've spoken to a couple people who've tried to print this out, and they said screw posts are prone to shearing. Ensure you're getting good layer adhesion with your printer settings. Using a 1/16" drill bit to ensure the hole is the right size (just hand turn the drill bit in the hole) would help. Slowly threading the hole with one of the screws by screwing it in 1-2mm at a time, backing the screw out, and repeating until the screw is fully threaded also could help. Another solution would be to enlarge the outer diameter of the screw post. Or do both. Once the hole is threaded however, there really isn't any problem. It's just the initial threading of the hole that puts the most amount of stress on it. SwitchDockRetrofit_Source.123dx I included the source file so people would have an easier time adapting the faceplate to their 3D printers. SwitchDockRetrofit_Source_NoBridges.123dx Another source file where I removed all bridges, which also seems to fit ok so long as the screws are secure. Enjoy!
With this file you will be able to print Nintendo Switch Dock Front Panel Retrofit with your 3D printer. Click on the button and save the file on your computer to work, edit or customize your design. You can also find more 3D designs for printers on Nintendo Switch Dock Front Panel Retrofit.