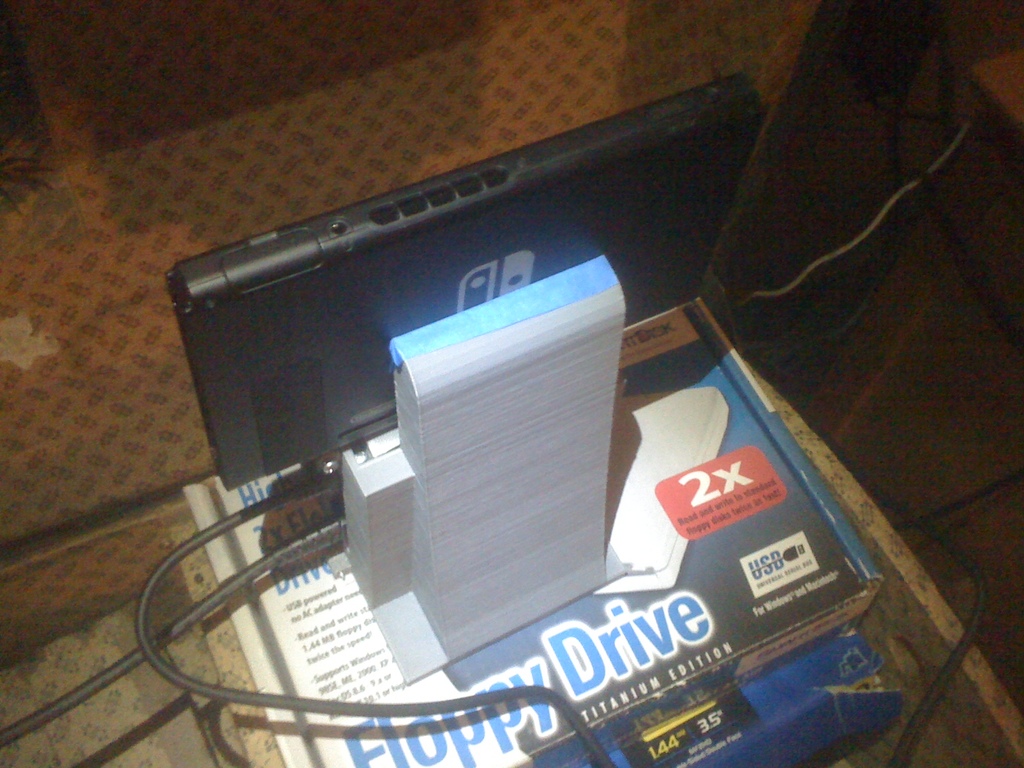
Nintendo Switch Dock
thingiverse
Human: After browsing Thingiverse, you'll find better dock designs that secure the breakout & power PCB well, use less plastic, and simplify mounting the Switch with a clear view of the USB-C port. Since I created this one myself, I decided to share it. Users have reported that if your system is severely warped, Nintendo will repair or replace it. However, they also mention that replacement units often retain some warping, suggesting a manufacturing issue exacerbated by heat. Heat likely plays a role, but it's not the primary cause. Update April 18 2017: I've improved the breakout box to securely snap in the Dock PCB without screws. It'll be a tight fit; if one or two poles are errant, adjust the file and/or print again. The source file hasn't been updated as I referenced "Docky", another design on Thingiverse. Hello. The Nintendo Switch is an incredibly popular gaming tablet system that can output its display and increase available amps by connecting an external PCB via USB-C. This connection occurs through a ribbon cable and two PCBs: one for the USB-C connector, and the other as a breakout and power box connected via a removable ribbon cable. When purchasing a dock from retail, several problems arise. The system itself generates a maximum of 16 watts of heat, with only 11 watts coming from the system itself and the remaining 5 watts for charging purposes. However, Nintendo's dock design features an air pocket on the Switch and only two contact points with the dock, leading to three issues: Heat builds up inside the dock, increasing the effective ambient temperature around the intake vents for the cooling system, causing thermal throttling in severe cases. When heat accumulates, the entire Switch system's RF shell becomes a heatsink, dispersing heat throughout the system and ultimately through the metal rails on the side. This heat gradient causes the ABS+PC shell of the system to warp, potentially permanently damaging your system. Nintendo hasn't clarified whether this issue is covered by warranty. The single two contact points that hold the system in place have rubberized pads, which can sometimes press too far into the dock's ABS+PC rails during manufacturing, scratching the screen. These latter two problems are irreversible once they occur, so it's crucial for Switch users to address these issues. One simple solution is to use a USB-C extension cable and lay your system flat on or beside the Dock instead of inside it. While this solution doesn't resolve the primary purpose of the Dock – protecting the system from dust and abrupt knocks – it does fulfill an essential function. Unfortunately, my dock design only aims to solve thermal issues. I've confirmed that it does so effectively. Using a blue tape reference point with a laser, the system's backside temperature on the SoC drops by 10 C when using this dock while playing Breath of the Wild compared to the original Dock. Additionally, the entire system remains much cooler. Before printing this file, it's recommended that you disassemble your Dock and examine the PCB, comparing it to my mounting method within this design. My approach is "quick and dirty"; if you have patience, consider designing a more secure method for securing the Dock breakout box PCB. This design serves as a starting point for those looking to prevent system-damaging issues. Note the small outcropping near the USB 2.0 side of the PCB is intended for the Dock LED PCB and Dock LED acrylic light spreader. To assemble this dock, you'll need 8 #4 3/4in screws with a pointed tip. [8 4x20mm screws] Thank you for reading.
With this file you will be able to print Nintendo Switch Dock with your 3D printer. Click on the button and save the file on your computer to work, edit or customize your design. You can also find more 3D designs for printers on Nintendo Switch Dock.
