*No Supports* Air Filtration System With Partial Recirculation (Designed for Ikea Lack)
thingiverse
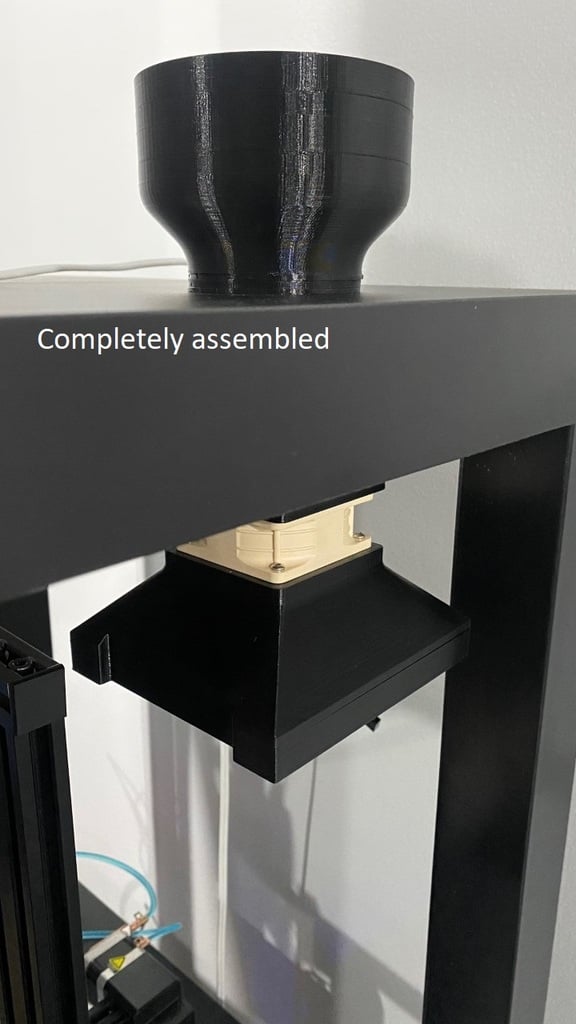
##### *Last Updated August 23rd, 2022 - Added Chambers* ##### *Last Updated August 21st, 2022 - Date of Creation* ## **Air Filtration System With Partial Recirculation** I've designed this air filtration system for my Ikea Lack enclosure. It does not interfere with anything, including build volume. <br> ##**Parts List** 1. M2.5xD3.8xL3.6 Heatset Insert Qty. - 4 (for the bottom of the filter to fan adapter in order to secure the filter housing) 2. M3xD4.6xL3.8 Heatset Insert Qty. - 4 (for the top of the filter to fan adapter to mount the fan) 3. M3xD4.2xL3.0 Heatset Insert Qty. - 4 (for the bottom of the filter to exhaust adapter to mount to the fan) 4. M2.5x16 Flat Head Hex Socket Cap Screw Qty. - 4 (to mount the filter housing to the filter to fan adapter) 5. M3x8 Hex Button Head Cap Screw Qty. - 8 (for the top and bottom 4 holes of the fan 6. Air Filters Qty. - 2 (I used [Roomba 800&900 series filters](https://www.amazon.ca/gp/product/B015OAXKRU/ref=ppx_yo_dt_b_search_asin_title?ie=UTF8&psc=1) ) 7. [Noctua Fan 60x25](https://www.amazon.ca/gp/product/B009NQMESS/ref=ppx_yo_dt_b_asin_title_o00_s00?ie=UTF8&psc=1) Qty. - 1 8. Print 1 of each part (I have included both STL and 3MF files) <br> ##**Driling The Hole** 1. Use a 2" Hole Saw 2. On the underside of the top table, measure 87.5mm from the edge of the right side of the table and mark it 3. On the underside of the top table, measure 138.8mm from the edge of the back of the table 4. On the underside of the table, drill where the marks intersect each other through the first layer of the table. Then, only drill through the second layer (top surface of the table) with the pilot bit and stop drilling. Then, use the pilot hole on the top of the table to drill from the top surface down. This will prevent blowout from happening. 5. Clear the debris from the hold and mount the air filtration unit <br> ## **Assembling The Chambers** 1. Take note of the direction of the Chamber Gaskets. They are slightly chamfered to match the Chambers. This allows printing without supports 2. DO NOT OVERTIGHTEN. If you over tighten the Chambers, they will be hard to remove. The gaskets work very well at making sure that air doesn't exist but if you crank them down, they will be difficult to remove. 3. All of the gaskets are printed at 100% infill with Overture TPU. 4. I will be cutting either a piece of screen or a piece of foam to put in the bottom of each chamber to hold the activated carbon and desiccant. I will also make a printable ring as a cutting guide to make this process easier. 5. There are two versions of the Exhaust Through Table which inserts through the top of the table. One is designed for use without Chambers. The one labeled "Exhaust Through Table for Chambers" is the one you want to print if you want to use the added chambers. 6. Chamber 1 has threads in the middle circle of the "spider web" screen or foam support. This is to potentially add a screw on deflector to help the air reach all the whole area. Leave it blank for now. 7. All of the Chamber pieces print right side up except the "exhaust through table for chambers" and "chamber cover" are printed upside down 8. If you want to add more chambers, they can be stacked indefinitely. Print as many Chamber 1s as you'd like, along with the gasket. Always finish with Chamber 2 so the Chamber Cover can be used. <br> ##**Future Plans** 1. Automate the fan to speed up as the enclosure temperature increases. If the temperature is too low, keep the fan on but only enough to maintain a negative pressure inside the enclosure so the fumes do not escape. 2. ~~Add a couple of chambers on the exterior side of the exhaust to hold desiccant and activated carbon~~ 3. Clean up the instructions contained within this publication 4. Add an air deflector to the small threaded hole in the "spider web" of chamber 1 to help disperse the air
With this file you will be able to print *No Supports* Air Filtration System With Partial Recirculation (Designed for Ikea Lack) with your 3D printer. Click on the button and save the file on your computer to work, edit or customize your design. You can also find more 3D designs for printers on *No Supports* Air Filtration System With Partial Recirculation (Designed for Ikea Lack).