Not another LEGO Lightsaber
thingiverse
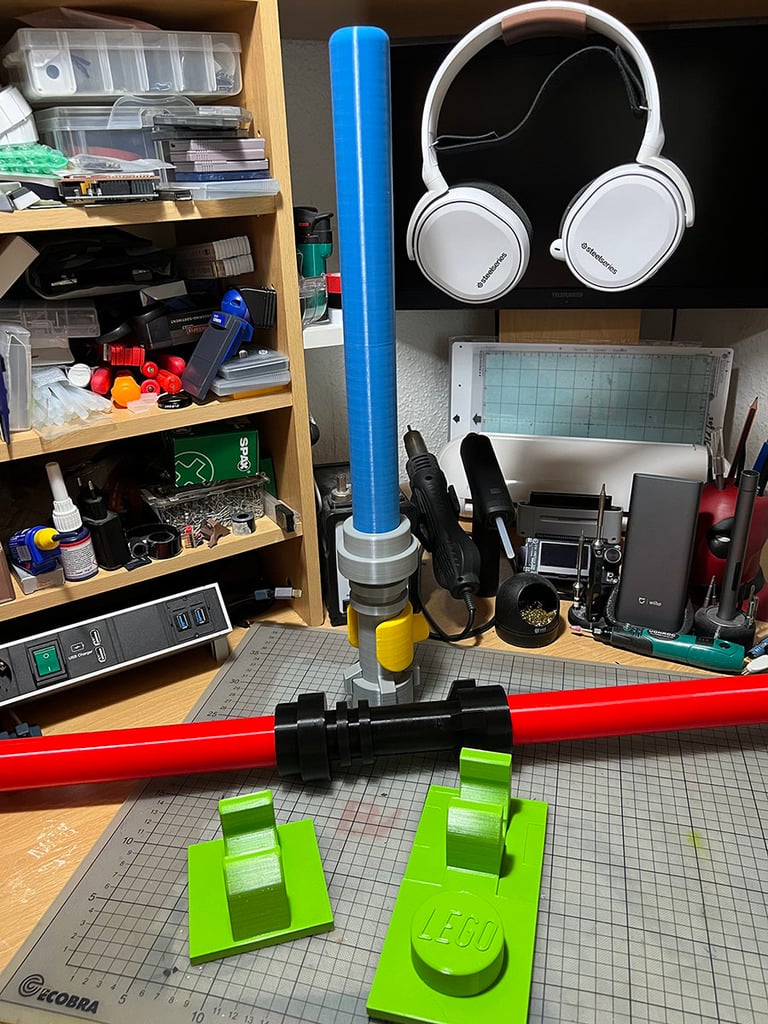
UPDATE: July 19 Add a Lego Head. Why? because i can. XD i shorten the buttom hole to save material and Print Time. and extend the bottom hole for a better fit (my printer is an A*hole with the tolerances) UPDATE: July 13 I updated the Lukes hand and add to Wallmounts based on a 1x1 and 2x1 Clip ;) Original Post: What a long journey... How it's start? For me the Original Design had to many pieces to print, so i completely recreate the lightsaber in Fusion360 to reduce the parts. My goal was less parts... what i get was, 40% less Print Time and 40% material what you need to print. In my Eyes the nearly the most accurate lifesize Lego Lightsaber. It starts as a remix and ends up as a new design. its an nearly 12:1 Scale. You can do a normal Lightsaber. The Blade is removable. You can also create a Darth Maul styled Lightsaber ;) Whats my changes: -recreate ALL Parts in Fusion360 -enlarge the Stud Parts from 38,5mm to 40mm. now it should fit 40mm Acryl Pipes for those of you who want to create an LED Blade -merge the ring parts, for less printing -merge the handle and pommel -recreate the "Pommel Blocks" in a right side and shape -add a logo for a realistic look -create a blade in a matching scale -new measurements and scaling -change the Print orientation for a cleaner Look ;) Print: 1x Emitter 2x Ring 1x Handle 4x Pommel Block 1-2x Blade and Blade_Tip FAQ and importent Notes: Q: Why i have to Glue the parts and why you did'nt use threads? A: Yes a thread is better for a glueless assembling, but this my i choose ist better for the aesthetics. The reason why i choose this method are Printing scars! I wanted to line up in one row (the last picture), and its very hard to line up the file with a thread. Q: They are to versions of the Blade, v2 and v2.1.... WHY? A: For Printing tolerance reason! The design in digital has both, the inner diameter of the handle and outer diameter of the blade, the same measurement of 40mm. But when i printed the parts, my Anycubic has to big tolerances so the Blade come loose. i tried a 40.1 mm Blade... and this snug fit in my handle If your blade is to loose or tied, try the other version. (v2= 40mm / v2.1= 40.1) Q: Do i have to Glue the parts? A: No, but its highly recommended! If you use it only as a Display Prob, you can stick it together (it should snug fit) and leave it in your shelf... what ever XD But when you take it often in your hands or want to play with it USE GLUE! (i use Revell Contacta for that) Q: Whats the Scale? A: Roundabout 12:1 Q: Why you say "nearly the most accurate lifesize Lego Lightsaber"? A: All dimensions are approximately 12:1 except the handle and Blabe width, this is roundabout 13:1. I choose this dimensons so you can add 40mm acrylic tube if you want. But i think for the eyes there is no significant difference. Q: But why you haven't createthe whole Prob in 13:1? A: 1. i started with using an other Model as base and didn't check the dimensions 2. i realized my mistake to late XD 3. if i change the scale i would have to split in 3 parts because it would to long for the most Printers 4. i'm to lazy to change it at this point of the project ROFL Q: Why there is a Lego Hand? A: Thats Lukes Hand after Darth Vader cut off his hand XD Usefull Stuff: Revell Contacta https://www.amazon.de/Revell-Kleber-Contacta-Professional/dp/B004FNWVU0?keywords=revell+contacta&qid=1657304757&sprefix=revell+contac%2Caps%2C127&sr=8-5&linkCode=ll1&tag=neo022-21&linkId=9380c5440f4287ead55120d530ac526d&language=de_DE&ref_=as_li_ss_tl
With this file you will be able to print Not another LEGO Lightsaber with your 3D printer. Click on the button and save the file on your computer to work, edit or customize your design. You can also find more 3D designs for printers on Not another LEGO Lightsaber.