Nozzle Cam
thingiverse
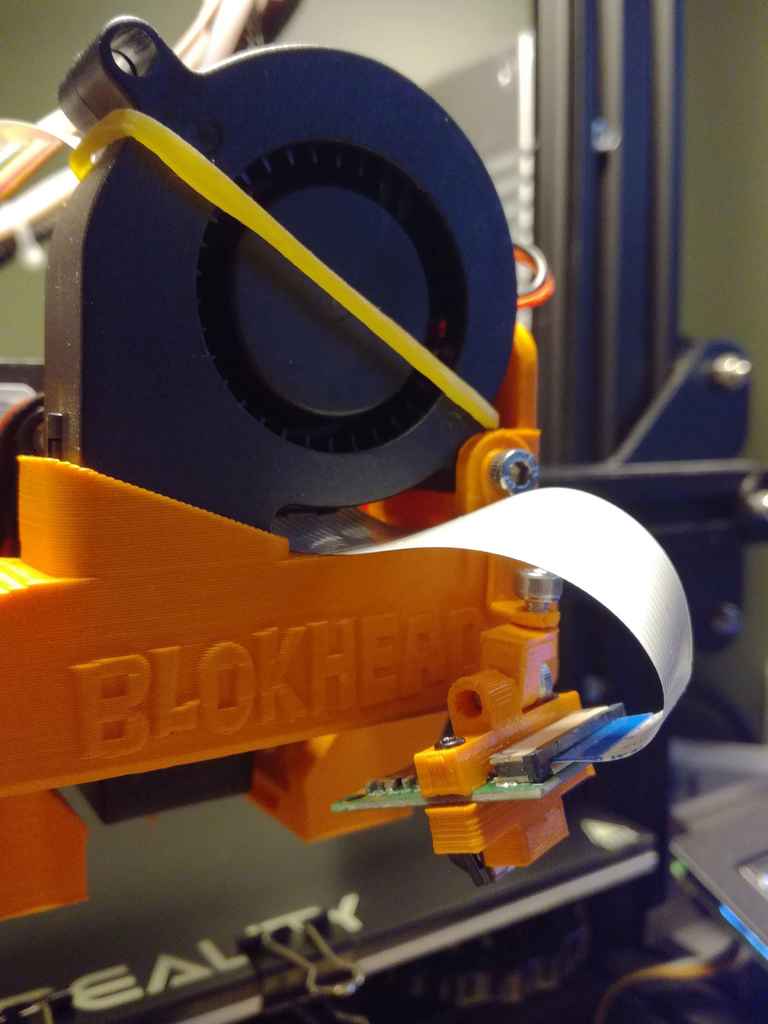
Tired of not being able to see first print layer, I changed my ender 3 head to a thin blokhead version. But it was not easy enough. So inspired by [this design]( https://www.thingiverse.com/thing:4859502) and the way it use the pi-cam, I made an small arm that can be attached to [this blokhead version](https://www.thingiverse.com/thing:4777217). So It's easier to see the first layer. It needs: - 2 M1.7x8mm screws for attaching pi camera. - and 2 M3x5 for the articulation - and finally one M3x30 for attaching to the blokhead (It reuse the one holding the blower). I used a rubber band to clip the camera cable behind the blower and keep it out of the way for the hotend fan. I used [this clip](https://www.thingiverse.com/thing:4241350/files) to attach the camera cable to the top of the ender 3 frame. I have reused a pi cam v1.3 for this. It work well enough. Focus is till a bit blurry, and fps are not that great with that version. It is still better that my eyes.. Now what I am missing is nozzle light... Notes: - I moved to .amf file instead of .stl and a such there is no preview on thingiverse.
With this file you will be able to print Nozzle Cam with your 3D printer. Click on the button and save the file on your computer to work, edit or customize your design. You can also find more 3D designs for printers on Nozzle Cam.