Nozzle cleaning tool
thingiverse
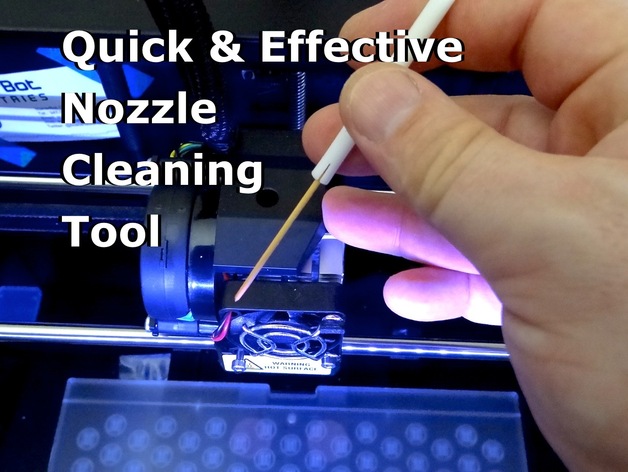
This is a toothpick holder designed to make cleaning your Replicator 2 extruder nozzle, quick and effective. With the extruder drive assembly removed and the nozzle pre-heated, you insert trimmed toothpicks into the top of the hot end with a circular downward motion. Repeat the process to clear out any burnt PLA until the toothpicks come out clean. Then use a sanded down pin to clean out the 0.4mm nozzle tip. The whole process takes about 15 minutes. This toothpick holder was designed using an ACIS solid in Shark FX/ViaCAD (vc3 file included) so will behave well with Makerware, ReplicatorG and skeinforge. Instructions Print, insert toothpick, pre-heat, push down and twist to clean. RATIONAL After about 600 hours of printing, my Replicator 2’s extruder nozzle became clogged with burnt PLA. Some of the telltale symptoms included the extruded filament curling up as it leaves the hot end, the extruder clicking as it strains to push PLA out of the clogged nozzle, and of course the inevitable print failures that follow. So I was interested in finding an easy method for cleaning a clogged nozzle that was quick, effective and inexpensive. Some people have suggested removing the nozzle and heating it with a propane torch or heat gun to burn off the toasted plastic. However this involved disassembling the extruder, which requires additional tools, along with owning a propane torch or heat gun, and a suitable place to use it. I had previously tried using wooden skewers, but they were too large, and splitting and sanding them to fit was time-consuming. Then Enginwiz on the Google Makerbot operators group suggested using tooth picks. These turn out to be around 1.75mm in diameter so with just a simple snip of the point they can be prepared and used very quickly to achieve great results. However the only problem is they are a little too short, making it difficult to handle them. So I decided to design this toothpick holder for nozzle cleaning to simplify this process. PRINTING THE PART I printed the toothpick holder using my 100 micron profile http://www.thingiverse.com/thing:39050 with the following settings in print-o-matic: Infill 100% Layer Height 0.1mm Number of shells 0 Feedrate 80 mm/s Travel Feedrate 150 mm/s WHAT YOU NEED You need to purchase a packet of 1.75mm diameter toothpicks from your local supermarket. The first packet I purchased ranged from 1.7mm to 1.8mm – so I suspect these are quite a standard sizes. To prepare the toothpicks, cut just below the shoulder of the tip at 45°. The wooden tip will then deform into the nozzle tip and act as a scraper, to help scrape off carbon deposits. You will also need a fine pin or needle, a course 120 grit sanding block and a pair of digital calipers. Basically, sand one end of the needle until it is 0.4mm in diameter, using the digital calipers to check as you go. You want to use course sandpaper so the end of the needle is rough enough to work like a file to remove carbon deposits from the tip. You can also use a pair of needle nose pliers to snap off the tip so you don't have to worry about jabbing yourself with it. THE CLEANING PROCESS Start by removing the extruder drive assembly. 1) Unload the filament form your extruder and wait for it to cool down. Wait until the heat-sink fan stops spinning. 2) Turn off the power to your Replicator 2. 3) Unplug the stepper motor and unscrew the two stainless steel hex head cap screws on the front of the heat-sink fan using the second biggest hex wrench provided. This will allow the extruder stepper motor and drive assembly to be removed. 4) Now turn your Replicator 2 back on and pre-heat the nozzle to 230c. 5) Insert a trimmed toothpick into the holder. Insert the holder in through the top of the extruder so the trimmed end of the toothpick is inserted into the top of the hot end. Push down with a twisting motion to expel the burnt PLA. Repeat this step until the toothpicks come out clean. 6) Insert the sanded down pin or needle into the nozzle tip from the bottom. Then, repeat step 5 with the toothpick holder to clear any burnt PLA that may have been pushed up by the pin. At this point you should be able to see through the clear nozzle hole by looking down into the hot-end from the top. 7) Reassemble the extruder drive assembly by re-positioning the assembly on the back of the extruder and mating it with the two stainless steel hex head cap screws. Gradually tighten using finger pressure, making sure not to cross thread. They just need to be snug, so don't over tighten them. 8) Reload your filament and let it run through for about 20 seconds. It should be coming out nice and straight.
With this file you will be able to print Nozzle cleaning tool with your 3D printer. Click on the button and save the file on your computer to work, edit or customize your design. You can also find more 3D designs for printers on Nozzle cleaning tool.