NR200 Hardware for Top Panel External Fan Grills
prusaprinters
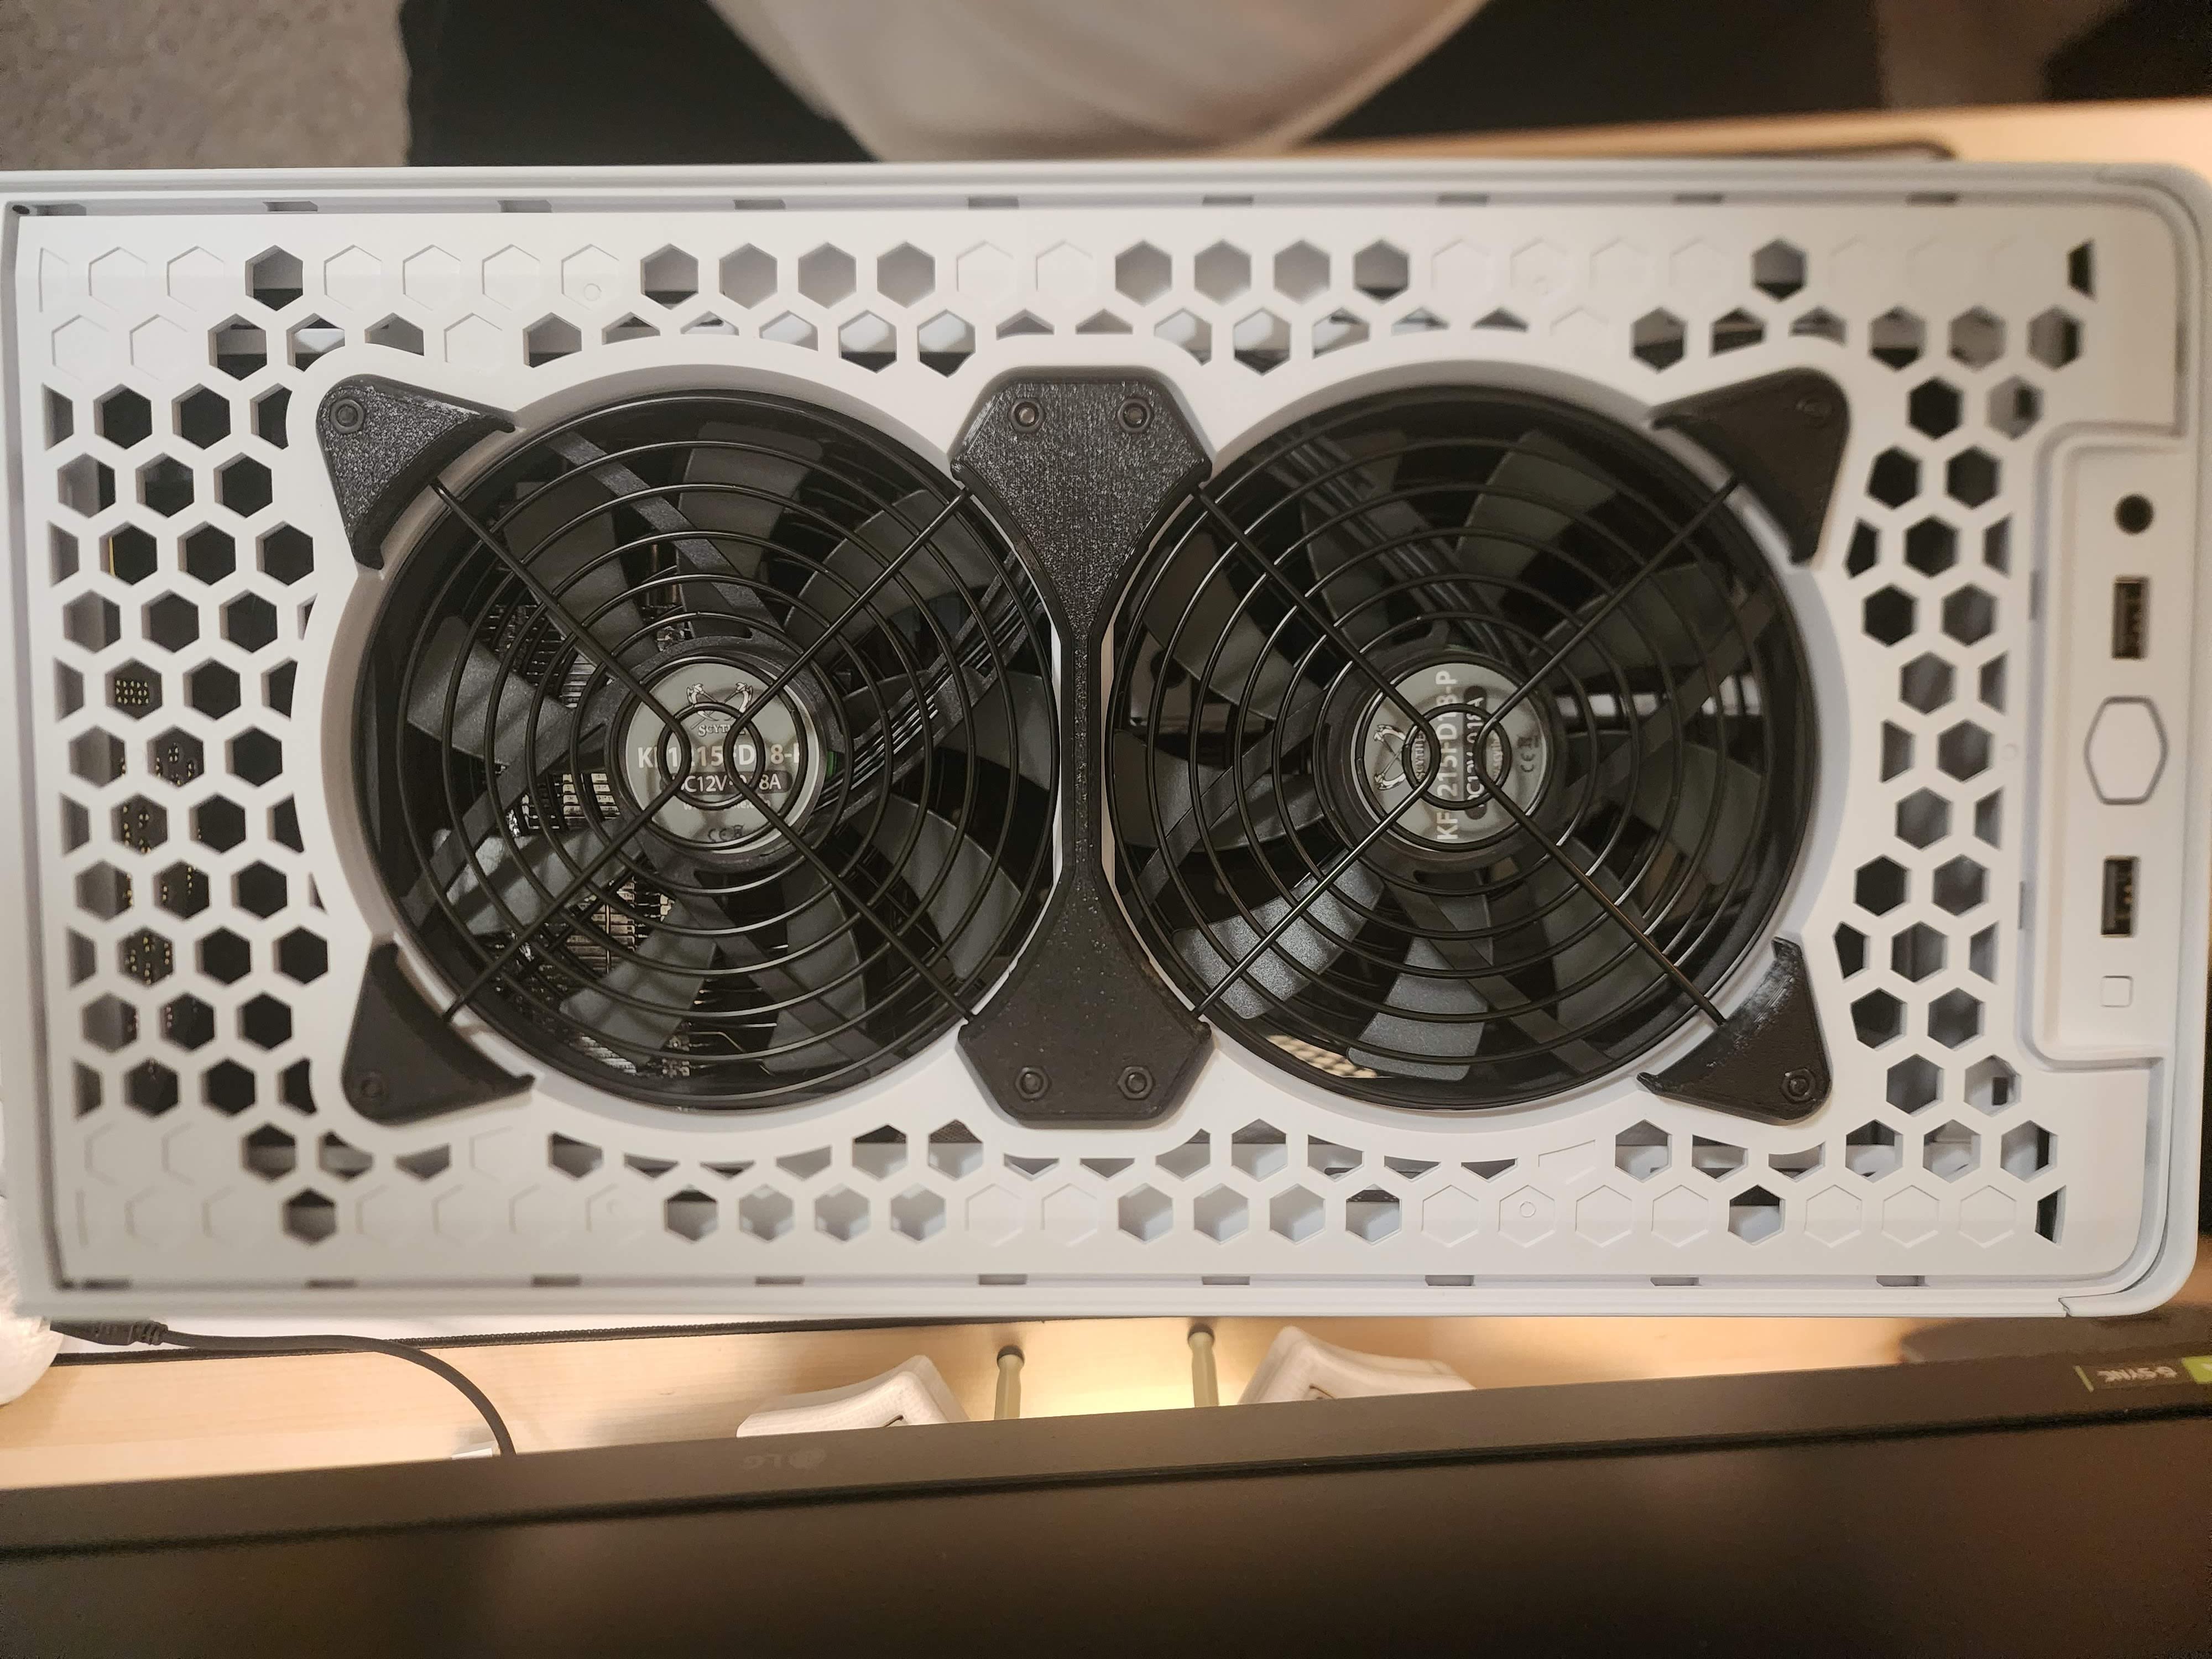
<p>I didn't want the included mesh top panel to restrict exhaust airflow so much, so I made this Cooler Master NR200/p top panel hardware to allow external fan grills to be installed to the top of the case when the mesh is removed. This can also be used to enable hardware mounting of the top fans, circumventing use of the included fan push pins, instead opting for m3 metric hardware.</p><p>The build pictured uses m3 hex head screws with m3 nuts in conjunction with Scythe Kaze Flex 120mm slim fans and fan grills on both the inside and outside of the case. This can still be used with standard 25mm thick fans should your build accomodate them. The included fan grills are used internally and aftermarket Amazon fan grills are used externally due to having a higher profile at the fan hub.</p><p>Note that the washer file measures at 2mm thickness and is used for isolating some amount of vibration from the metal components (hardware, grills) as well as accomodating certain lengths of screws.</p><p>Printing this on a Prusa Mini, I was able to press fit the nuts into the printed parts simply by using pliers to press them into the appropriate holes. If your printed experiences a greater amount of shrinkage, you may want to scale this up by a VERY small percentage. There is tolerance between the parts and the top panels slots for them that can allow a marginal increase in size.</p><p>________________________________________________________________________</p><p><strong>Materials list in the pictured build</strong>:</p><ul><li>1 x NR200 Top Center (print file)</li><li>4 x NR200 Top Corner (print file)</li><li>2 x NR200 fan grill (included with NR200 case)</li><li>2 x PC fan grill (aftermarket, amazon)</li><li>2 x Scythe Kaze Flex 120 Slim</li><li>8 x m3 nut</li><li>8 x m3x35 hex head screw (use m3x45mm if using standard 25mm thick fans)</li></ul><p><i><strong>*NOTE</strong>: The pre-installed rubber vibration dampeners are left installed in the case's top panel to allow vibration isolation and some measure of adjustability in hardware attachment tightness.</i></p><p><strong>Order of parts in the hardware stack are as follows</strong>:</p><ol><li>m3 screws</li><li>printed washer (2mm)</li><li>fan grill (2mm)</li><li>printed washer (2mm)</li><li>PC fan</li><li>NR200 Top Panel</li><li>fan grill (2mm)</li><li>printed NR200 Top Corners/Top Center</li><li>m3 nut</li></ol><p>I found it easiest to assemble this flat on a table, starting with the internal fan grill/washer/screw combo so that you can simply place the fans onto this assembly, then place the NR200 top panel onto them, then the external fan grills, and finally the printed Top Center piece. Once you have the Top Center piece screwed on (or at least one Top Corner per-fan, you can safely remove it from your work surface as this will prevent the fan grills from falling off.</p>
With this file you will be able to print NR200 Hardware for Top Panel External Fan Grills with your 3D printer. Click on the button and save the file on your computer to work, edit or customize your design. You can also find more 3D designs for printers on NR200 Hardware for Top Panel External Fan Grills.