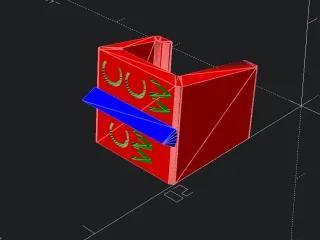
Nut Clipper - Parametric OpenSCAD Remix of Bed Adjustment Wheel Clip for Metal Wheels
thingiverse
### If you could do me a favor? I like filament. If random internet people like and download my model **[from here](https://www.printables.com/model/218566-nut-clipper-parametric-openscad-remix-of-bed-adjus-)**, Josef Průša will send me a truckload of Prusament Orange PETG. That's right, he's going to personally drive it from Europe across the Atlantic to my house in the United States. Trust me, I have an agreement. Don't worry, you can just download it there and sent the models straight to your trash. Hell, just throw your entire machine in the trash, I really don't care, as Iong as that truck gets here. ### And now for something completely different I have the Creality metal wheels on my Ender 3 v2 printer and as such could not use the original model. I thought it was a fantastic idea. Remix of https://www.thingiverse.com/thing:5387968 If your printer software tells you how to turn your bed wheel nuts to level your print bed, then this model may help. I use Klipper and the <i>SCREWS_TILT_CALCULATE</i> macro to help with bed leveling. Small turns, like “CW 0:15” (quarter turn clockwise) are easy enough, but sometimes a helper may want to turn the bed screw when you're not looking and the correction is “CCW 1:25” (one full turn and 25 minutes counter-clockwise). It's hard to keep track of where the starting point is. So what this hack does is make a pointy end on one small sector of the wheel. So you can feel that nub as you move it, and you don't have to go back and forth with the software to get it right. ### Instructions / Warnings: The source is commented. I will put a brief “how-to” at the head of the file for OpenSCAD also. But in short, change variables, Render, then Export as STL or 3MF. Done. Each of these clips should print pretty fast, probably around 10 minutes apiece or less, depending. I did them in PETG but I think PLA should work fine. I did 0.24 layer height and 5% infill with PETG. The key is flexibilty so you can get it on and off. You can change the thickness of the clip with the variables if you want to. I am a big variable fan. You can change many things at the top of the file. There are a few local variables in the modules. Hack it to pieces, I won't stop you. You can try to raise the text labels but I had better luck embedding them. The raised text came out a bit bumpy. Set <i>engrave_top</i> or <i>engrave_vert</i> to <i>false</i> in the call at the bottom of the code if you want to check it out. If your wheel is slightly different than mine, change the paramenters in the .scad source file. Bust a Nut Clipper or four. You'll feel a sense of relief and satisfaction. Or bust eight nuts, two on each side of each wheel, two different colors for even easier turnings. Just don't bust them all at once. You have been warned. If you have a suggestion, shout it out loud. It's probably more effective if you post it here in the comments.
With this file you will be able to print Nut Clipper - Parametric OpenSCAD Remix of Bed Adjustment Wheel Clip for Metal Wheels with your 3D printer. Click on the button and save the file on your computer to work, edit or customize your design. You can also find more 3D designs for printers on Nut Clipper - Parametric OpenSCAD Remix of Bed Adjustment Wheel Clip for Metal Wheels.
