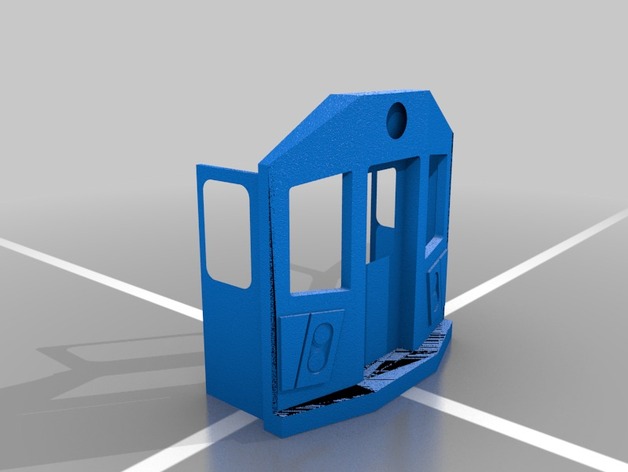
NYC Subway New Technology Train R142 "A" Car
thingiverse
I have spent months working on everything to make this subway car right. Its currently in beta testing, so expect a lot of bugs. This is a "A" car which means its the first and last car in a 5 car subway set. The rest of the subway cars of "B" cars, where I will upload them later when the "A" car is finished. Please report any bugs to me. Also, the entire set of a actual subway car is a 10 car set which is split into two 5-Car sets. The actual number of "A" cars you need to make a 10 car set is 4, and the amount of "B" cars is 6. A little history: The R142 subway car was first put in service on the (6) subway line in 2000, which then made its way to the (2)(4) and (5) trains and is where they are today. Upcoming Releases: R62 Subway Car R188 Subway Car R160 Subway Car R32 Subway Car Note: This train is designed to run on a O-Gauge scale track, I will include the trucks later but you would have to find out some way to power the motors. Again, the motors can only be placed on the "A" cars, the "B" cars do not need them Note2: It seems as the sides of the subway car are not slicing correctly either as I have tried to print it on the makerbot and the model was not able to slice correctly. I am currently looking into the issue as it seems like when I uploaded the model to thingiverse some polygons have gone missing and your 3D printer may think it is a different model and print a sort of weird side. Please wait while I look into the problem. Instructions This is split into 6 parts , the front, the back, the right side, the left side, the bottom, and the roof. Please note when you print the sides MAKE sure to print them with supports or they will just fall on their face during the first layer. Step 1: Print all 6 parts Step 2A: If I haven't released the wheels for the train skip this step. Next print the wheels. Step 2: Get super glue and connect the right side to the base and make sure that the side fits exactly to the correct side of the base. Make sure that there is a rectangle under the doors. Glue it to the base and hold it there for 2 minutes. Step 3: Connect the left side to the base and follow the same instructions as in Step 2 Step 4: Connect the Cab front to the front of the car and glue it down to the base. Step 5: Connect the end part of the car to the back of the car and glue it down. Step 6: Connect the roof to the top of the car and make sure the sides fit evenly with the the side parts and the front and back. Glue it down. Step 7: Prepare the car for painting. After everything has dried, check to make sure none of the parts of loose. Step 8: Start on the front part of the car. In the shape of where the lights are, color that part red but do not touch the lights yet. After you painted that part, paint the top light dark red and the bottom one white. Step 8A: Color the area around the windows on the front part of the car all black. Basically paint everything black for the parts above the lights. Step 9: Print the decal stickers on your 2D printer for the A car and place them in the first door. Step 10: Print the undercarriage on your 3D printer and glue them to the bottom of the car, make sure that the couplers are in even length. Step 11: Print my coupler adapter and connect it to both of the couplers so that you can connect the "A" car to the "B" car. Step 12: Your done!
With this file you will be able to print NYC Subway New Technology Train R142 "A" Car with your 3D printer. Click on the button and save the file on your computer to work, edit or customize your design. You can also find more 3D designs for printers on NYC Subway New Technology Train R142 "A" Car.
