NZXT H1 Fan Bracket v2
thingiverse
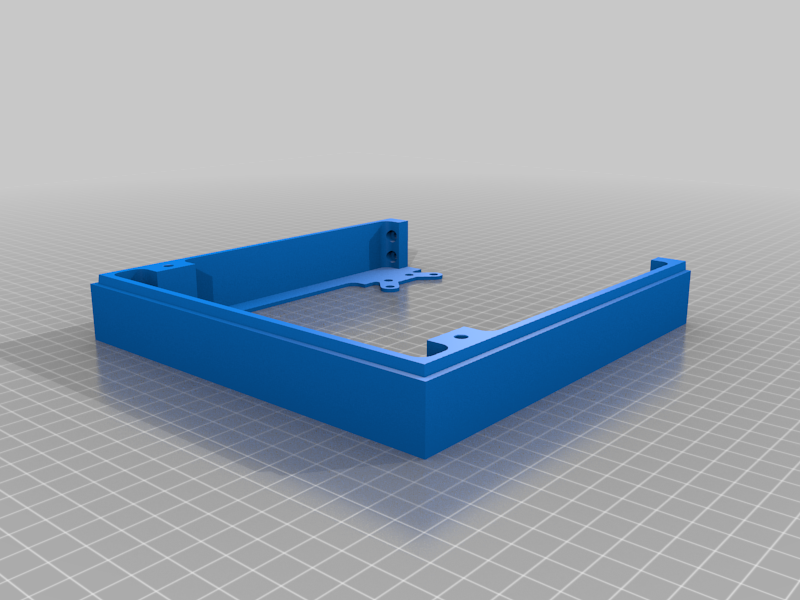
Remixed https://www.thingiverse.com/thing:4716763 Changes include: 1) Joined the left and right panel to each top and bottom panel to make only 2 prints that fits onto a ender 3 200mm x 200mm platform. 2) Added bore holes to insert brass standoff. The original design ball connectors were fragile. Now you can simple replace the screws if the stand off wears out. 3) Squared off the sides panel flush with NZXT sides while still having the original slope to fit easier. 4) Removed the screw mounting mechanism for both the top left and right and bottom left and right panel. 5) Filled in the gap side gaps on the bottom panel feet. Parts needed: 1) 4 M3x8mmx5mm Female Threaded Brass Insert. Use a solder iron to push these in ths side that faces the H1; these holes are on the top of the print. 2) 4 M3x12 screws to attach the bead mechanism you chose. I used 4 7mm beads with a 3mm hole or print the standoff from https://www.thingiverse.com/thing:4565620 3) 4 M3x12mm screws with nuts to attach the top and bottom panels together.
With this file you will be able to print NZXT H1 Fan Bracket v2 with your 3D printer. Click on the button and save the file on your computer to work, edit or customize your design. You can also find more 3D designs for printers on NZXT H1 Fan Bracket v2.