O-Ring jig
myminifactory
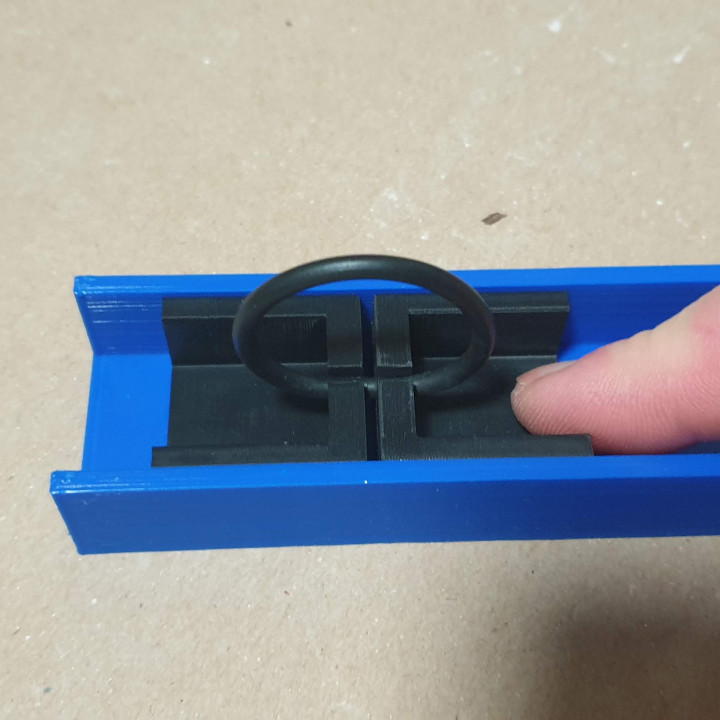
O-Ring Jig to help glue your o-rings perfectly. You need to print one Slide and two jigs for the size o-ring material you working with. Included popular sizes 1.78, 2.62, 2 and 3mm Once printed use a drill bit the same size as your o-ring material to clean out the holes. Use the jig to hold the material and you can use your fingers to pinch along the o-ring material to get the perfect length. Then use a thin very sharp blade to cut a perfect end. I suggest you do a few trimming cuts to test your cutting technique. Dry fit your o-ring in the groove to make sure you have it right. Then line up the o-ring jig and slide as per photos to prevent twists. Leave approx 0.5 - 1mm gap to allow for a bit of glue so you don't glue the jig together. Use very little glue (I use a toothpick to dab a small dot on the end. Loctite 406 is recommended for this sort of work. Apply a little pressure for 10 secs then leave in the jig for 5 mins. To remove gently pull the two jigs appart, one side will give a little and work with your fingers to reduce stress on the glued joint and with the glued joint rotated well away from the jig pull the o-ring through the slot trying not to put any strain on the glued joint. Check the glued joint and remove any excess glue. After an initial go you will become very proficient at making perfect o-rings.
With this file you will be able to print O-Ring jig with your 3D printer. Click on the button and save the file on your computer to work, edit or customize your design. You can also find more 3D designs for printers on O-Ring jig.