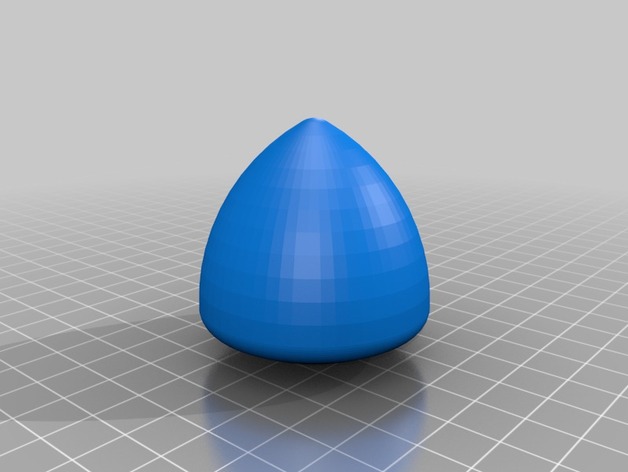
Object of Constant Width
thingiverse
An Object of Constant Width: A Geometry Experiment This project is an experiment in geometry, exploring how objects of a certain shape can roll smoothly. An object of constant width has the same diameter all around, allowing it to roll without wobbling. By combining three such objects, we can create a smooth-rolling surface that appears to be balls but are actually not. Print Settings: Printer: MakerBot Replicator (5th Generation) Rafts: Yes Supports: Yes Resolution: Unknown Infill: Unknown Notes: The supports may not be necessary, but they or the raft is. The object has no flat surfaces, so it will always be in one point of contact with the raft at a time. Supports are recommended to ensure smooth rolling. Post-Printing: Remove the raft and/or supports. Try to make the surface as smooth as possible, but don't worry about perfection – slight imperfections can actually help the object gain traction on carpeted surfaces. Use this to demonstrate the quality of these objects. To check if the object is level, use three of the same scale. How I Designed This: I started with a simple 2D sketch in Onshape. First, an equilateral triangle was drawn (its size doesn't matter). Then, two sets of three arcs were created, alternating between equal radii and all tangent to adjacent arcs. The centerpoints of opposite arcs should be coincident, and the center point should also be on a vertex of the inner triangle. Designing this object required some patience and attention to detail, but the end result was well worth it. Why It Works: Each arc is 60 degrees, so each arc contacts the ground for the same amount of time. The top arc contacts the top object for exactly the same amount of time through 60 degrees of rotation. Because the large and small arcs add up to the same height (in this case, 50 mm), the object on top remains level. Project: Recreating Objects of Constant Width Objectives: The objective of this project is to teach people how to use Onshape and basic geometry to create objects that seem impossible or illogical. Audiences: This project can be adapted for anyone from middle school to adults who want to learn sketch-based CAD. Preparation: A basic understanding of sketches, constraints (coincident, tangent, equal, dimension), and the Revolve function is necessary. A free Onshape account is also required. Steps: 1. Get a concept of the project you are tackling. Think about what makes spheres roll – two things to keep in mind: this project can only be done with a triangle as a base, and only a third should be done at a time. 2. Create a sketch of the outline of the shape; make sure that the inner triangle frame is equilateral, the proper arcs are set to equal, and the arcs are given the tangent constraint, etc. 3. Check that the width is constant by creating a line between two opposite arcs, terminating on the arcs. Constrain each end to their respective arcs with the Normal constraint, and add a driven dimension. The dimension should be the same as the height that was set or the radii of the opposite arcs added together. 4. Revolve the sketch – specifically, half the sketch. If you get an error stating that the model is intersecting itself, either set the revolve to 180 degrees or cut the sketch in half and use a full revolve on one half. 5. Export and print! Print three times for the best effect. Place a flat object, such as a binder or folder, and spin it around a few times. There should be almost no perceivable wobbling. Results: The students should have a working object of constant width, along with new knowledge about what can be done with CAD.
With this file you will be able to print Object of Constant Width with your 3D printer. Click on the button and save the file on your computer to work, edit or customize your design. You can also find more 3D designs for printers on Object of Constant Width.
