Octoprint 3d printer and enclosure controller
thingiverse
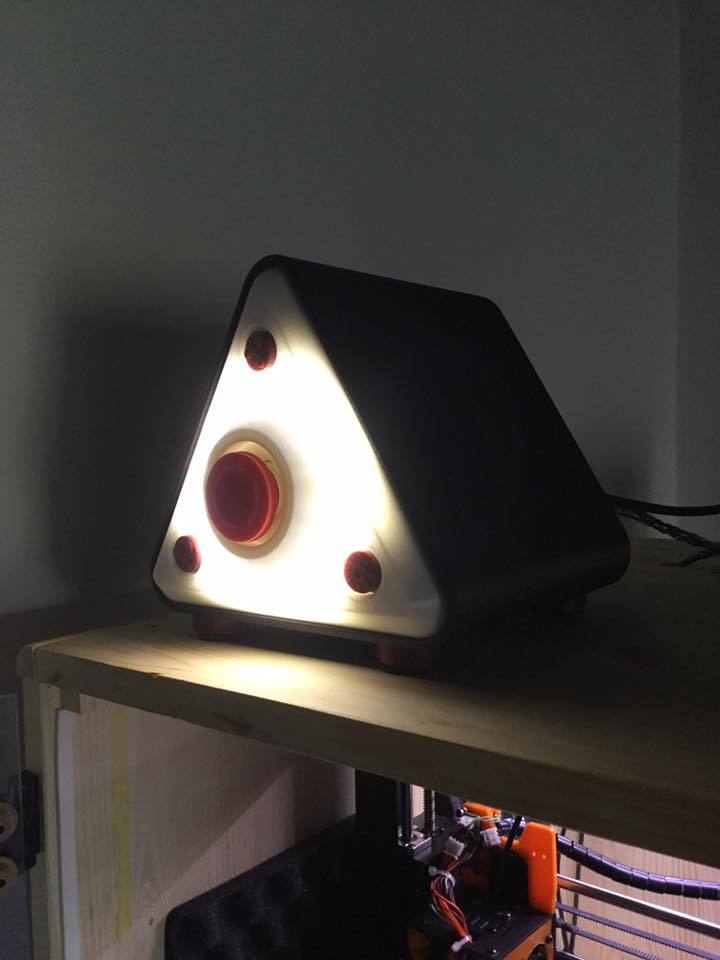
Here is the list of items needed for your project, along with a brief description and link to purchase on Amazon: 1. Emergency Push Button: * This is the emergency push button used in the front panel. * [Buy on Amazon](https://www.amazon.it/gp/product/B07RGQQTW8/ref=ppx_od_dt_b_asin_title_s00?ie=UTF8&psc=1&_encoding=UTF8&tag=ineiub-21&linkCode=ur2&linkId=6813aa367e518f3931f2ad12b661b155&camp=3414&creative=21718) 2. AC Plug: * This is the AC plug required for your project. * [Buy on Amazon](https://www.amazon.it/gp/product/B000L0XCQI/ref=ppx_yo_dt_b_asin_title_o02_s03?ie=UTF8&psc=1&_encoding=UTF8&tag=ineiub-21&linkCode=ur2&linkId=995ca73bd72801a4e09ef7610a26884d&camp=3414&creative=21718) 3. AC Plug Female: * This is the female version of the AC plug. * [Buy on Amazon](https://www.amazon.it/gp/product/B07Z3F3WT8/ref=ppx_yo_dt_b_asin_title_o03_s00?ie=UTF8&psc=1&_encoding=UTF8&tag=ineiub-21&linkCode=ur2&linkId=c7be5e14b38c47ad89d056f7e87007c9&camp=3414&creative=21718) 4. Breadboard Cable: * This is the breadboard cable required for your project. * [Buy on Amazon](https://www.amazon.it/gp/product/B01LWAXJJS/ref=ppx_yo_dt_b_asin_title_o02_s00?ie=UTF8&psc=1&_encoding=UTF8&tag=ineiub-21&linkCode=ur2&linkId=851746107bd1927ec1b4d03ef347e6a9&camp=3414&creative=21718) 5. Tactile Push Button: * This is the tactile push button required for your project. * [Buy on Amazon](https://www.amazon.it/gp/product/B07F3PR3L5/ref=ppx_yo_dt_b_search_asin_title?ie=UTF8&psc=1&_encoding=UTF8&tag=ineiub-21&linkCode=ur2&linkId=ff9b2724e9df715e060ef52f7e3bc2db&camp=3414&creative=21718) 6. Led Strip: * This is the led strip required for your project. * [Buy on Amazon](https://www.amazon.it/gp/product/B00HSF66JO/ref=ppx_yo_dt_b_search_asin_title?ie=UTF8&psc=1&_encoding=UTF8&tag=ineiub-21&linkCode=ur2&linkId=3e0ff011adde780cab84464691832a95&camp=3414&creative=21718)
With this file you will be able to print Octoprint 3d printer and enclosure controller with your 3D printer. Click on the button and save the file on your computer to work, edit or customize your design. You can also find more 3D designs for printers on Octoprint 3d printer and enclosure controller.