Octoprint and GPIO Control Tutorial!
thingiverse
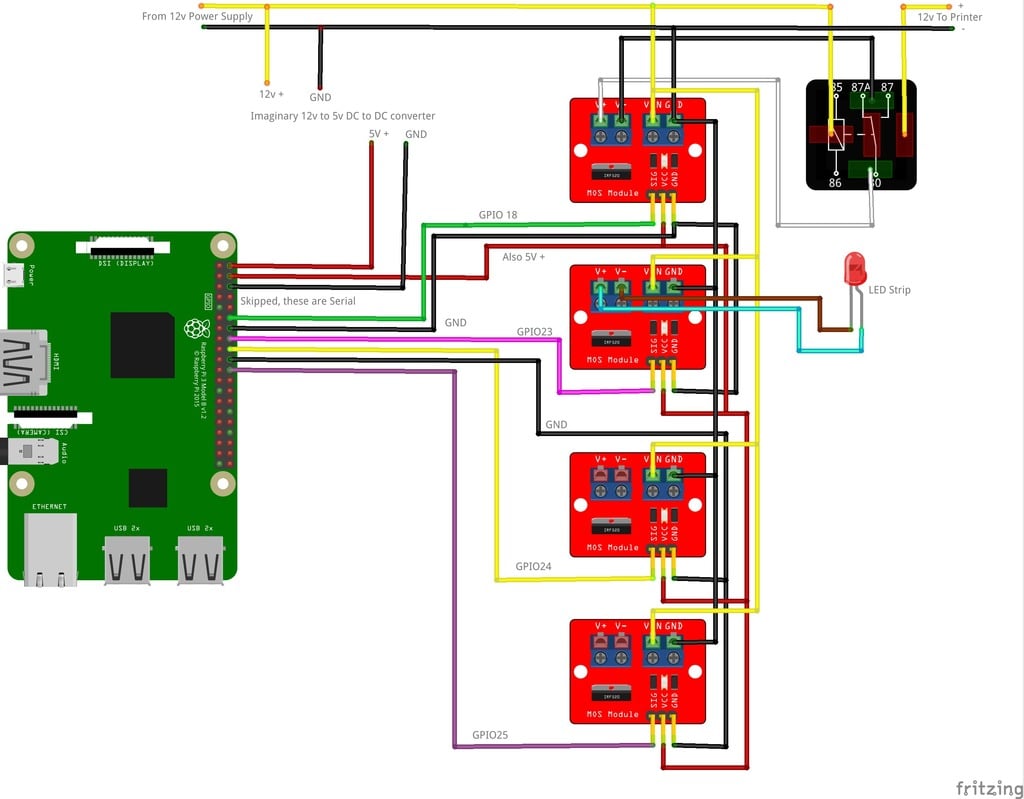
This text appears to be a tutorial on setting up OctoPrint, a software for controlling 3D printers, on a Raspberry Pi. The tutorial covers the following steps: 1. Installing OctoPrint on the Raspberry Pi 2. Configuring the printer and light settings in the OctoPrint web interface 3. Creating custom scripts to automate tasks such as turning off the printer and light when the print is completed or failed 4. Setting up automatic running of the scripts at startup and during specific events (e.g., PrintStarted, PrintFailed, etc.) 5. Updating the Raspberry Pi with the latest software packages 6. Rebooting the system to apply the changes The tutorial also includes notes on how to set up timelapse photography using OctoPrint and some tips on experimenting with plugins and themes. Some of the key points from the tutorial include: * Creating custom scripts to automate tasks such as turning off the printer and light when the print is completed or failed * Setting up automatic running of the scripts at startup and during specific events (e.g., PrintStarted, PrintFailed, etc.) * Updating the Raspberry Pi with the latest software packages using `sudo apt-get update`, `sudo apt-get dist-upgrade`, and `sudo rpi-update` * Rebooting the system to apply the changes with `sudo reboot` The tutorial also includes some additional tips and notes on how to customize OctoPrint, such as setting up a delayed light off script and customizing the timelapse settings.
With this file you will be able to print Octoprint and GPIO Control Tutorial! with your 3D printer. Click on the button and save the file on your computer to work, edit or customize your design. You can also find more 3D designs for printers on Octoprint and GPIO Control Tutorial!.