Octoprint Box - Raspberry Pi 4B, Waveshare 4.3" DSI
prusaprinters
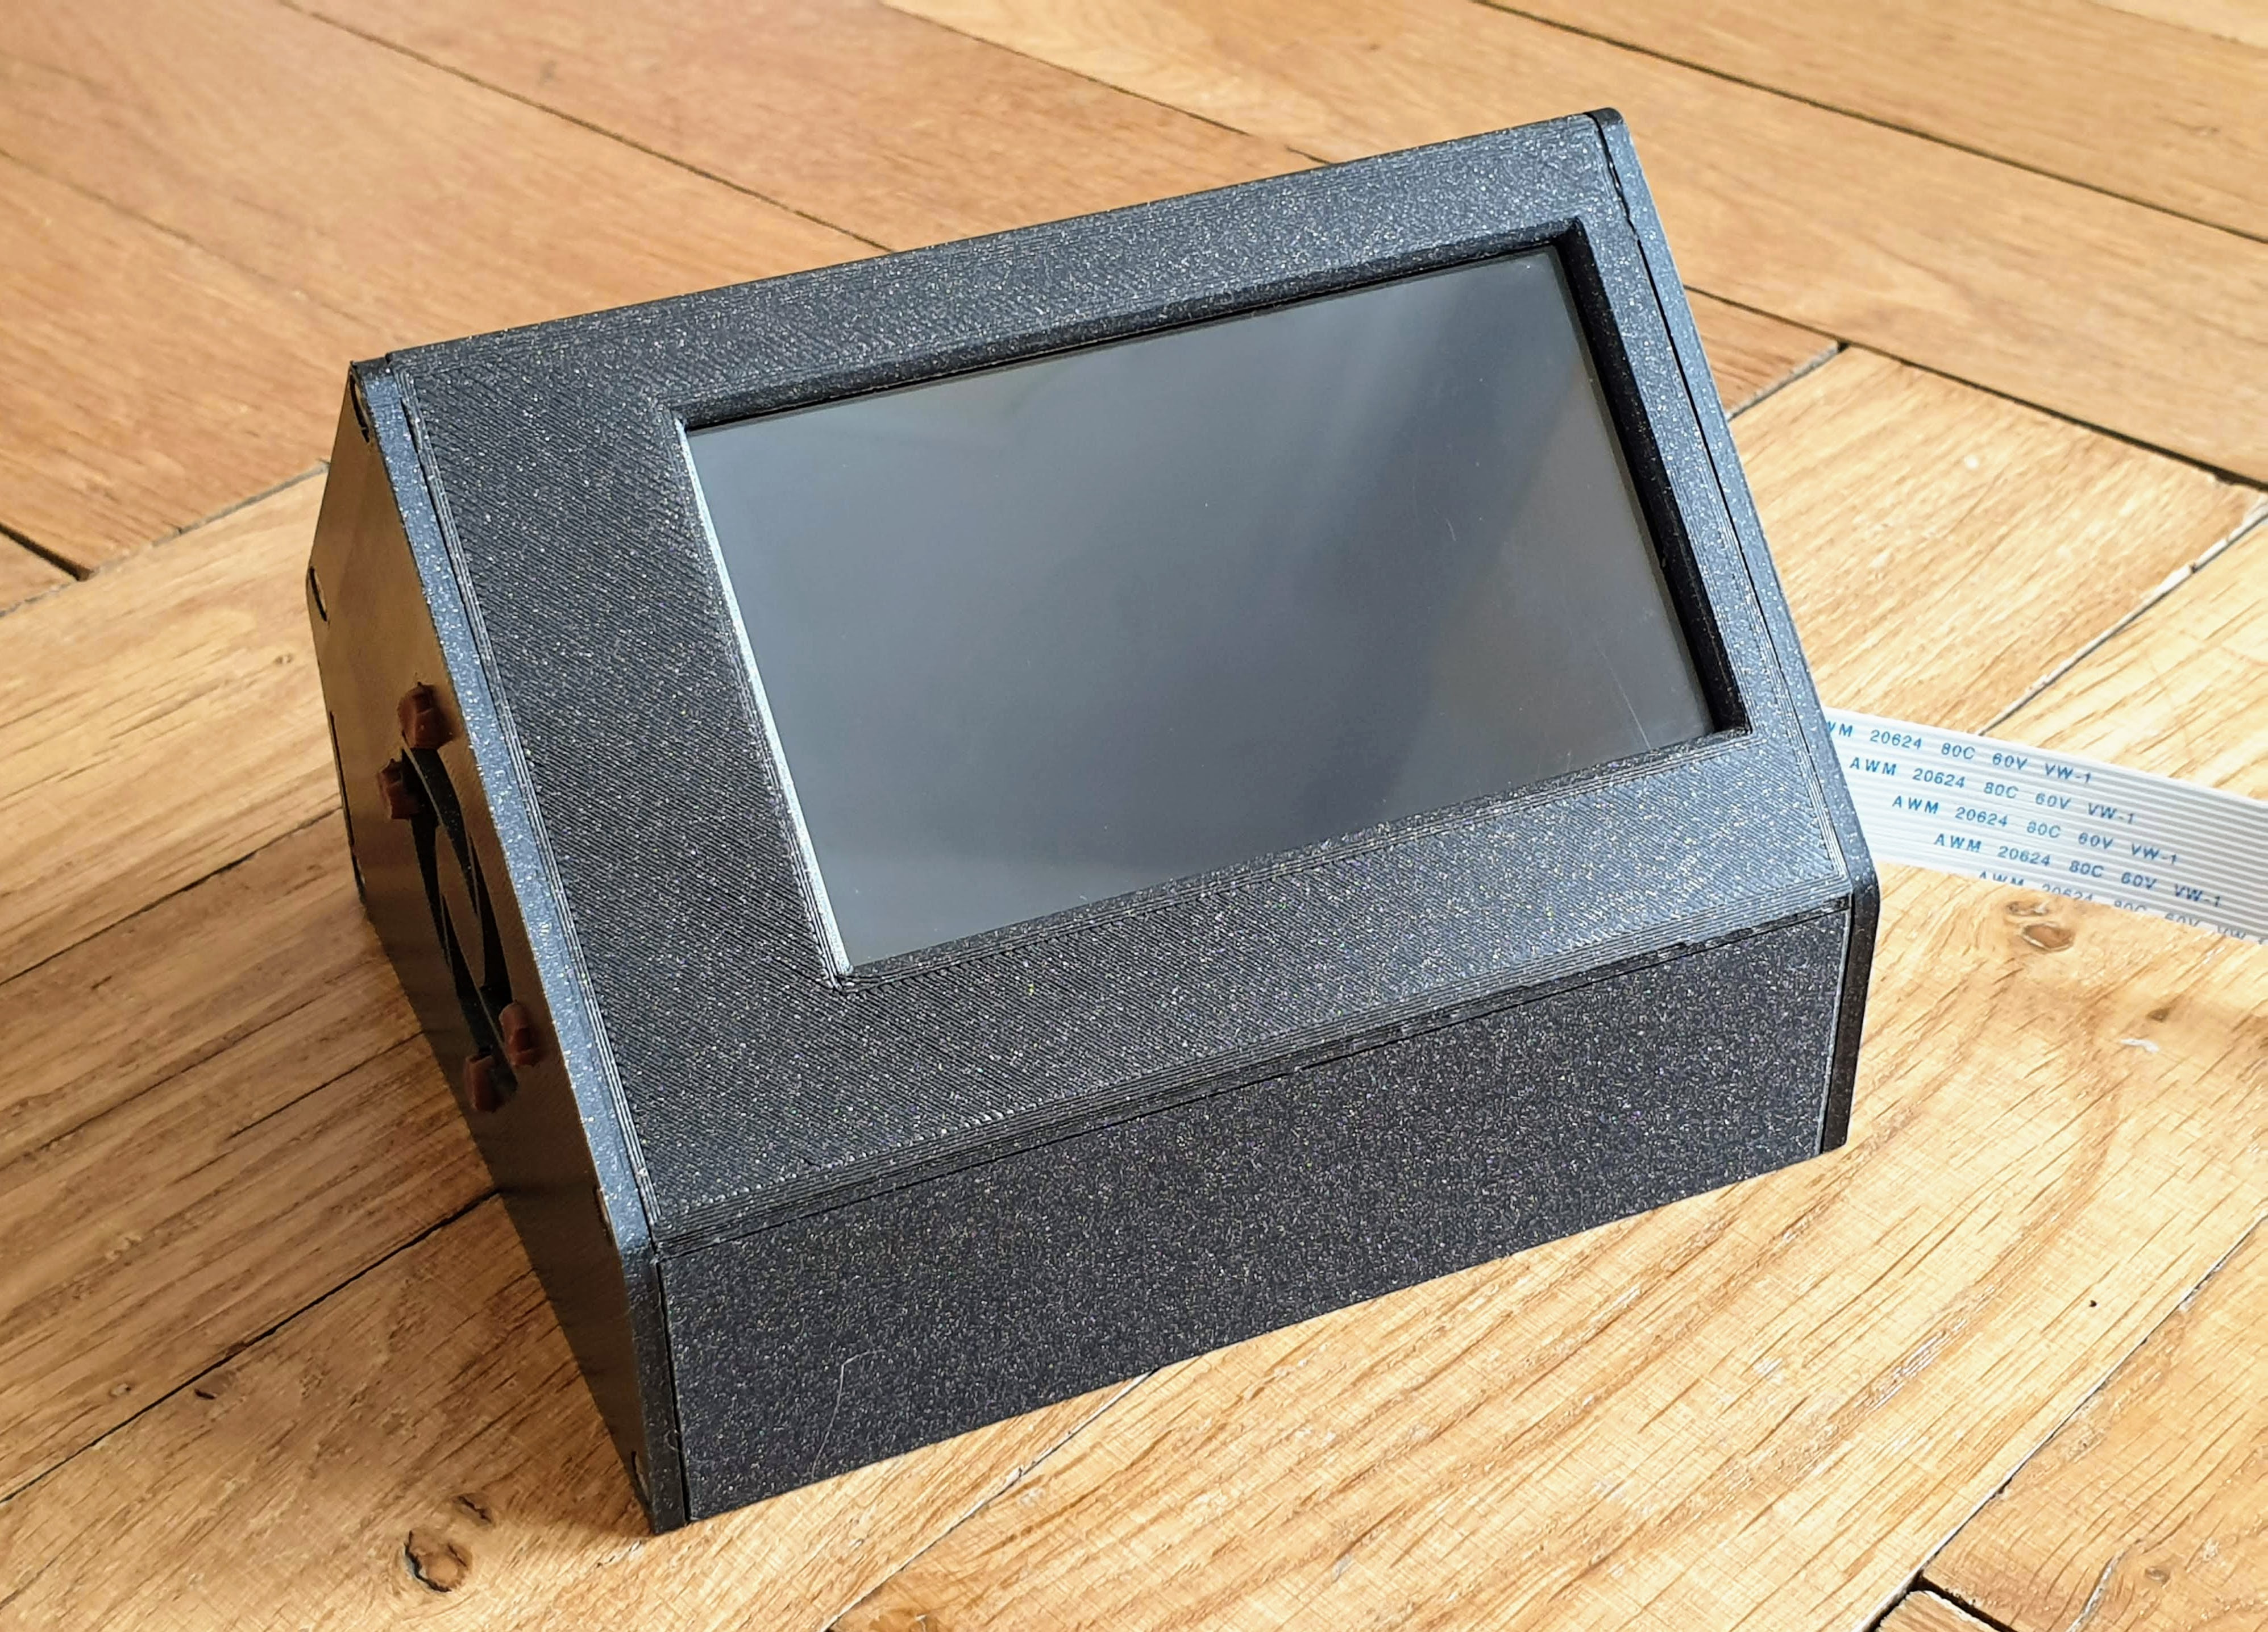
<p>This box supports following components:</p> <ul> <li>Raspberry Pi 4B</li> <li>Waveshare 4.3" DSI display (<a href="https://www.waveshare.com/wiki/4.3inch_DSI_LCD">https://www.waveshare.com/wiki/4.3inch_DSI_LCD</a>)</li> <li>Noctua 40mm 5V fan - NF-A4x10 5V PWM</li> <li>1-channel relay (unfortunately not exactly a typical one: <a href="https://rpishop.cz/akcni-cleny/1640-rele-modul-1x-10a250v-s-optickym-oddelenim.html">https://rpishop.cz/akcni-cleny/1640-rele-modul-1x-10a250v-s-optickym-oddelenim.html</a>)</li> <li>Raspberry Pi Plus Breakout Kit (<a href="https://uk.pi-supply.com/products/raspberry-pi-plus-breakout-kit">https://uk.pi-supply.com/products/raspberry-pi-plus-breakout-kit</a>)</li> </ul> <p>First, you don't really need the fan. Temperature of the CPU is 54ºC when nothing is happening, and around 60ºC when printing. But if you need it, the box is ready :-). If you wonder how to wire PWN fan to Pi, look here:<br/> <a href="https://electronics.stackexchange.com/questions/446128/5v-4-pin-noctua-a4x10-on-raspberry-pi">https://electronics.stackexchange.com/questions/446128/5v-4-pin-noctua-a4x10-on-raspberry-pi</a></p> <p>However, I would replace the transistor with this, as the wiring would be simpler:<br/> <a href="https://www.adafruit.com/product/1787">https://www.adafruit.com/product/1787</a></p> <p>Also please note that the Waveshare display has a peculiar way of controlling brightness. You need to unsolder a SMD resistor on its back, and wire upper pad of that resistor with one of the GPIO pins that support hardware PWN (pin 18 in my case). Consult FAQ page of the Waveshare display for more details (<a href="https://www.waveshare.com/wiki/4.3inch_DSI_LCD">https://www.waveshare.com/wiki/4.3inch_DSI_LCD</a> - you need to change tab to FAQ). Also note that the varsion of wiringPI gpio command shipped with octopi doesn't support RPi 4, and you need to update to the latest (2.52) - more details here: <a href="http://wiringpi.com/wiringpi-updated-to-2-52-for-the-raspberry-pi-4b/">http://wiringpi.com/wiringpi-updated-to-2-52-for-the-raspberry-pi-4b/</a>. Once you do so, few on-liners in cron will do for a basic scheduling (turn off the backlight during sleep time in my case).</p> <p>Please ignore the way how wires are connected to the breakout board, as I have soldered the cable pins from the other side, hence pin labels are flipped :-/.</p> <p>As a software, I'm using OctoDash. Originally I wanted to use OctoScreen, but it has flaws that make it unusable for me (can't turn off the screen when printer is not connected, constantly retrying connection when printer is off, eventually killing Octoprint, filament change didn't work on my MK3S).</p> <p>OctoDash works much better, although I personally don't exactly like its aesthetics (but can live with it). It also supports several popular plugins, which is really nice.</p> <p>To mount the camera, I'm using this superb mount:<br/> <a href="https://www.prusaprinters.org/prints/3407-articulating-raspberry-pi-camera-mount-for-prusa-m">https://www.prusaprinters.org/prints/3407-articulating-raspberry-pi-camera-mount-for-prusa-m</a><br/> with longer flat cable.</p> <p>WARNING: all holes are intended for Ruthex inserts (except the ones supporting the display, those are through-holes). Except the relay, I'm using M2.5 screws with countersunk flat head with the inserts. Display screws are also M2.5, but with a regular head, the same is true for the breakout board.<br/> Inserts: <a href="https://www.amazon.de/-/en/Threaded-Bushings-Plastic-Through-Ultrasonic/dp/B088QJDPKK/ref=sr_1_3">https://www.amazon.de/-/en/Threaded-Bushings-Plastic-Through-Ultrasonic/dp/B088QJDPKK/ref=sr_1_3</a></p> <p>Noctua fan is mounted using the silicone mounts NA-SAV2: <a href="https://noctua.at/en/na-sav2">https://noctua.at/en/na-sav2</a> (4 comes with the fan)</p> <h3>Print instructions</h3><p>Top is a bit tricky to print. I have sliced it in Cura with tree supports, display face on the bed. Printed nicely in PLA, but the supports were a bit painful to remove (quite literally).</p> <p>The rest is a breeze, no problem whatsoever.</p> <p>Attached gcode files are for printing with Prusament PLA (Galaxy Black)</p>
With this file you will be able to print Octoprint Box - Raspberry Pi 4B, Waveshare 4.3" DSI with your 3D printer. Click on the button and save the file on your computer to work, edit or customize your design. You can also find more 3D designs for printers on Octoprint Box - Raspberry Pi 4B, Waveshare 4.3" DSI.