OctoPrint Dual instances control box

OctoPrint Dual instances control box

thingiverse

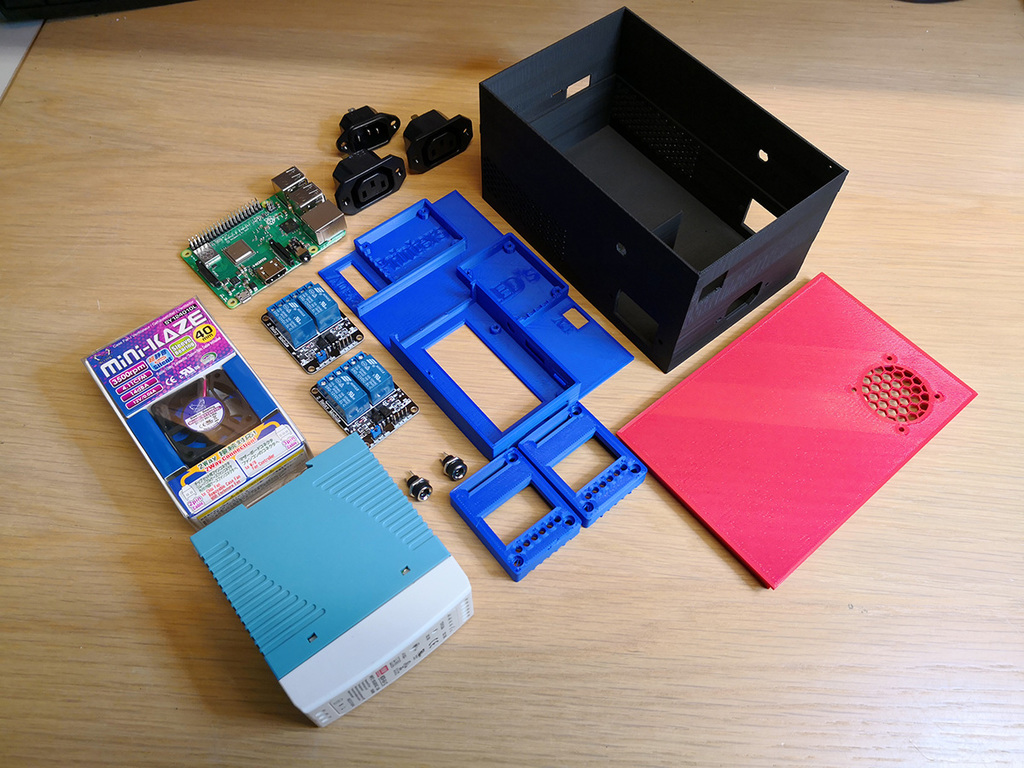
This is a control box for OctoPrint running on Raspberry Pi 3 B+ with two OctoPrint instances. EDIT: I decided to add a illustrated wiring diagram, but since mains power is involved I want to say once more, it is not my responsibility if something goes wrong, like shorting or getting electrified and blowing up your devices, it is all your own responsibility if something goes wrong, therefor I can't be blamed if something happens. Here is the link to the wiring diagram: https://i.imgur.com/pYo7L1e.png That being said, I made this box to control power and LED lights on both printers through GPIO pins of the Raspberry Pi within OctoPrint. Box is made to hold a Raspberry Pi 3 (B+), two 2 channel relay modules, a passive USB hub and a power supply. The reason why I did not use a 4 channel relay module is keeping mains power and 12V separate as possible, the lower compartment of the box is mainly for mains power and a small 12V 5A power supply. Upper part is a tray you don’t have to mount it, just lay it in there, on this tray there is 2 relay modules mounted and the Raspberry Pi itself, there is also room for a small USB hub. The reason why I used a power supply was to power relay modules and the LED lights on both printers, you can power the relay modules through the Raspberry Pi, but I did not want to draw more power from Pi since it has already 2 printers and 2 cameras connected to the USB ports. Besides that, you have to run a cable for switching the LED's anyway, this way it is directly powered from the control box. To keep the box small as possible, the connectors of the mains power and other stuff on upper tray is very close to each other, it requires some patience to put everything together, be careful when installing the USB connections, make sure mains in not plugged in while working on it. The SD cards is removable when the box is closed. There is also a little gap to check the LED’s of the Raspberry Pi. I remixed couple models on the upper tray, using PSU control plugin for OctoPrint on both instances, and I used this tutorial to get lights working on both instances: https://www.thingiverse.com/thing:1428478 ###################################################################### Parts list I used on request: 1x Raspberry Pi 3… doh! :D I used 12V relay modules and not 5V relay module, reason as explained before, I don’t want to draw current from Raspberry Pi for the relays, it is tricky to connect this one, if you mix things up you end up blowing your Raspberry Pi, with these relay modules you remove the jumper and connect the 12V on the 3 pin header on outer pins at JD-VCC and GND, cut away the middle VCC pin if you accidently connect 12V here it can hurt your Pi, than connect the desired GPIO pins to IN1 and IN2, to make this work you need to connect +5V pin from pi to the VCC pin next to IN1 and IN2, DO NOT CONNECT wires on GND next to IN1 and IN2, this way it is completely isolated. 2x Relay modules: https://www.aliexpress.com/item/12V-2-Channel-2-Channel-Relay-Module-Shiled-Relay-Expansion-Board-Low-Level-Triggered-For-Arduino/32669152426.html You can also get a 5V relay module and connect it to the Pi without any need of power supply, that is up to you: https://www.aliexpress.com/item/1PCS-2-channel-New-2-channel-relay-module-relay-expansion-board-5V-low-level-triggered-2/32273357570.html The 12V 5A power supply I have used: https://www.amazon.com/gp/offer-listing/B00MEKLTKY/ref=dp_olp_0?ie=UTF8&condition=all&qid=1531919932&sr=8-2 You can also get a small 2A power supply, this will defiantly fit in there: https://www.aliexpress.com/item/DC12V-1A-2A-3A-5A-8-5A-10A-15A-20A-30A-lighting-Transformers-LED-Driver-Power/32677602188.html Make sure you get the 2A one, bigger ones might be tight fit, 2A is mostly enough to power couple relays and LED lights. C14 Male panel socket: https://www.aliexpress.com/store/product/2017-Hot-5-Pcs-3P-IEC-320-C14-Male-Plug-Panel-Power-Inlet-Sockets-Connectors-AC/2949063_32804170262.html 2x C13 Female panel socket: https://www.aliexpress.com/store/product/Chassis-Female-15A-250V-3PIN-05231-AC-IEC-C13-C14-Inline-Socket-Plug-Adapter-Mains-Power/4058098_32870604221.html 2x 12V DC power supply socket for LED’s: https://www.aliexpress.com/item/5Pcs-3A-12V-For-DC-Power-Supply-Jack-Socket-Female-Panel-Mount-Electrical-Socket-Connector-5/32804739048.html The 12V 40mm Fan I have used: https://www.amazon.com/Scythe-Mini-KAZE-Silent-SY124010L/dp/B000LB0M8S This fan is silent, but if you want you can get another one, it does cool the Pi nicely. USB Printer cable, you need this one because most other cables have long USB connector and wont fit in the box, or you can buy a similar one: https://www.aliexpress.com/item/Ugreen-USB-2-0-Type-A-Male-to-B-Male-Printer-Cable-Sync-Data-Charger-Cable/32416310263.html Dupont wires: https://www.aliexpress.com/item/WAVGAT-Dupont-line-120pcs-20cm-male-to-male-male-to-female-and-female-to-female-jumper/32501238474.html USB Hub I have used is a ISY IHU-1001 it is sold at Mediamarkt and Saturn in Europe, I am not sure but next USB Hubs should fit in there too: https://www.amazon.com/dp/B00DQFGH80 https://www.amazon.com/QICENT-Ports-Super-Speed-5Gbps/dp/B07547LLH7/ As always use crimp connectors and ferrules on your wires!

Download Model from thingiverse

With this file you will be able to print OctoPrint Dual instances control box with your 3D printer. Click on the button and save the file on your computer to work, edit or customize your design. You can also find more 3D designs for printers on OctoPrint Dual instances control box.