Octoprint Ultimate Lights / Fan / Temperature Control
thingiverse
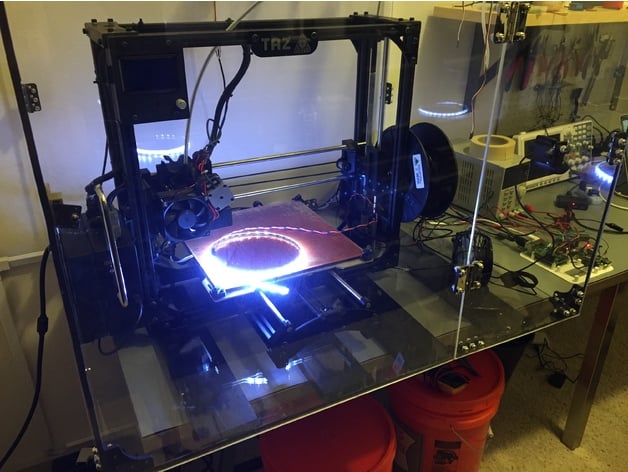
It appears that you're providing a documentation on an OctoPrint plugin called "Enclosure Plugin". The plugin allows users to control and monitor various aspects of their 3D printer enclosure, such as temperature, lights, fans, and filament sensors. Here's a summary of the key points: **Heater** * A $15 Lasko heater can be used with a relay to heat the enclosure. * Caution: voltage on mains wire can kill you, so only attempt if you know what you're doing. **Cooler** * A USB Mini Desktop Fan can be controlled using a relay. **Filament Sensor** * A filament sensor can be added to automatically pause the print and run a GCode command to change the filament when it runs out. * The sensor should connect to ground for "active low" or 3.3V for "active high". **Configuration** * The plugin has two main types of configuration: Inputs and Outputs. * Outputs control devices (temperature, lights, fans, etc.) and can be set to various types (GPIO, PWM GPIO, Neopixel Control, Temperature Alarm, GCode Output). * Inputs trigger actions or input values to the plugin (temperature sensor, GPIO trigger). **Features** * Automatic turning on/off of outputs when the printer starts/finishes. * Scheduling events by hour (HH:MM 24-hour format). * Temperature Alarm to control another GPIO output after a certain temperature is met. **Safety Note** * The author is not responsible for any damage caused by fires, so proper smoke detectors should be installed by professionals. Overall, the Enclosure Plugin provides a robust set of features for controlling and monitoring various aspects of a 3D printer enclosure.
With this file you will be able to print Octoprint Ultimate Lights / Fan / Temperature Control with your 3D printer. Click on the button and save the file on your computer to work, edit or customize your design. You can also find more 3D designs for printers on Octoprint Ultimate Lights / Fan / Temperature Control.