Oculus CV1 head strap to Quest 2 adapter
prusaprinters
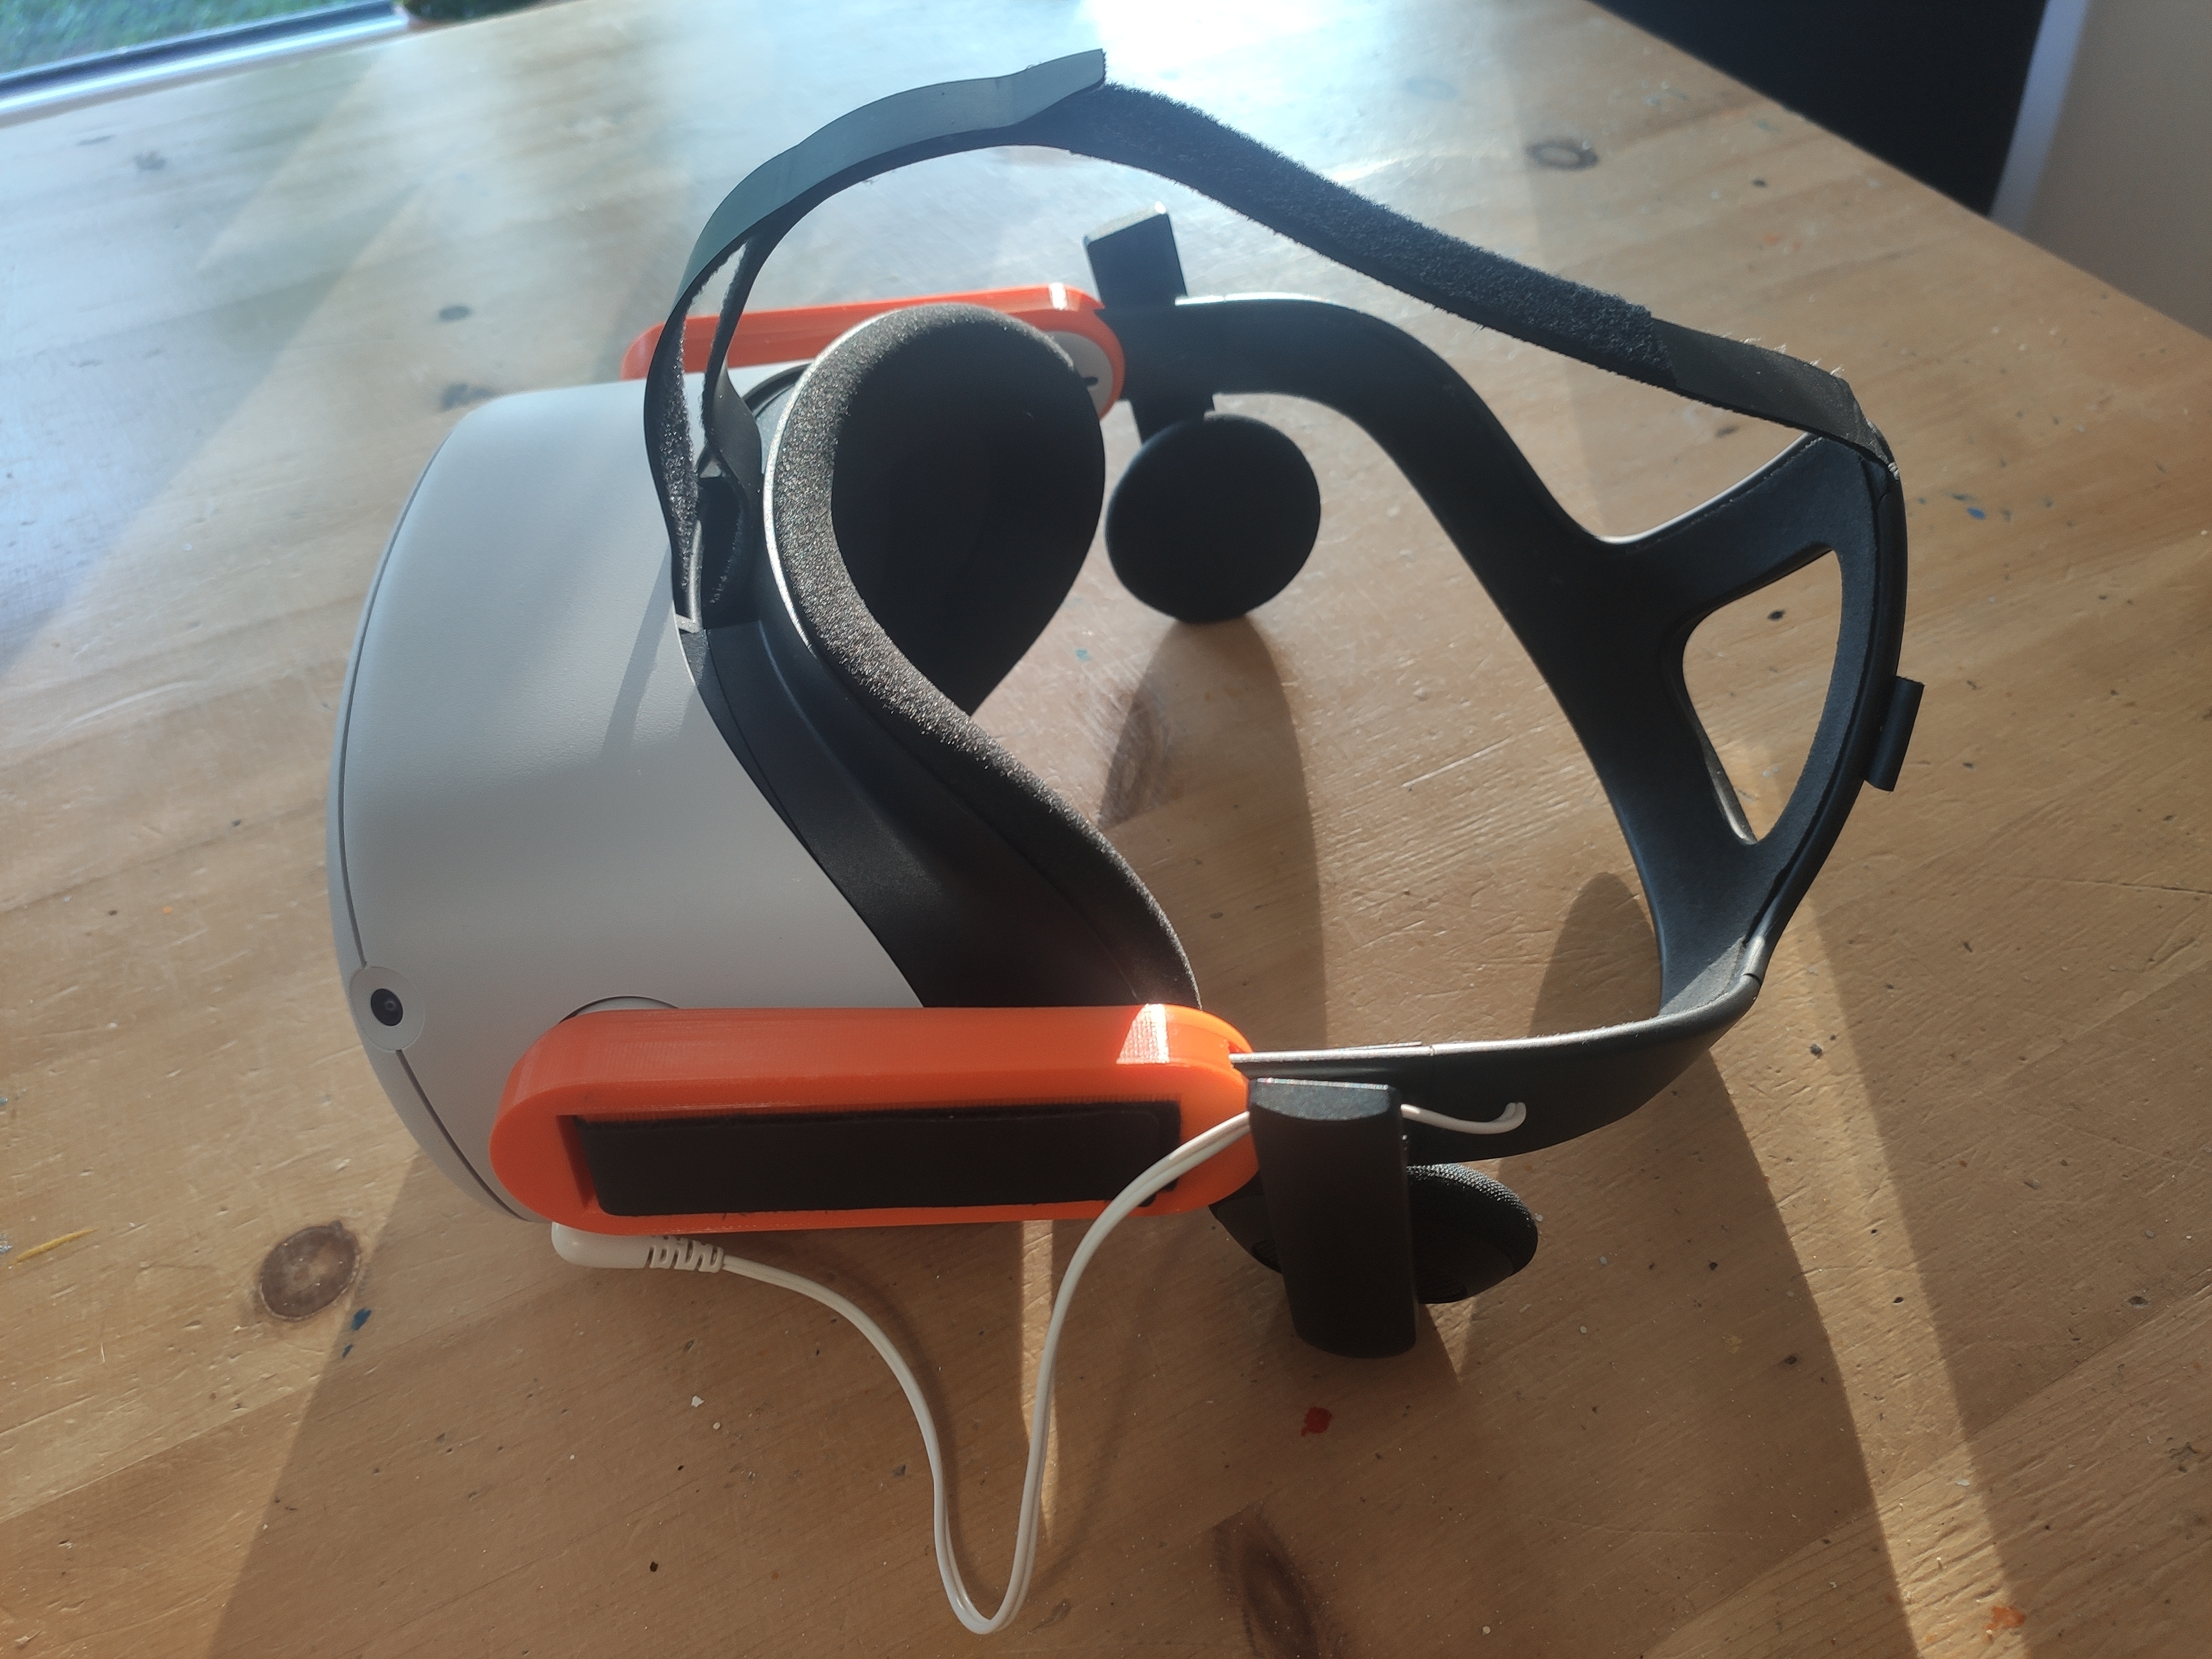
<p>I decided to mod my (dead) CV1 head strap with audio and use it with Quest 2 which has pretty mediocre build-in sound system. </p><p>My model uses interface provided by <a href="https://www.thingiverse.com/tanvach/designs">tanvach </a>here: <a href="https://www.thingiverse.com/thing:4626664">https://www.thingiverse.com/thing:4626664</a></p><p>You will need to disassemble head strap from CV1 first. It is fairly easy but please note that in the process you will cut flex cable in right arm which will permanently disconnect sound and back leds from the CV1. You will not be able to revert this. If your CV1 is dead like mine its not a problem.</p><p>To disconnect arms peal off the velcro from the original adapter on the strap. This will reveal spring mechanism with the detent which needs to pressed in to slide out the arm from the adapter. Make sure you do not damage the velcro strip as it will need to be glued on the printed adapter. </p><p>Once adapter is printed place the velcro in the same way as on original adapter and slide in the arm (make sure you use correct one left or right as they are not identical). Use knife or something flat to help guide the velcro strip. I made opening on the inside to help push it through with some flat tool. </p><p>I recommend to print it at least at 0.15. The sloped part will be very jaggy if printed with higher layer high. I printed it PLA at 0.10 with small painted on support at the end where the opening for the strap is. When printed well the spring should move freely. </p><p>I also provided small gluable cable guide. It just to provide some support and guide cable in the right direction.</p><p>Sound. You will need soldering iron, glue and small screwdriver and something to drill a small hole if you want to run the cable like me. I simply unscrewed arms apart with small screw in the middle, the rest is just snap locks. The fabric on the inside need to be carefully peeled off to reveal small channel where you will run your cable. You can cut and remove existing flex cable completely to make more space. Next is just a matter of soldering common negative wire to both bottom pads on left and right side and then top pad respectively for right and left channel. </p><p> </p><p> </p><p> </p>
With this file you will be able to print Oculus CV1 head strap to Quest 2 adapter with your 3D printer. Click on the button and save the file on your computer to work, edit or customize your design. You can also find more 3D designs for printers on Oculus CV1 head strap to Quest 2 adapter.