Oculus Quest Anker Battery Mount
thingiverse
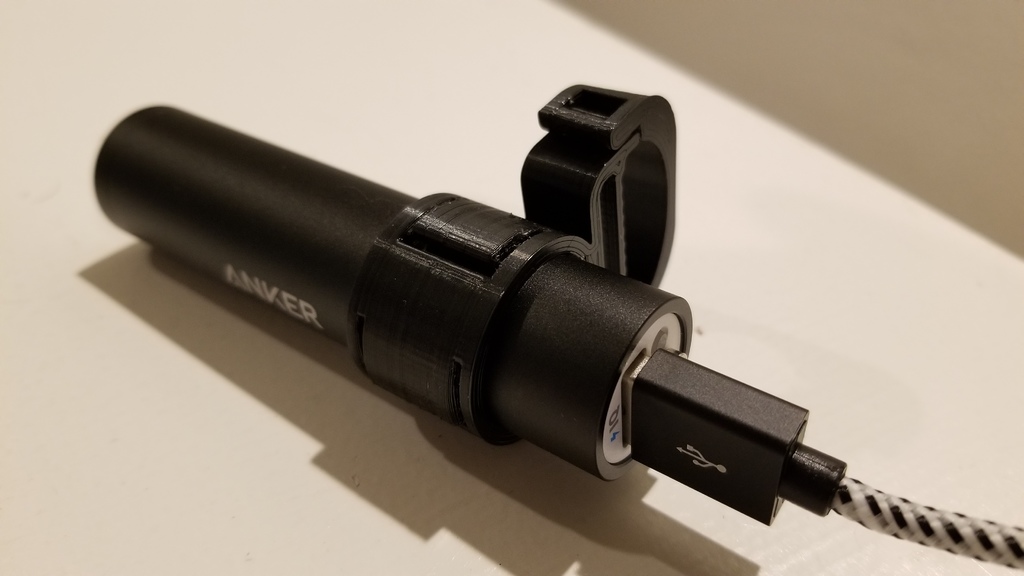
VR tether-less is great, but it still has the limitation of the battery. Add this mount to your Oculus Quest to play even longer and potentially swap out multiple Anker batteries to just keep on playing. The Anker battery for this print is: https://www.amazon.com/gp/product/B005X1Y7I2 To feed the power directly into the Quest while using it, connect a short USB cable from the Anker battery to the Quest headset. (See https://www.amazon.com/CableCreation-Braided-Compatible-MacBook-Resistance/dp/B01CZVEUIE). Make sure to get the USB-C one. The previous mount for the Oculus GO (https://www.thingiverse.com/thing:3435891) hooked around the head-strap mount on the headset, but there isn't as much space on the Quest. The Quests head-strap also isn't as flat as the Oculus GO one. The mount had to be re-designed to be clipped-on in one place and uses a lot less filament. It stays in place through three ways: - The head-strap is curved and changes size slightly along the side. I designed the mount to make sure that it can't slide to the front. - It uses friction on the velcro on the outside of the head-strap to reduce the possibility to slide backwards. This is actually pretty effective. - Through light friction from the print-pattern on the head-strap. If the mount still moves when the headset is in use, try moving the mount a bit towards the front where the head-strap gets thicker. The clip provides enough pressure to increase the friction. When you put it on, you have to pull the clip apart a bit to get it onto the head-strap. This might require some force. Try doing this at the ear or even further back as it is the thinnest there. Then, move it to the front and close the clip. You can do this a couple of times without issues, but at some point it might just break apart. I leave the mount on as it isn't noticeable at all (at least for me). NOTE: Make sure that the clip is on the top. Otherwise the mount doesn't fit quite right. You can slide the battery out to recharge it. In comparison to the Oculus GO version, I added another pressure point on the ring to make sure that pressure stays on even when the battery was removed a couple of times. Try positioning the battery further to the center of your head/neck than to the front. This mount is pretty far back and therefore you will feel the battery even less. I also added a small slit between the battery ring and the head-strap mount to pass through the velcro, if needed. (My head is big enough that I don't need it) The USB port is on the left side, so you probably want to print the left version. However, I have also included a mirrored version for the right side, if you want to balance the headset with another weight/battery (I personally didn't feel the difference). Someone started selling it on Etsy. If you want to have an all-in-one solution (including print, battery, and cable) for this, you can buy it here: https://www.etsy.com/listing/708510027/oculus-quest-battery-mount-kit-with
With this file you will be able to print Oculus Quest Anker Battery Mount with your 3D printer. Click on the button and save the file on your computer to work, edit or customize your design. You can also find more 3D designs for printers on Oculus Quest Anker Battery Mount.