Olaf Snowman maker (Remix)
thingiverse
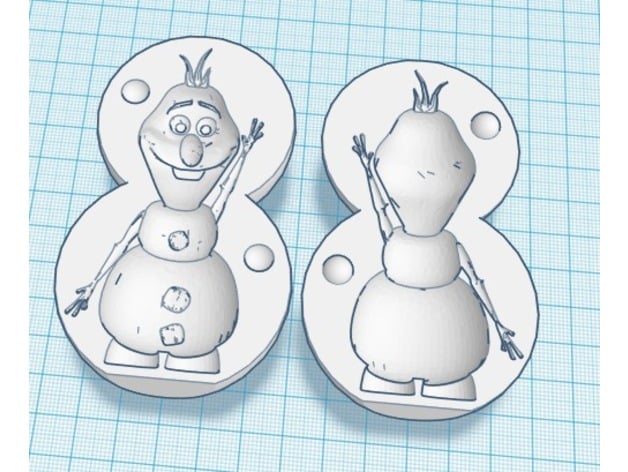
My first entry for the #RemixChallenge was a success, but my daughter loves Frozen even more, so we need an Olaf snowman maker that's just as amazing! Extra Credit Opportunity: Add some color to your Olaf by placing drops of food coloring into the mold where his nose, eyes, buttons, and arms are. February 1st, 2018 - I made a change to the body of the mold to give it a snowperson shape, which should save material. I also replaced the cylinder pegs with half spheres, which will make them easier to separate from the mold. I haven't printed it yet, but I'll post photos when I do. Print Settings: Rafts: Doesn't Matter Supports: No Resolution: 0.1mm or better Notes: To get a high level of detail, print with 0.1mm layer height or better! I printed the 'box' snowman maker on my MakerBot Mini and it's just short of 100mm tall. The level of detail is nice, but the arms/hands won't come out well on a snowman. I'd definitely scale up for a usable one! Just use sticks instead. How I Designed This: I used TinkerCAD and Slic3r to design this snowman maker. When I saw the snowman maker on the #RemixChallenge collection, I knew I had to remix Olaf. I found an Olaf mold by rocketboy already on Thingiverse, but I also wanted to show the steps I used to create this snowman maker. Step 1: Check the Model I first found a model of Olaf that would work well and imported it into TinkerCAD. I checked for any mesh errors, but nothing major appeared! Step 2: The Block Next, I raised the model 5mm off the floor of the workspace to prevent the feet from sticking out of the bottom of the snowman maker. Then, I added a simple cube that would become the snowman maker. Don't forget to apply the 'hole' setting to the Olaf model so it gets removed from our cube! Step 3: Paper Cut I created another cube and stretched it as wide as my snowman maker was, and as tall as the snowman maker was. Then I made it only 0.1mm thick, like a piece of paper that will split our model into two pieces! Position the 'paper' so that it splits the model in half. Step 4: The Trick There has to be a trick if you want these all grouped together nicely. Select the Olaf model and make him about 10mm taller. Then, make the snowman maker 5mm shorter than the Olaf model. Next, select the Olaf model and shrink him back down to original size. The Olaf model should still be selected, even though it's now hidden inside the red cube. Step 5: Cut in Half Now it should look like you have a big red cube with 'paper' piece slicing through the middle. Select the 'paper' piece and make it a 'hole.' Then select the 'paper' hole and the red cube and group them together. This effectively cuts your model in half. Step 6: Separation TinkerCAD won't easily separate these two pieces, but Slic3r will! So export your file from TinkerCAD and open it up in Slic3r. Once you have it open in Slic3r, hit the 'Split' button in the toolbar and BAM! You've got both sides split. All you have to do now is rotate them so the relief is facing up and print! Do the splits!
With this file you will be able to print Olaf Snowman maker (Remix) with your 3D printer. Click on the button and save the file on your computer to work, edit or customize your design. You can also find more 3D designs for printers on Olaf Snowman maker (Remix).