Oldie Vice V2 Remix Hobby Vise
thingiverse
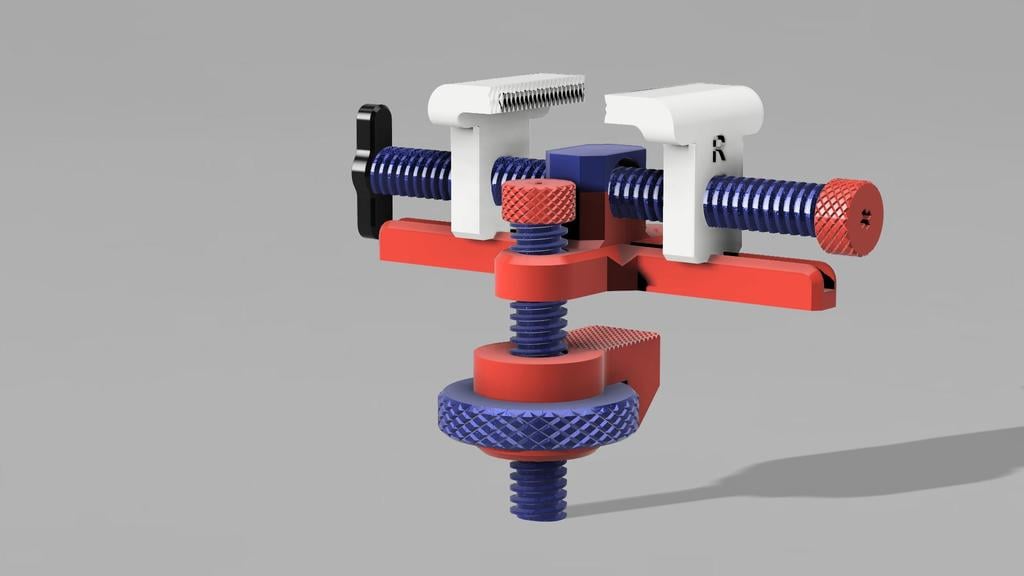
Note: This is not a beginner type model to print. There may be some light sanding, filing, and careful print considerations involved for a couple of the parts. That said, it is a totally fun model that produces a useful hobby vise in the end. REMIX: I fell head over heels for AnsonB's "Oldie Vice V2" and Version 1, but they had a few quirks. Version 1 had very fine threads that could be tricky to print. Version 2 improved the threads for printing and also had better knob setup. After testing with those for a while and reading some user comments about wanting to mount the vise down, I decided to see what I could do. A few prototypes later, along with me murdering Anson's Fusion 360 model, this remix was born. CHANGES: - Removed the lower flanged part of the main vise base and thickened the bottom - Extended mounts out both sides of main vise base - Vise can now be screwed down to bench with provided holes - Optional clamping parts can be printed to clamp vise to bench with clamping mechanism and wheel gizmo (easily added and removed, too) - Rounded off a few sharp areas - Switched from fine threads to ACME style vise threads which cuts the full open/close rotations by 50% from original designs - Oriented the models for printing PRINTING: You can follow AnsonB's instructions for most of the vise parts. https://www.thingiverse.com/thing:3448268 I glued the knobs in place on the ends of the threaded rods. Threaded parts should all be printed at similar resolutions, such as .2mm or less with lower speeds and at least 4 shells with 30% infill. The optional clamping plate part requires supports and should be printed as modeled for strength reasons. Tolerances were built into the model so you should not have to adjust anything at print time, but it may depend on your printer and filament type. I only tested PLA and PLA+. I would print the main vise thread and one of the vise jaws as a test before printing the whole model and insure you are getting good thread fit. Then you can move on. Worst case you can shrink the threaded rods by 1 to 1.5%, just not the length, if you can't make the stock model work. POST-PRINTING: Light sanding on parts that have contact areas is a great idea. The threaded parts require great care until they are carefully worked into place. They may appear extremely tight at first and must be worked back and forth (as if you were tapping the threads) with care and patience that will pay off, and they will loosen up.
With this file you will be able to print Oldie Vice V2 Remix Hobby Vise with your 3D printer. Click on the button and save the file on your computer to work, edit or customize your design. You can also find more 3D designs for printers on Oldie Vice V2 Remix Hobby Vise.