Omega Printer / DIY 3D Printer
thingiverse
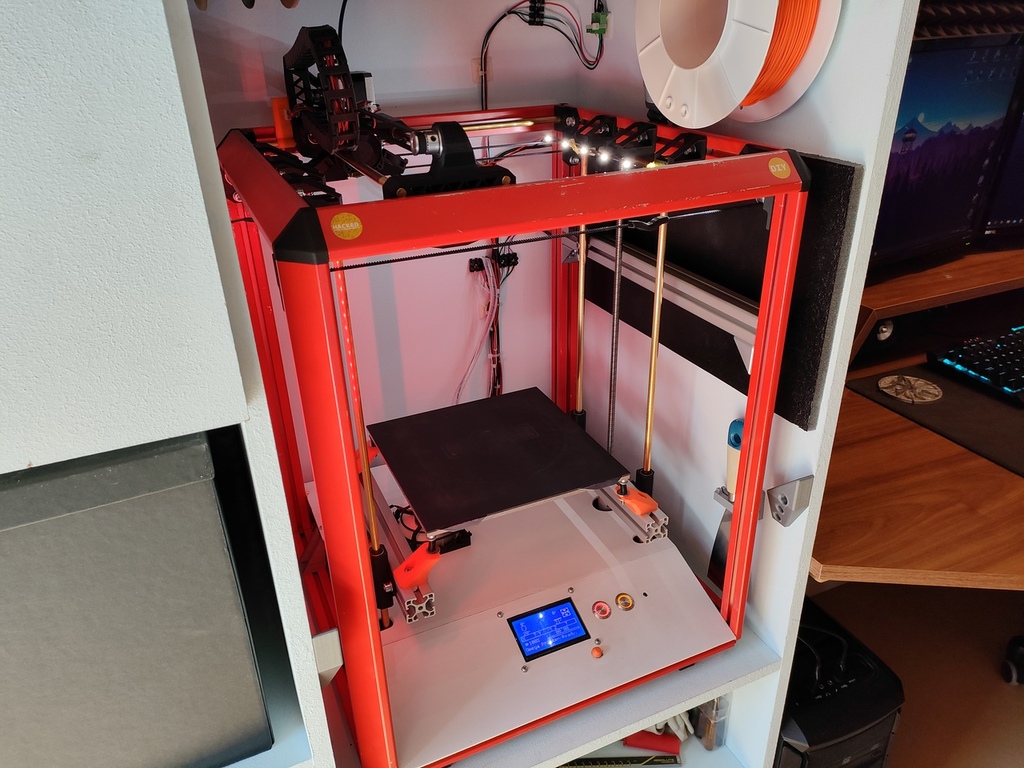
Hi there, glad you visit my site here! Quick explenation about what you see here: This is my completely selfbuilt and tested DIY 3D Printer. Now, the design- and buildprocess of this machine used about 6 years. I made several updates on the printers design and function over this time and now, after I am really happy with the design and the quality of the prints, I like to give the printer free for other people to build one for themeselfes. there are for shure better printers out there, but I am quit happy and proud on this one. If I would start from scratch again, I would build it a bit different. But for now i leave it like this for the comming years. Most parts are not that expensive. But there are some parts, where I think that it is good to use high quality parts, like the hotend, the trapezoidal threads and the printbed from princore. - belt driven extruder with a bowden system - xyz cartesian system - E3D all metal hotend - 40mm radial fan for heatsink - 2x30mm radial fan for partcooling - t8 lead screw for the Z-axis (up and down) - nema 17 steppermotors - 8mm brass rods (for the Y-axis it is recomended to change to a carbon fiber rod) - gt2 belts, two closed belts for the extruder and the X-axis - vibrationdampening pieces for the extrudermount - 5mm to 8mm coupling for Z-axis - 8mm ballbearings (cheap and reliable) - strong frame out of 30x30 aluminium extrusions (i liked the triangular shaped ones) - two lightbarrier endstops and one switch endstop - controlpanel in front with 3 buttons to control the printer (eg: power, fan, usb connection) - printbed is from princore with a flexplate and has the dimensions: 235mmx235mm Now, which dimensions you want to print the printer is your choise, you can scale it up and down to your prefered size. I went for this dimensions of the aluminium extrusions: - 4x500mm - 8x390mm - 1x390mm (square for the nema 17 mount and other stuff) - 2x290mm (square for printbed) I recommend to print or buy vibrationdampening blocks to place the printer on. It really makes a huge different in quality and noise. For the coverplate (big white plate) I just used some plasticsheet from a lokal store (Hornbach). You can also use a metal plate or even wood for that of course. I think the white colour gave some good optics to it. Change the colours as you wish. Mount the cablechain/energychain with some zipties to secure them in place. You can mount a luster therminal on top of the extrudermount. that way you can unmount the energy chain later if you have to repair somethings. Its just so much easyer that way, believe me. I especially reserved a place for this luster terminal with 3 holes to screw it in. If you are unshure about anything just leave a question down below and I reply as soon as I see it. I hope that covers all. Here is a really old version of the printer, but dont be shy to give the video a try as you can see really early versions of the printer and some buildup tips and clips: https://www.youtube.com/watch?v=JWtdxnSHNTs&ab_channel=xeniumoxidmovies So this video is really old and the printer was not as good then as it is now! Would be nice to see if someone builds one themeselfes, if so, pls share your finished Omega Printer here with us all. Have a great day and happy printing! Martin
With this file you will be able to print Omega Printer / DIY 3D Printer with your 3D printer. Click on the button and save the file on your computer to work, edit or customize your design. You can also find more 3D designs for printers on Omega Printer / DIY 3D Printer.