Omni wheels robot
thingiverse
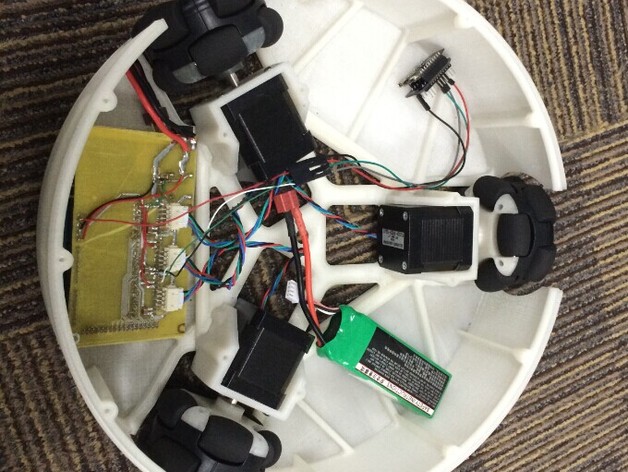
Here's how it all came to be: A while back I was playing with this thing called the Omni Wheels Robot. This is basically a bot that can move around pretty nimbly on its feet - almost like me! Anyhow, the concept struck me when I saw this one robot trashcan designed by some whiz Japanese bloke about 2 years ago in this viral vid on youtube, you know how sometimes something strikes a chord with us & it all came flooding back as we recall those nostalgic feelings from our past. You know like, how he throws away this scrap of paper, thinking that controlled rubbish bin would chase it down right? Anyhow, let's dive in! What caught my attention here was that algorithm driving it - this particular algorithm could spot that flying piece of paper first & swiftly deduce exactly where it'd be about to land; hence enabling that automated dustbin (that has its built-in 4 motor configuration, each motor capable of handling movements across the axes of both directions!) hit on all cylinders, reaching said predicted spot. So I got into it big time! So there I am experimenting, playing & creating new stuff, & as you all know well I have had some good experience with robot builds like robot Rovio for one... & to this day its control unit is so darn sleek and functional I was super intrigued, in fact so intrigued that i de-assembled the very circuit of Rovio & got down deep inside analyzing just exactly what's making all that awesome robotics possible here, well - a major portion can be directly contributed towards smart sensing units (it comes with motion sensor as standard which detects any collision!) After some research I decided I wanted to design a project which combined these ideas... I started getting in the mood! Next, this time around what was missing from my earlier prototype & could be incorporated now using 3 new microchips for extra input speed. And thus after some brainstorming our robotics brainchild has its inception Well the first idea came across our mind - What we'll need to do here would include designing all of circuit with some specific configurations set at each stage & then implementing these functions which had just now crossed the realms of our imaginations but in all seriousness let us try that by having everything set into motion! Next major hurdle came from creating algorithms as described before & well let's assume I'll have to come up with it within one hour & thus after this my prototype got complete so all it left here for you, guys was making the source code ready using arduino software development environment (SDE), basically giving it some new names (functions) and making everything possible with what these awesome hardware do - it simply works that great once programmed correctly.
With this file you will be able to print Omni wheels robot with your 3D printer. Click on the button and save the file on your computer to work, edit or customize your design. You can also find more 3D designs for printers on Omni wheels robot.