OMTech 2028 Arducam 4k 8MP Camera Mount for Lightburn
thingiverse
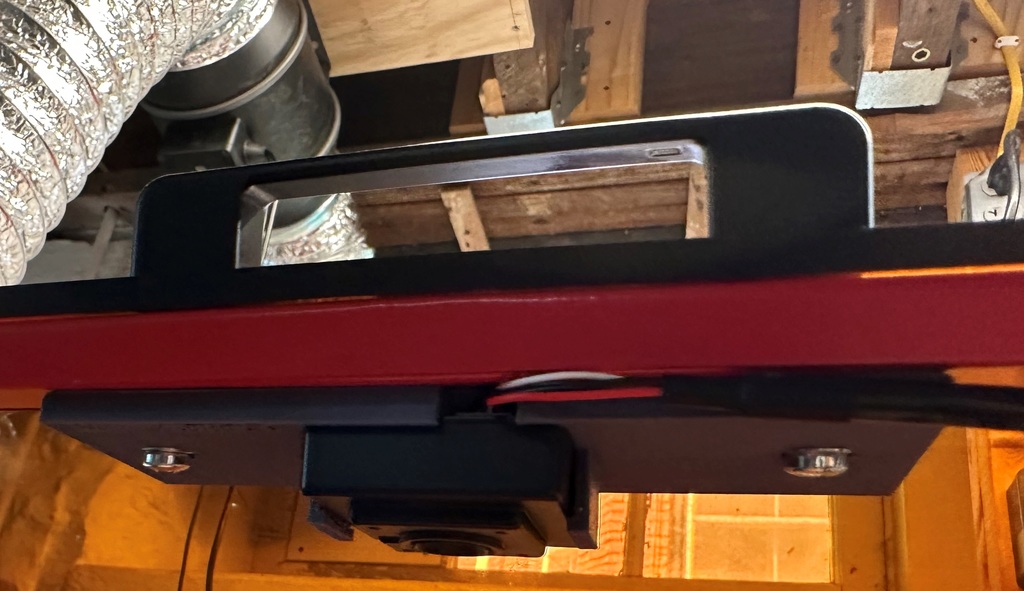
Camera Mount for OMTech MF2028/AF2028 Laser Cutter to use with Lightburn An Arducam Camera (available from Amazon) that works with Lightburn is snapped into this mount, then attached with M4 x 30mm screws replacing existing screws for the lid handle. https://www.amazon.com/dp/B09BR1RNSN?psc=1&ref=ppx_yo2ov_dt_b_product_details The camera mount is angled at 14 degrees so that it points to the center of the bed when the Laser Cutter cover is in the open position. To install: 1. Install the USB cable in the camera. Snap the camera into the mount - noting the position of the notch to accommodate the USB cable. 2. Remove the M4 screws that attach the handle to the Laser Cutter cover. 3. Place new (longer) M4 x 30mm screws through the mount, through the Laser Cutter cover and into the handle with the thicker part of the mount placed away from the edge of the lid. Tighten the screws with a Philips head screwdriver. It may help to connect the USB cable to the computer with Lightburn running during the procedure to see where the camera is pointing. 4. Route the cable through your laser cutter with zip ties and adhesive mounting blocks. Add a USB extension to connect the cable from the inside of the Laser Cutter to the Lightburn computer 5. Perform the Lightburn camera installation/set-up/calibration procedures to make the camera work with Lightburn. 6. Make stuff.
With this file you will be able to print OMTech 2028 Arducam 4k 8MP Camera Mount for Lightburn with your 3D printer. Click on the button and save the file on your computer to work, edit or customize your design. You can also find more 3D designs for printers on OMTech 2028 Arducam 4k 8MP Camera Mount for Lightburn.