Onager Catapult Model
prusaprinters
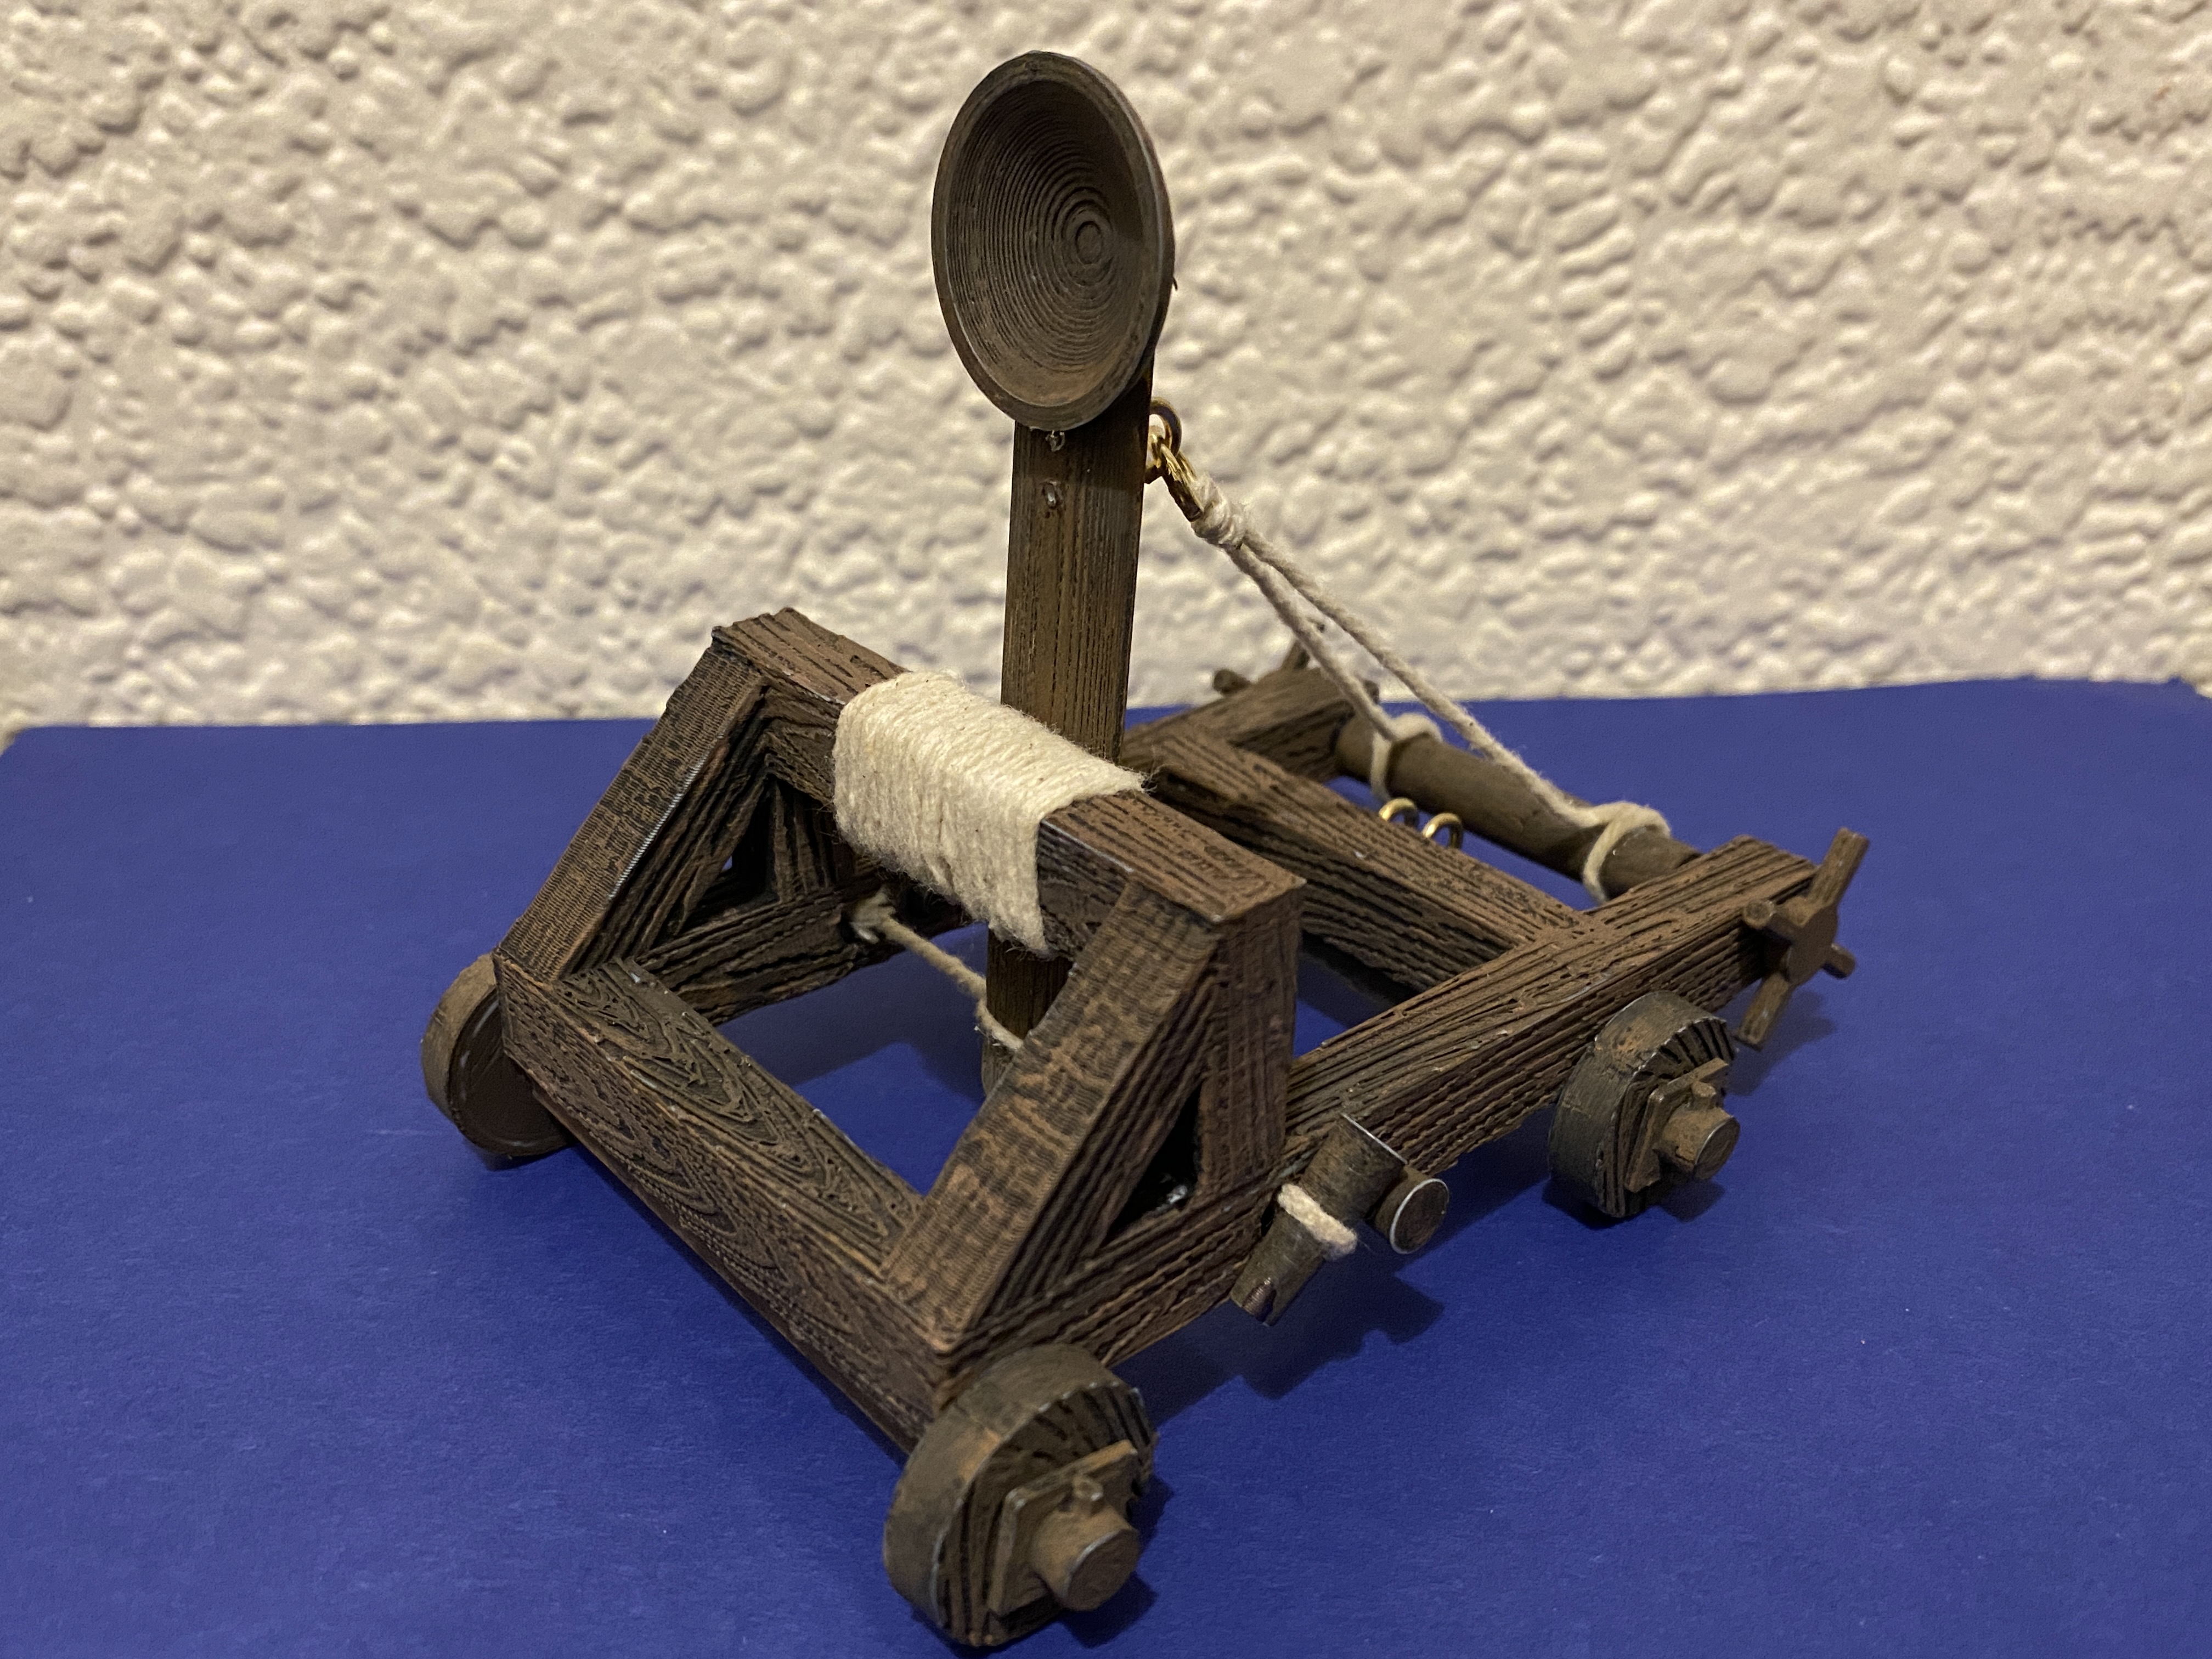
<p>Here is a model catapult… I believe the Romans called this one an “Onager”, as it kicked like a donkey of the same name!</p><p>I've designed this with a wood grain texture. I painted mine, but it would look and work fine printed in black or brown.</p><p>To make, print out the parts as follows:</p><p>Base - 1<br>Arm - 1<br>Axels - 2<br>Wheel - 4<br>Wheel retainers - 4<br>Pins - 4<br>Crank drum - 1<br>Crank handles - 2<br> </p><p>I printed .2 layers. For infill, I went 60% for the base as I wasn't sure how much force the string would put on it, but that was overkill - 30% would probably be enough unless you were printing oversize and planning to see how much it would throw!</p><p>The base needs support from the build plate only. This will hold up the crossarm, but not put anything in the holes.</p><p>Other parts can be printed .2, no support and minimal infill other than the arm - go high infill on the arm.<br><br>The axels can be glued to the base and the wheels slide on and are held on by the retainers. The retainers are designed to look like a square washer held against the wheel with a pin.</p><p>To fit the arm to the base there are two option, both using the same general method. First is to use a rubber band - pass each end of the band through the front hole on either side and position the arm in the middle of it. Using two of the pins, wind the rubber band forward tightening it up. The arm should spring up against the cross member - if it doesn't, you're winding the wrong way. Tighten the band up as much as possible without it breaking and use the other two pins in the rear hole to stop the band spinning back. Pull the arm back and give it a test.</p><p>The second option is to use string instead of a rubber band - this sounds counter intuitive, but the string will give much more power than the rubber band. To use this option, tie a piece of good strong string in a loop that is just wide enough to pass through the holes in the base and have enough slack to slide the pin in. Then follow the same process to tighten the string, winding towards the front. Put the pins in the rear holes to prevent it undoing.</p><p>In both cases, pull the arm back and launch something. The tighter the string or rubber band the more power.</p><p>There are a few options at this stage:</p><p>First of all, you can leave it at this stage and just start pinging stuff about your desk, or you can fit a firing mechanism. For mine, I used 3 small brass eyelets I picked up at the hardware. I wasn't sure where these would be placed, so I marked the spot on the arm and base and screwed them in after assembly. I slide a 25mm brass nail in through the eyelets and pull it out with an attached string to fire. I might work on improving this in time.</p><p>Word of caution - screw the eyelets in before assembling the winding gear at the rear - I didn't and this made it more difficult than it needed to be.</p><p>The winding gear can be inserted at the back - the winding gear does wind the arm back, but it is really just for looks. Depending on the firing mechanism it does also get in the way a bit. Insert a crank arm from each side and glue into the drum with a drop of CA glue - I used one that had a 60 second dry time, which gave me a bit of time to position. Open an eyelet up to make a hook and attach (I used CA glue) it in the centre of a piece of string about 20-30cm long. Attach the hook to the arm, run the two strings down to the winding gear, wrap them around once and drop a bit of CA glue onto them to secure. Trim the excess string and the winding gear is done.</p><p>For paint, I base coated everything is black and then dry brushed a light brown over the top - for those who aren't sure, to dry brush, load the brush up with paint, but then brush most of it off on a bit of newspaper - just dust it lightly over the top of the model to colour the high parts. Paint I used was the cheapest acrylic poster paint and I didn't even prime it. Matt paint works best for wood look - start with a dark colour and drybrush light over the top.</p><p>To finish the look, wind a piece of string around the cross arm and secure with another drop of CA glue.</p><p>As far as power goes, I have it cranked reasonable tight, but haven't pushed to see when things will break - it tossed a ½" steel ball about 1½ - 2 feet. Not amazing, but it is only 4" long.<br><br>A few of the parts had tight tolerances - I have adjusted these a small amount but there might need to be a bit of trimming and sanding - if there is anything that doesn't work let me know and I'll adjust and upload, but feel free to remix however. </p>
With this file you will be able to print Onager Catapult Model with your 3D printer. Click on the button and save the file on your computer to work, edit or customize your design. You can also find more 3D designs for printers on Onager Catapult Model.