One-handed DualShock 4
prusaprinters
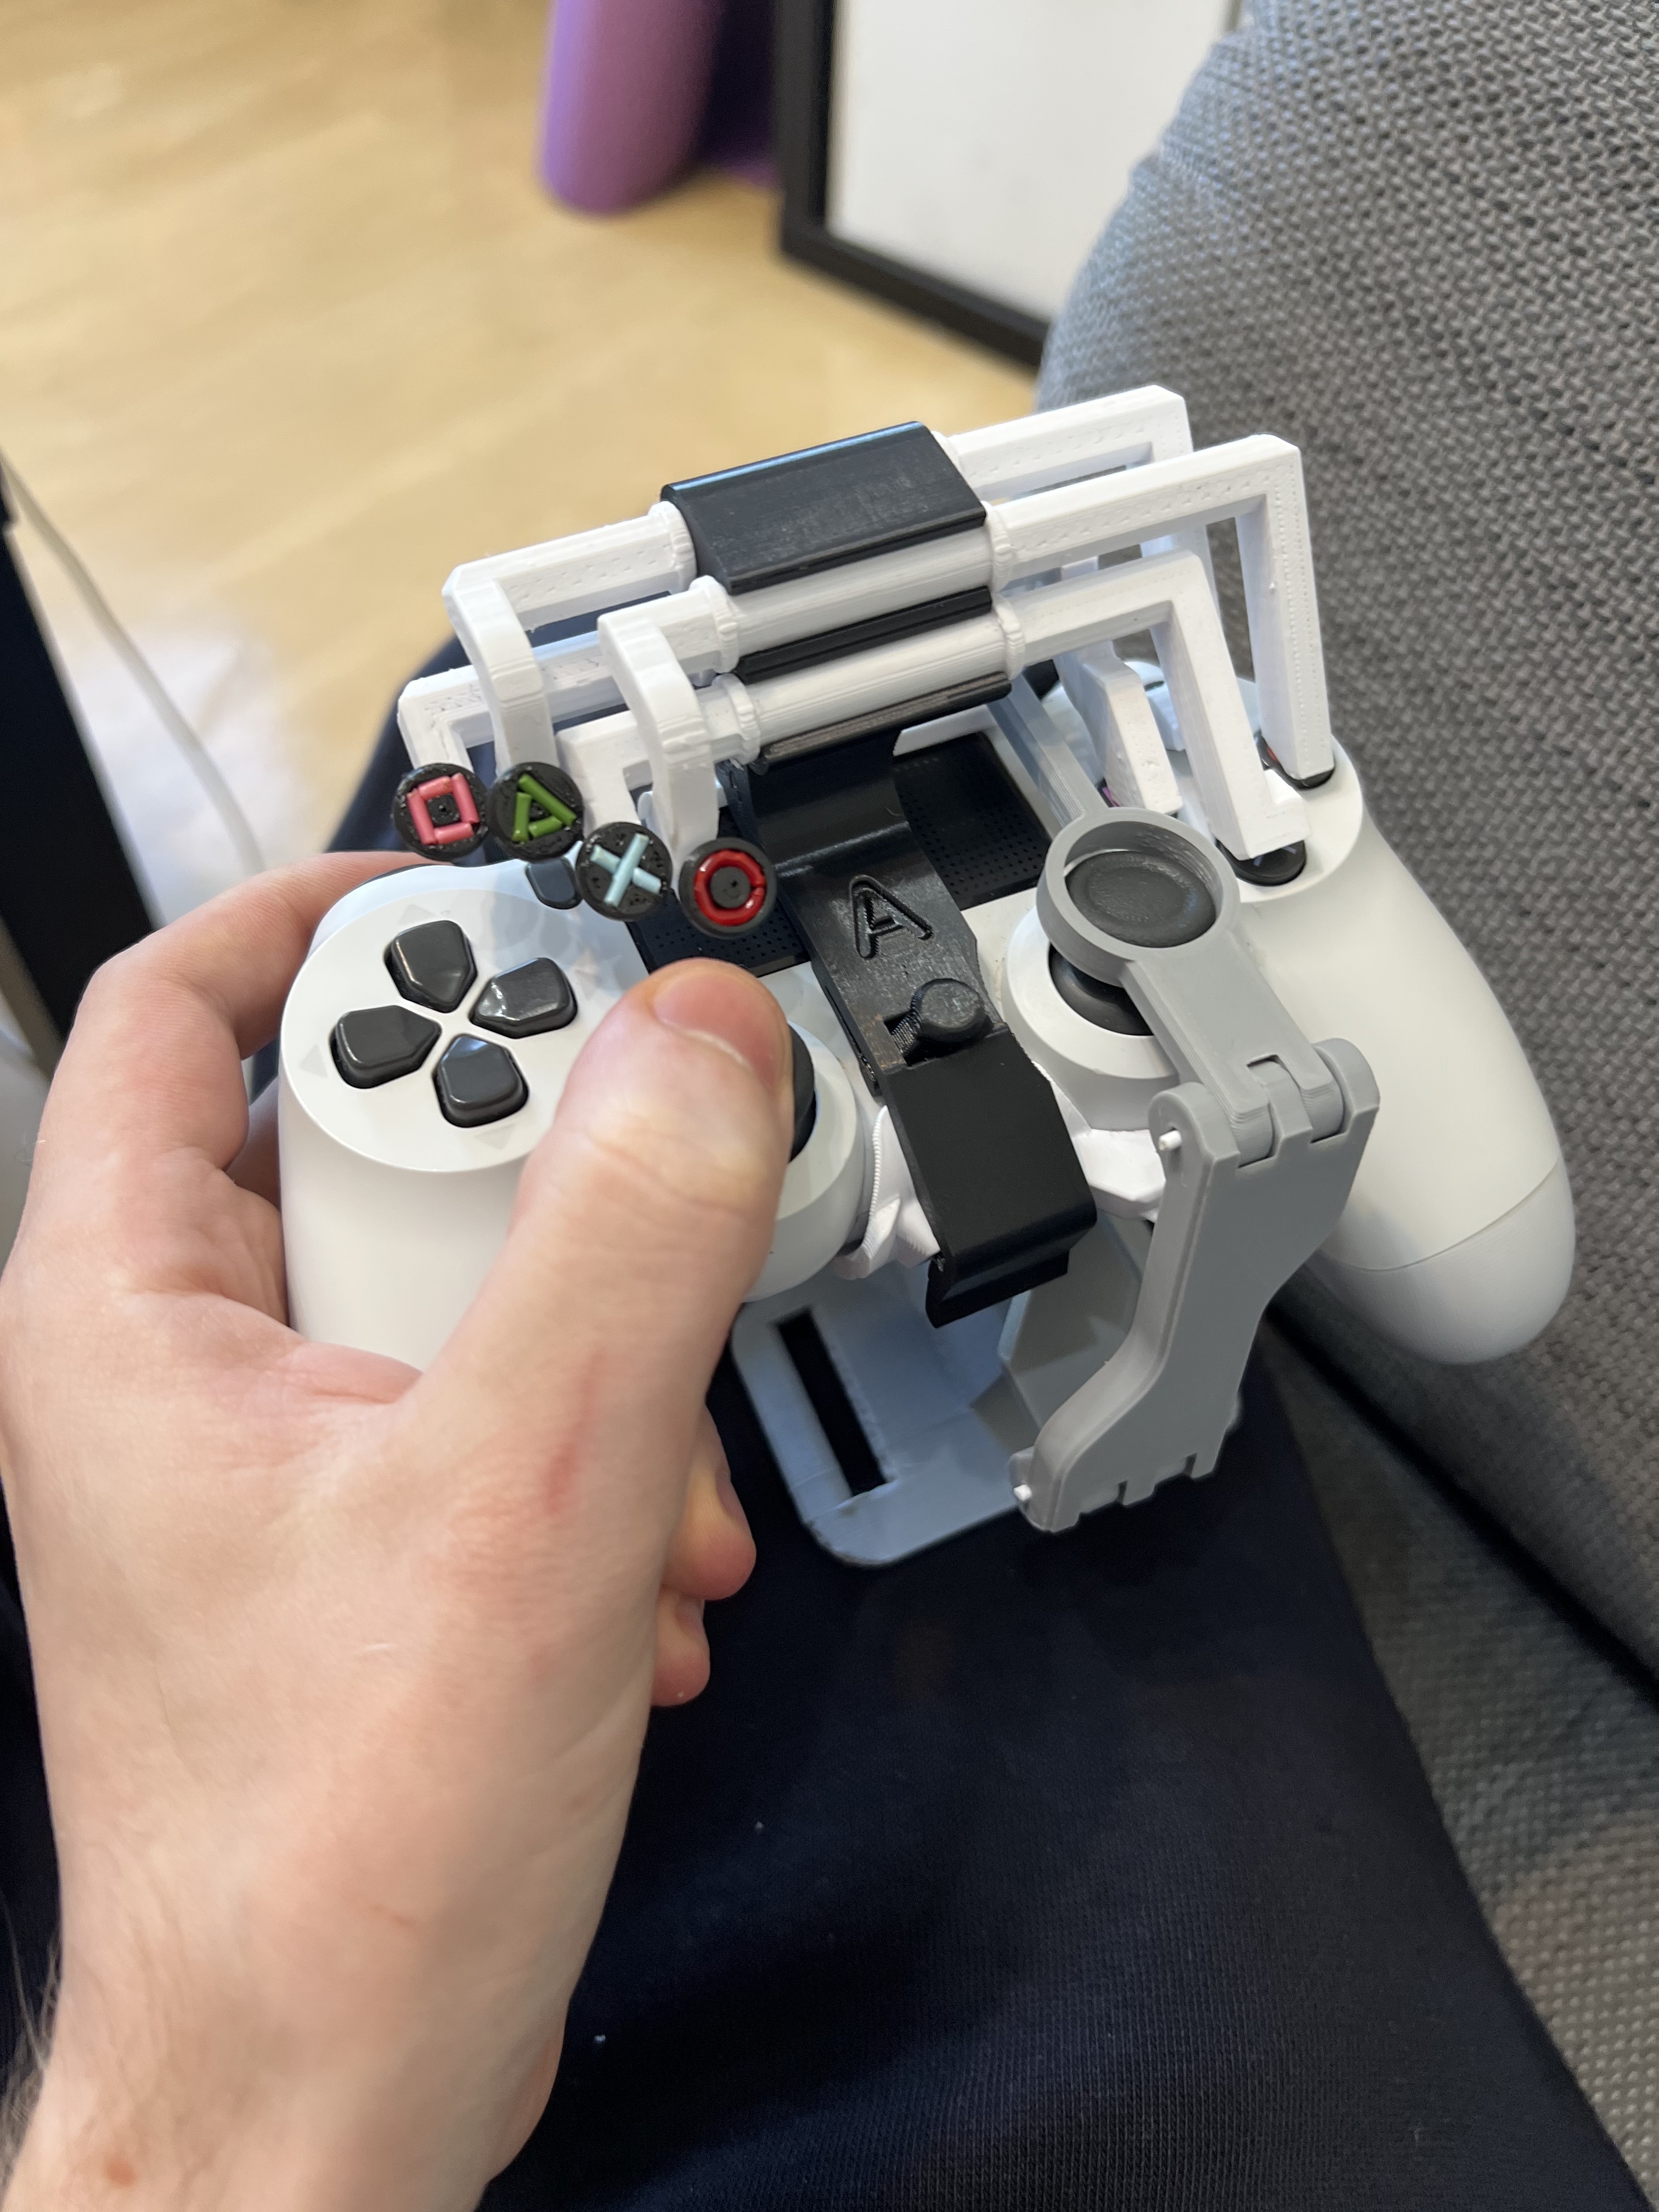
<p>Single-handedly the best DualShock adapter!<br><br>The thumbstick is controller by moving the whole controller. Rest the controller on your lap or the table, and move it around. Its motions are transmitted to the thumbstick. There is a 4-to-1 mechanical advantage going on, so you can get good precision even with rougher motions.<br><br>See the video for how it works:</p><figure class="media"><oembed url="https://youtu.be/VIqHEktjqu4"></oembed></figure><p>You can use a rubber shoe to balance the controller on, or swap it out for a strap-on attachment that can be tied around your thigh.<br><br>The shoulder buttons are migrated over to the other side, where you can use your index finger to push all four. They're placed so that pushing L2 and R2 simultaneously is possible (many games use L2 for aim + R2 to shoot, for instance).<br><br>Four linkages push on the opposite face buttons. You can leave it off if the game doesn't require pushing the face buttons regularly.<br><br>The DualSense is symmetric, so to make a left-hand controller, print the pieces mirrored.<br><br>All pieces print without supports. I used PLA for all pieces, except the shoe piece, where I used flexible TPU for more grip. If you print the shoe in PLA, add a bunch of rubber bands around it to add grip.<br><br><br><br>To assemble the device:</p><ul><li>Use short pieces of raw filament to create the four hinges for the stick-moving linkage. They tend to stay in, but you could add a drop of AC glue to the end of the filament piece to secure them in place.</li><li>Snap the linkage onto the ball joints in the controller mount.</li><li>Optionally, add a rubber band around the hooks at the bottom, to add centering to the stick motion.</li><li>Slide the rubber shoe onto the bottom linkage, and secure it in place with another piece of filament.</li><li>Snap the shoulder button pusher's shaft onto the mount piece. Confirm that the shaft turns freely. (Shave the corners around the flat face of the shaft, those are most likely the culprit if it doesn't turn well)</li><li>Slide the controller on. Start from the front first, and then insert the flat protrusion into the gap between the touch-pad and the controller body.</li><li>Stretch the stick-mover linkage on the face of the controller, and hook it in with the rear link.</li></ul><p>Optionally:</p><ul><li>Snap the four face button pushers into their corresponding slots in the mount, following the four circular icons on the side of the mount.</li><li>Snap the face button pusher mount onto the device.</li></ul><p> </p><ul><li>Use another piece of filament to form the hinge in the leg mount. Attach it to the device with yet another piece of filament, in place of the rubber shoe.</li></ul><p> </p><ul><li>To decorate the buttons, add colored pieces of filament into the slots in the XO口Δ button faces. Cut the away from the runners and CA glue them onto the button pusher sticks. Make sure the buttons don't interfere with each other when positioning them.</li></ul><p>Send a tip if you find this helpful: https://paypal.me/akakikuumeri</p>
With this file you will be able to print One-handed DualShock 4 with your 3D printer. Click on the button and save the file on your computer to work, edit or customize your design. You can also find more 3D designs for printers on One-handed DualShock 4.