Onewheel Pint FATBOI Fender
prusaprinters
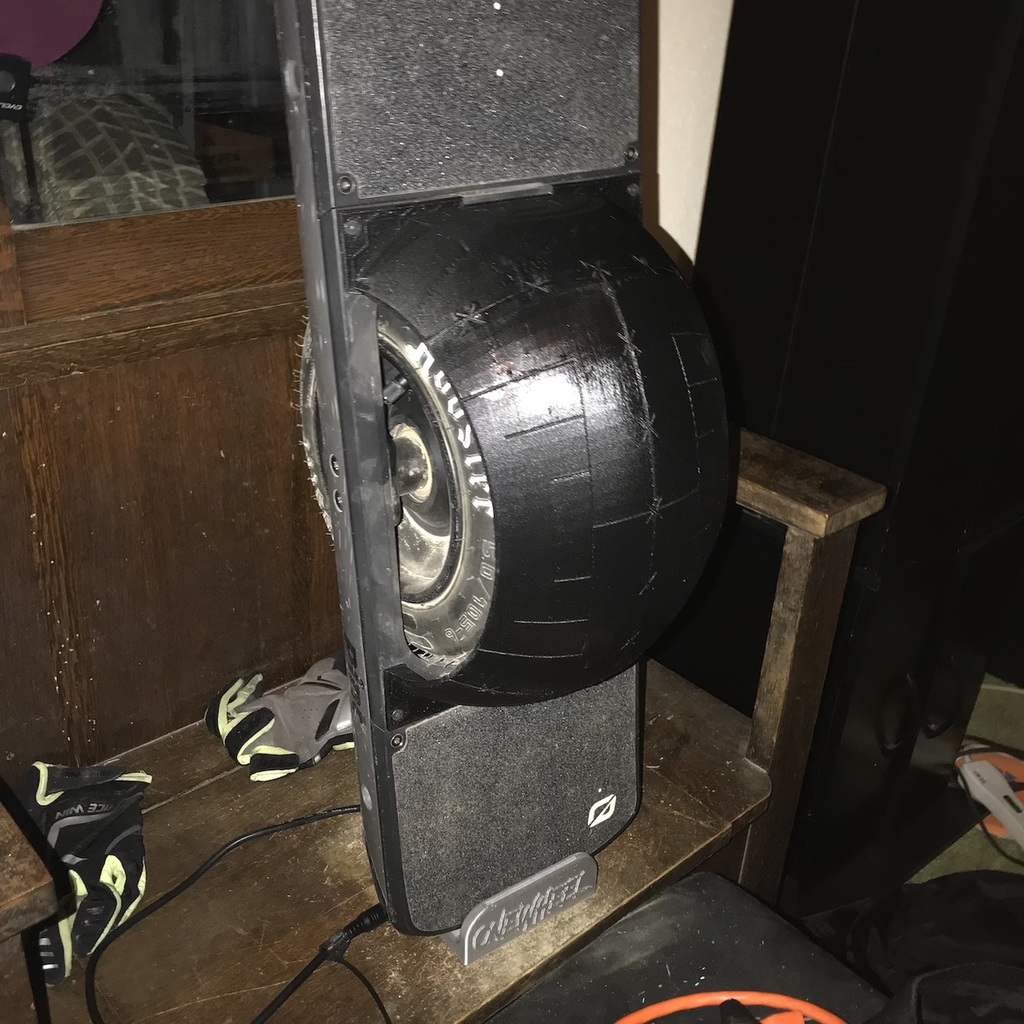
<p>This Onewheel Pint remix of the OneWheel+XR FATBOI Fender by cutzish is designed to fit on top of the Onewheel's included Fender Delete (wheel well insert). You'll need longer bolts than the ones included, such as M4 x 14mm Flat Head Socket Cap Screws (.70 thread pitch). A 12mm length may suffice. The rear left bolt may need to be shorter than 14mm to prevent contact with the surface underneath. I filed down one of my 14mm bolts to about 12mm to ensure clearance.</p><p>I printed all 4 pieces on my FlashForge Creator Pro, but orientation had to be precise, because the dimensions are on the very edge of compatibility with the 6"X9" bed. The two top pieces printed in the required orientation need supports to accommodate the joint contours.</p><h3>Print Settings</h3><p><strong>Printer Brand:</strong></p><p>FlashForge</p><p><strong>Printer: </strong></p><p>Creator Pro</p><p><strong>Rafts:</strong></p><p>No</p><p><strong>Supports: </strong></p><p>Yes</p><p><strong>Resolution:</strong></p><p>.26-.3</p><p><strong>Infill: </strong></p><p>5%</p><p><strong>Filament:</strong> PXMalion, SainSmart, or NinjaTek Armadillo TPU (95A shorehardness or harder, Armadillo is extremely stiff at 75D) any color</p><p><br> </p><p><strong>Notes:</strong></p><p> </p><p>My preliminary remix design attempt (shown in "PintFenderPLA.jpg") was printed at .3mm layer height using PLA and glued with thick gel superglue. I don't recommend PLA, because it's really too fragile for a fender. I used 95A-rated TPU for the final flexible version, because NinjaTek Armadillo is quite expensive, although it would greatly increase durability. At the .26mm layer height needed for truest accuracy, total print time for me for all 4 pieces was close to 40 hours. I used medium thickness cyanoacrylate to glue, but next time, I'll try a thicker version. The instant bond allowed me to hold the two top pieces together until setting well enough for me to brace for curing. Joining the end pieces to the top was a little more difficult. I finally decided to use duct tape to hold the edges in the correct orientation while I applied glue to the larger area of contact and braced for curing. I then removed the tape to finish gluing after the first bond had cured well enough to maintain the shape. I found it helpful to glue 4 short, thin strips of TPU to the inside of the 4 adjoining corners of ends to top using clamps. This creates better strength, and can't be seen when the fender is installed.</p><p>Post-Printing =============</p><p><strong>My print required slight trimming at the connection edges above the wheel well.</strong></p><p>They were close, but not absolutely precise.</p><p>Remixed from Thingiverse thing:</p><p>OneWheel+XR FATBOI Fender</p><p><a href="https://www.thingiverse.com/thing:3674246">https://www.thingiverse.com/thing:3674246</a></p><p> </p><p> </p><p>Category: Sport & Outdoors</p>
With this file you will be able to print Onewheel Pint FATBOI Fender with your 3D printer. Click on the button and save the file on your computer to work, edit or customize your design. You can also find more 3D designs for printers on Onewheel Pint FATBOI Fender.