ONSHAPE CONFIGURABLE CableCuffs™ Rev3
prusaprinters
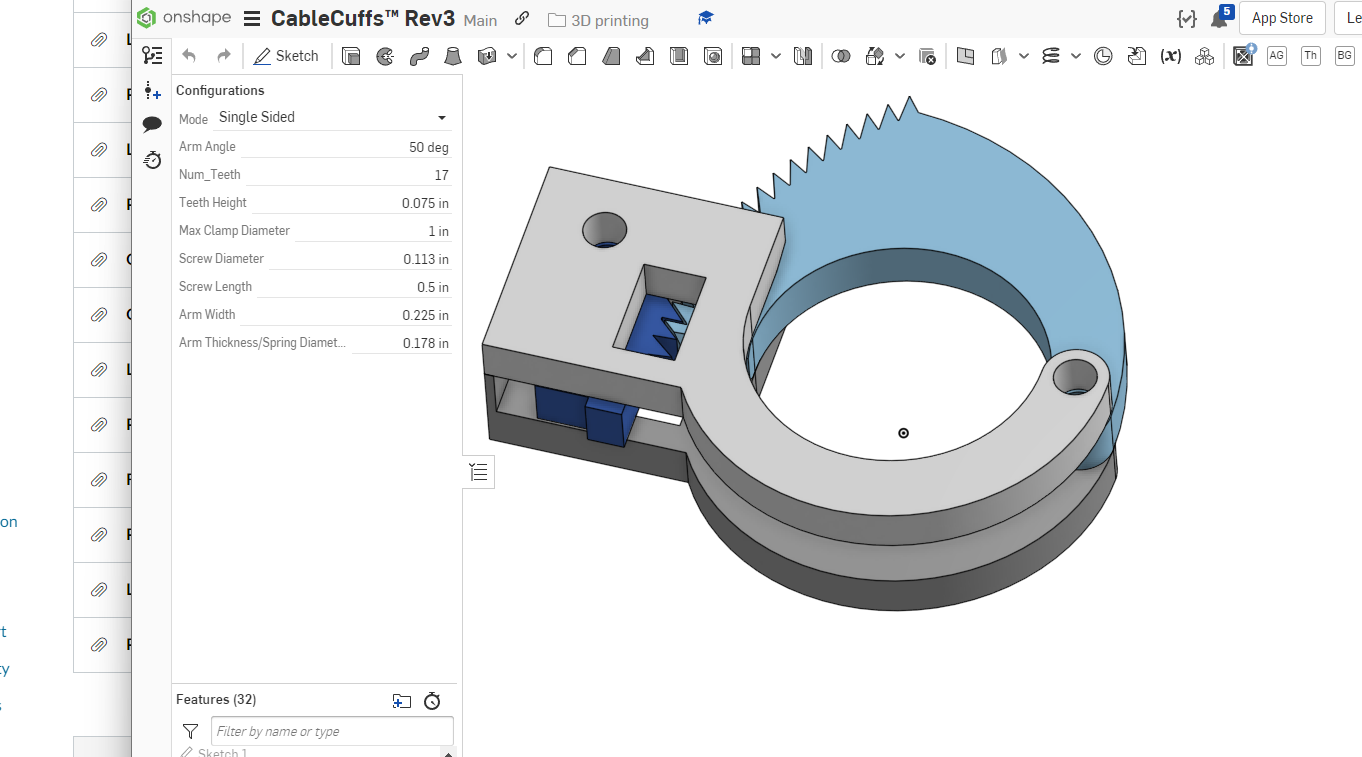
<p>Third iteration!! Now fully configurable with Onshape's configuration features. Need a small or tiny one to fit your irregular spring / screw choices? No problem.</p><p><strong>Items Required: </strong></p><p>0.4" long pen spring</p><p>2 small-ish screws</p><p> </p><p><strong>Step one: </strong> Click on <a href="https://cad.onshape.com/documents/9cb7e9efd42434c001cdde01/w/3ea52196c4762204ed040157/e/3d60f5f84642bd27bfd13257?configuration=Arm_Angle%3D0.8726646259971648%2Bradian%3BArm_Thickness%3D0.004511675000000001%2Bmeter%3BArm_Width%3D0.0057150000000000005%2Bmeter%3BClamp_Radius%3D0.025400000000000002%2Bmeter%3BList_SBlOscs14pYP2J%3DDefault%3BNum_Teeth%3D17.0%3BScrew_Diameter%3D0.0028575000000000002%2Bmeter%3BScrew_Length%3D0.012700000000000001%2Bmeter%3BTeeth_Height%3D0.001905%2Bmeter&renderMode=0&uiState=622852d1a6d97f46ee6b7586">Onshape link </a></p><p><strong>Step 1.5: </strong></p><figure class="image image_resized" style="width:57.29%;"><img src="https://media.prusaprinters.org/media/prints/147716/rich_content/1d99d509-ebc9-4443-b7b6-146dab687a54/image.png#%7B%22uuid%22%3A%22836672b3-876f-4caf-9dd6-124738edac7b%22%2C%22w%22%3A606%2C%22h%22%3A600%7D"></figure><p>Click on configuration window “bar” in the top left and draw it down so that it's bigger</p><p><strong>Step two:</strong> Play around with parameters window in the top left corner. </p><p>Some things may break because they depend on some other values. So be sure you change them as well: (Ex: massive ratchet except your teeth size is tiny; a gigantic screw size) </p><p>If you mess up beyond repair, just reload the page. Let me know of bugs and things that I need to fix</p><p><strong>Description of some parameters: </strong></p><ul><li>Mode - Double/Single sided</li><li>Arm Angle - Angle to which the arm will be able to ratchet </li><li>Screw Diameter - Put in the absolute diameter of the screw. Through holes will be automatically +1/32in and tapped holes will automatically be -1/32in</li><li>Screw length - Use exact length of screw so that there is no protrusion</li><li>Arm Thickness - <strong>SET TO DIAMETER OF YOUR SPRING </strong>since you need to fit the spring in between the two plates</li></ul><p><strong>Step three:</strong> Export</p><figure class="image"><img src="https://media.prusaprinters.org/media/prints/147716/rich_content/0fa0c87c-9256-4d1d-91e0-3beb8e52c313/image.png#%7B%22uuid%22%3A%2206192e5b-8a3c-4f73-b387-2180ce120174%22%2C%22w%22%3A1323%2C%22h%22%3A872%7D"></figure><ol><li>Right click on the Main Body tab at the bottom of your screen</li><li>Change format to STL </li><li>Change Units from Meter to Millmeter </li><li>Check the box “Export unique parts as individual files”</li><li>Download and print your winnings!</li></ol><p><strong>Step four: Assembly </strong></p><figure class="image image_resized" style="width:57.36%;"><img src="https://lh3.googleusercontent.com/_Hw0FvPwPciie7AsBaE-0UBA-uVvQJItxTYYLKLcW3RVIH5HDaSdo9yBcOnMTMgcc6IyVVI5ijEH3zhDepO0LtfgLBJbriS533RTNVl6JB2nW4FCVk1YPc8DnFqcCixK_uDCD6rlyc613ciKkAA5vMAvpC42ADSMi3XW29QHbpCoz74B5Nl67YrjMt6vOaXm1Ar0IAm4p2BHAkaDt0lR3q_OVdR84Z8ZF7SdBGwnvllji7nlUC44Bd7u9cDwwpHhnEBPfQNlt76dAFDdhXgalwpBPFsGD-YcQoKhoLOVrk5PdC2UwfUzy86tfSDe3akjPVhSZWpmxAlAFa_eoDML_J2xXXrDX15ifaL03fBWB4wkKppynerQcu9QUPKA7cSipoaUzBlzhSUR-eyOS3B7An43GQta-77mhTDt7C9K6soZIqUMOrJUnLmerUvyXiFiNdUtLoZK9Xg0SG5-VGcOxib6xGmI-JaZXG3Wx8ilmMBwvhg9iA_a960phwVvbAcH0qmOSYBTmk14I0pDIpG0Va9N6SdTkstjz4iEPWJ_GabuPpdH9Wfgr8ekf3C22GqBjepEdLvpiOcBpjH-a5ZPHnDW5jVs-RNEFi2dJSMFmbRe4BUPeuo-pbV8LDPE0OczBUSmHSzEMu9SoBUVxACYsM74ojgo1FbWMYfLQTASSrPuketpjITHe-GbwC04yZls4X5rde8Z_4a3ZCBR1CIqW5AiLw=w1652-h929-no?authuser=0"></figure><ol><li>Orient parts like shown<img class="image_resized" style="width:80.17%;" src="https://lh3.googleusercontent.com/8dMrwwCvwVQvCXtwVZFb8Os3Jjtry-dxmX70hyJX818OQ8bZJYhpo0mhZIGi9XafXiTM_DyAT6CbzbMSFPTwfZuvuBieU-JSOgOfN3B0g5Z9_LYYT9l8fRY5HDPzCd4arjsdjE45iTLkjcg7t4KngZm6yN6dIWT2FqBRBAXz2waFXHV8Nb8QpNjhMDNEiqdgm-0nk3_hmxXQV5JYCZRYVbKiv6bbZ10aFWH1fbjTGulYJqkKWYQDvimQEN8LkbWGOUeuPvE_Sd9fi2YCU9sT8Fq26diNy9FWxDHUhyTU9XhRFNdY8A72NLdzXLZhHaCFX4HjVK41_QB22Czsj1ksKlOvQzhOWUrbP4b068iWcJ4sxuiCAbnmxK0IMz4O-9oSRRsfgeuIP21wgL5iVs7Ps7VX0cQ7aPmiTOdUzMrlZOH3SsHe3uU_M9YKM_-3CMTJRNHgMjHVEt19UhJp8wsPF_iz4n-9csxBKMILePqYtpMhkfpjSqVZkphmqhn5AARegofiG05ugDpp83JHAIyMIwijH632g-I628t4cKGMnQnSEMoVWMdCdfySbu8dbg0NsQgdc2zHY4zt2X_ang9gYaMu8B2Qjb_gIgU3gunHkLUJL_409mxke7Scyhl-m0fwc79b0Yq8YTvh6Iqb6BxwL39h8mBFzc3oVxuydkJ8joWXQ182TMwC_79r9umZzbZwiG9HOHA6Zg_n8wzIc7SFDUVlYw=w1652-h929-no?authuser=0"></li><li>Shove screw through all the plates and screw it into the Main plate <i>(the tension of the spring should keep it in place, if not add a bit of hot glue)</i><img class="image_resized" style="width:80.72%;" src="https://lh3.googleusercontent.com/Psr8kRG07WIf06VAaSXJJQmJstJ43asNanPNO6G4XUerud2Abn4IY6smWuzbS8YtX8fhBWpZ1bNwYgKVSh9mCYill1F-UwQ073W5NZUY2xM20gncaLVLYXUxIEFT1jPIXvXMtFzBlvFHJr8zL4YdoXoYJgAIkEStjXwjpF7G3Fatn6J51WMX2oeVOg08aZ3CfraufICHNiumo85CodnBH1iKO4I7doJeDF9eZ6AXGl_XeHOMJBdgh3ZClVIZ6ImlVjcJxfADfcNWsrk13bsfVDb3LSgyob_EeWF7fhMSpry0wLftUfdTtrIl0uiyr1kFFOXrhwrUSD94RDk144oZx4bPJoo7C2KRqWkRRaBvaHv6ek8nDn2eihy9I1iNTSxzZfFs40H2cA0uKTXqr0e8P0Jivh-DoXhFb9Lef4gKe12AO4xcTJUG7-rlA7CLJBtKhopkI6OVfWsH5mXv0pndshOzXCB-2DcgsaGdXIcOAWcgr8Wbtd6yjZ2m5ZIj3LlHx5ZwGbq_wDDALJQmeMvw8QWJuxP4B96IkKRiNbAdBx0vumyksXRrk3cuSsfnp-nqNX_EGKsehfwJSl25rrsEd1MTw-KRpc8NKKGtFpyGc7ZonKrIncBk3MWHGW3gZcBIqyH5-EzRpVCpYxqpD9ztVzcKRwbtPHBKHvMRaoGyWpLZsNi2xHdsTHTNRY4i8_Nd6NdG4Ni96rZnfdEtSiTaykf7Ig=w1652-h929-no?authuser=0"></li><li>Screw on the ratchet arm<img class="image_resized" style="width:81.79%;" src="https://lh3.googleusercontent.com/ZPgRSIzZKrsKemMScPY7mwazRVdO-liEDaZ_9S0f1f6ueqJawFYMb56X9wAvBsy8pYVPQ9-lz5fb1GrgTgBLcecDEtN_sJ-mAoXvLef15SlnIP-zzNW042dlgUF2_5dCChn13ilFleAdc1tkop9aDJVzCC8cZrn248HOhVY3wVwqK_TispAFk1EMgZ8YHvF17C1PZo9L3Vk-TSr_pzW8b2AAXjVtKhqFwXOD0oDyqv_stvSIE8RUEXXdgpC9CdYR8oXq9hKQKHQWxJwpjlM6tknCqjxKz4kA6guXAZ6479QK876KMqZh2FKwitzideWkAqyn8XU1SYjEeQScxw6DIsmW4LKaT7c5x7u4WiAGuWkl-6_Mc7Es_iAGNyquFZ8ghmejCZa-UKfqOAzt8hTh9E78vgBNsi436H3gxFqLX9GiQn47anrWGbLZGiSBTEdaBK4LzUFUCtpXBmg50SnFmrmGqCgn0TUhJjSNqxppv9Gg0dDU15TiZlIKOEe12eC1hTPQEDyfYBg0r7EnNop9d72kxH21Y1AUE0YUOqYPST5Qze_ZsZrHsgP2DSrsEmZLLwHS2MWWhunDtwk8lELZ3g5icKjh39sJK6_Tsj7Dpdoa6WkpxxzFfdnZbxM8jbap3LqHMS2Uaivbx8RMcZOgAQzoitlwTpOQEtC1V5z4cfNS1hh6abughFYExhZ1L1NJ6e9WIDffChyD9UTaQIGiH1CxiQ=w1652-h929-no?authuser=0"></li></ol><p> </p>
With this file you will be able to print ONSHAPE CONFIGURABLE CableCuffs™ Rev3 with your 3D printer. Click on the button and save the file on your computer to work, edit or customize your design. You can also find more 3D designs for printers on ONSHAPE CONFIGURABLE CableCuffs™ Rev3.