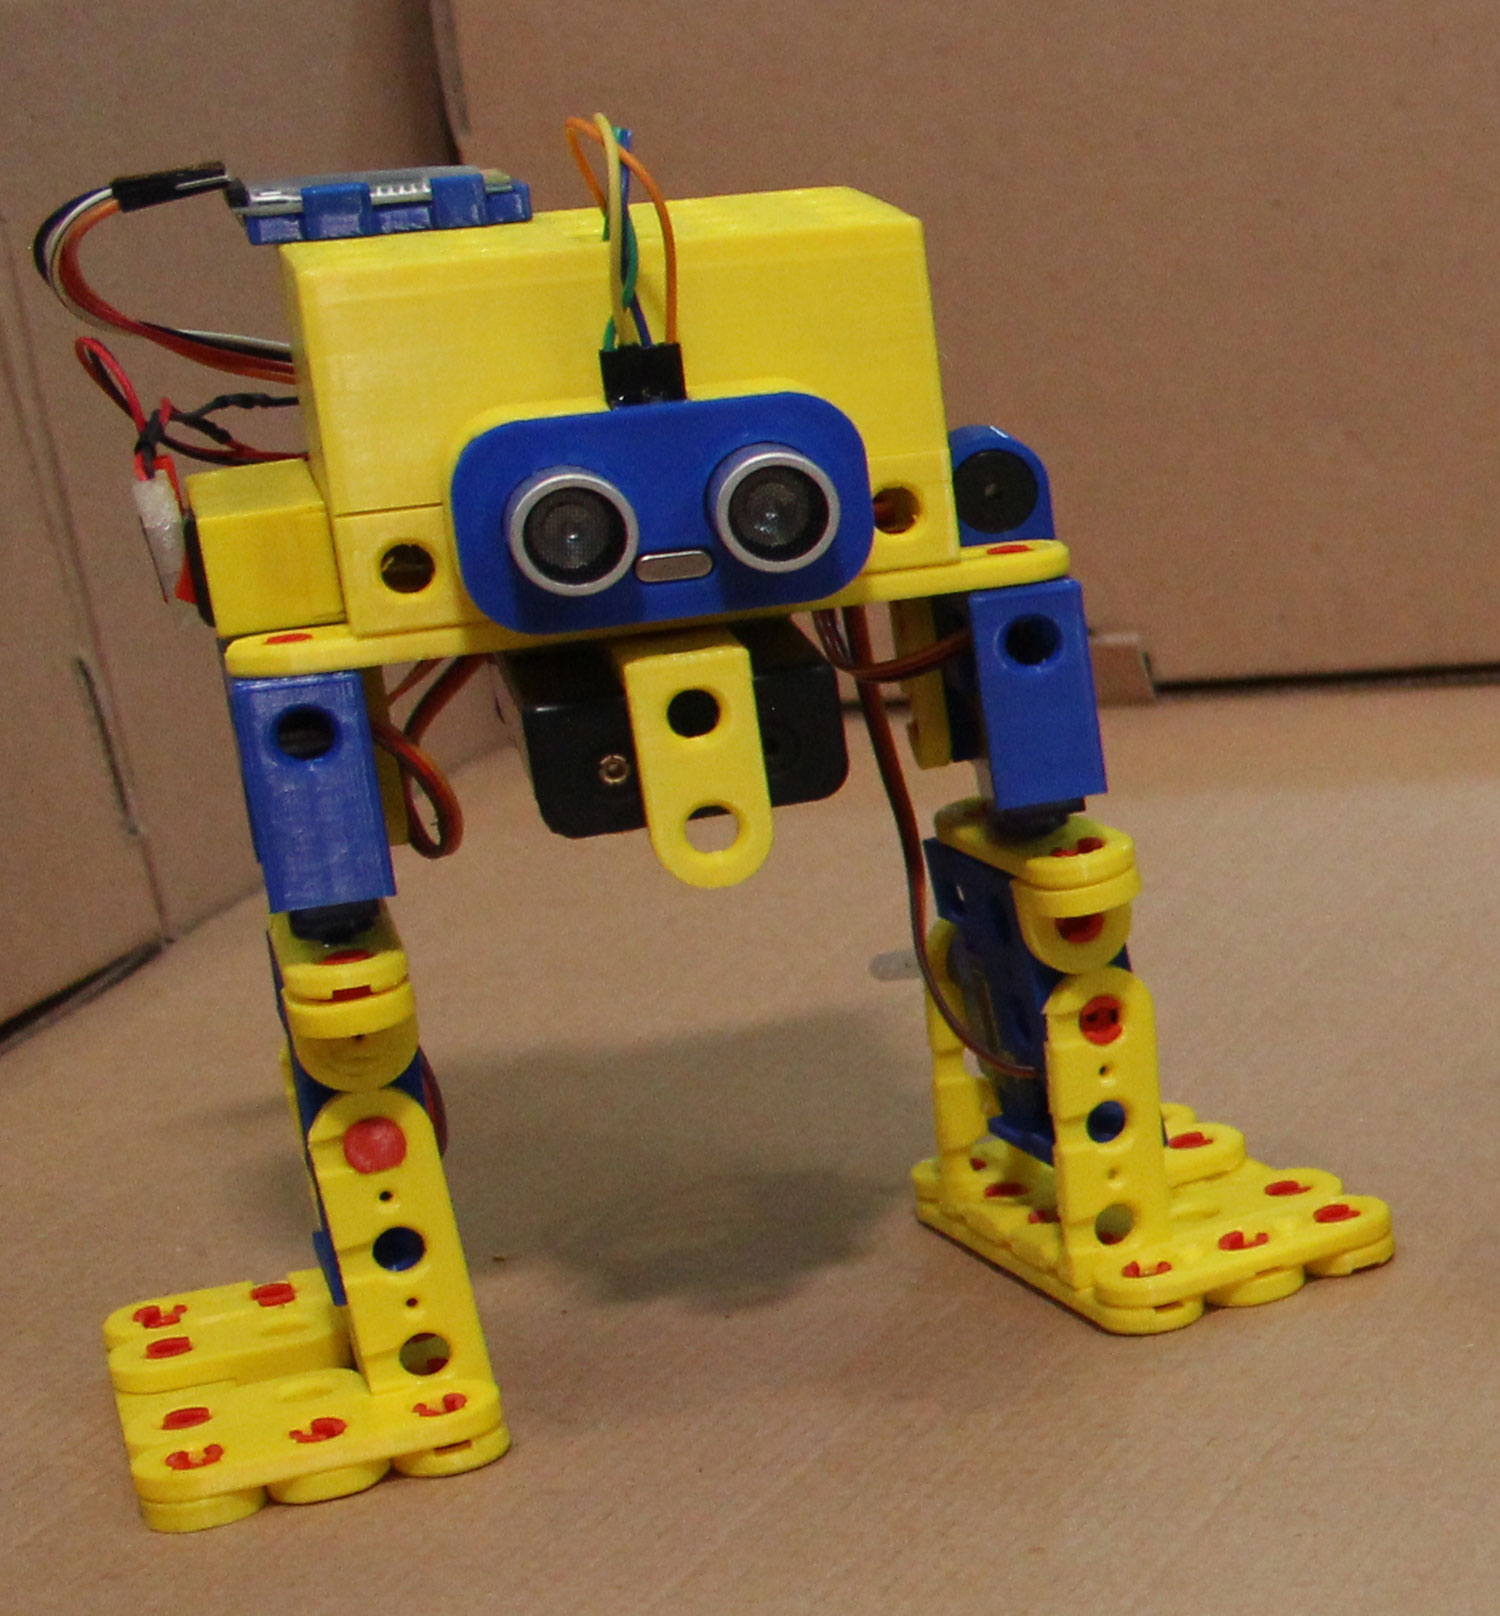
Open Source 3D printed modular Otto DIY robot
prusaprinters
<p>The modular blocks that I'm using to build this robot are called Blocky Codes, some of the features are :</p><ul><li>it is opensource,</li><li>it's modular</li><li>Optimized for 3D printing</li><li>You can build lots of cool projects using Blocky Codes.</li></ul><p>To learn more about Blocky Codes you can <a href="https://blocky.codes/">visit the website here</a></p><p>I also have written <a href="https://www.instructables.com/The-Most-Advanced-Open-Source-3D-Print-Modular-Blo/">a Getting Started tutorial with blocky codes here</a>, It's important to take a look at this tutorial so you know how to work with Blocky Codes and all the capabilities.</p><figure class="media"><oembed url="https://youtu.be/yXnNq5r3Zs8"></oembed></figure><p><strong>Supplies</strong></p><p>Here is a list of the parts you need for this project. (affiliate link)</p><ul><li><a href="https://www.banggood.com/custlink/GGmdjpowpp">1 x Arduino Nano with USB mini cable data</a></li><li><a href="https://www.banggood.com/custlink/KGGhOCl7p4">1 × HC-05 Bluetooth module</a> (optional, only if you want to control the robot using mobile app)</li><li><a href="https://www.banggood.com/custlink/GK3ROrlTFY">1 × Arduino Nano Shield I/O</a></li><li><a href="https://www.banggood.com/custlink/mvvYlr6V5Z">1 x Ultrasonic sensor HC-SR04</a></li><li><a href="https://www.banggood.com/custlink/vGvhjWa7tQ">4 × Micro servo Sg90</a></li><li><a href="https://www.banggood.com/custlink/KKDyaCj2uM">1 x Buzzer</a></li><li><a href="https://www.banggood.com/custlink/vKmYlpoqwn">Female to female jumper wire</a></li><li><a href="https://www.banggood.com/custlink/GDGhjcjwFM">1 x Rocker Switch On-Off</a> (you have to do a bit of soldering if you want to use the switch, otherwise you can skip it)</li><li><a href="https://banggood.app.link/SzXK1yNShfb">2 x 18650 Battery</a></li><li><a href="https://www.banggood.com/18650-Battery-Box-Rechargeable-Battery-Holder-Board-with-Switch-for-2x18650-Batteries-DIY-kit-Case-p-1467955.html?cur_warehouse=CN&rmmds=search">1 x double 18650 battery Holder</a></li><li><a href="https://www.amazon.com/BLUELEC-AntiOxidative-Fastening-Materials-Phillips/dp/B078ZVQ7XM/ref=sr_1_1?dchild=1&keywords=Screws&pd_rd_r=52cee0fa-cb21-4106-86e3-a4e617791c50&pd_rd_w=vWxhJ&pd_rd_wg=TBEzp&pf_rd_p=b4950e17-f2f6-494c-bba5-69a9d0aa3887&pf_rd_r=NVSFEFKAKDAJHWSM35KB&pid=FudURnT&qid=1617360532&refinements=p_n_feature_twenty-eight_browse-bin%3A19043857011&s=industrial&sr=1-1">Small tap screw 2x6mm</a></li><li><a href="https://www.banggood.com/custlink/v3myOCjuaF">Phillips Screwdriver</a></li><li><a href="https://www.banggood.com/custlink/mGGhjC0P5q">Male DC jack</a></li></ul><p>I have printed all the components using PLA with an FDM machine. Please share if have printed using any other material. You want to make sure your 3D printer machine bed is level and also calibrated.</p><p>I print most of the time with a raft, especially for the PIN.</p><ul><li>0.4 Nozzle size</li><li>0.2 layer height</li><li>207 Nozzle temp (don't know why, but sometimes I fail with 200C)</li><li>75C Initial bed temp, the rest is 60C</li><li>60 mms speed</li><li>I like to use 10% fill, especially with the bigger part to keep it lightweight.</li><li>Use good quality PLA materials that have more strength in tension and less brittle. I use PLA+</li></ul><p>It's a bit challenging to print the Pin since it was small. but once you make it work, you will get excited. I like to print per 12 in raft.</p><p>Here is the part list you will need to print (all prints are re-usable for another project)</p><ul><li>4x servo mount</li><li>About 50 Small Pins</li><li>6x Long Pin</li><li>1x Battery case holder</li><li>1x Ultrasonic sensor case</li><li>1x on-off switch case</li><li>1x Arduino nano case</li><li>1x Buzzer case</li><li>4x 5x1 Block</li><li>2x 7x1 Block</li><li>6x 3x1 Block</li><li>2x U3x3 Block</li><li>3x Set of corner lock block</li><li>2x L 2x2 Block</li><li>2x L 1x1 Block</li><li>2x Cable Holder</li><li>1x Bluetooth case (optional, only if you're to control it using the mobile app)</li></ul><figure class="media"><oembed url="https://youtu.be/B9V04bVnWXc"></oembed></figure><h4><a href="https://discord.gg/CZZytnw">Join the community here</a></h4>
With this file you will be able to print Open Source 3D printed modular Otto DIY robot with your 3D printer. Click on the button and save the file on your computer to work, edit or customize your design. You can also find more 3D designs for printers on Open Source 3D printed modular Otto DIY robot.