OpenAstroTracker Focuser
prusaprinters
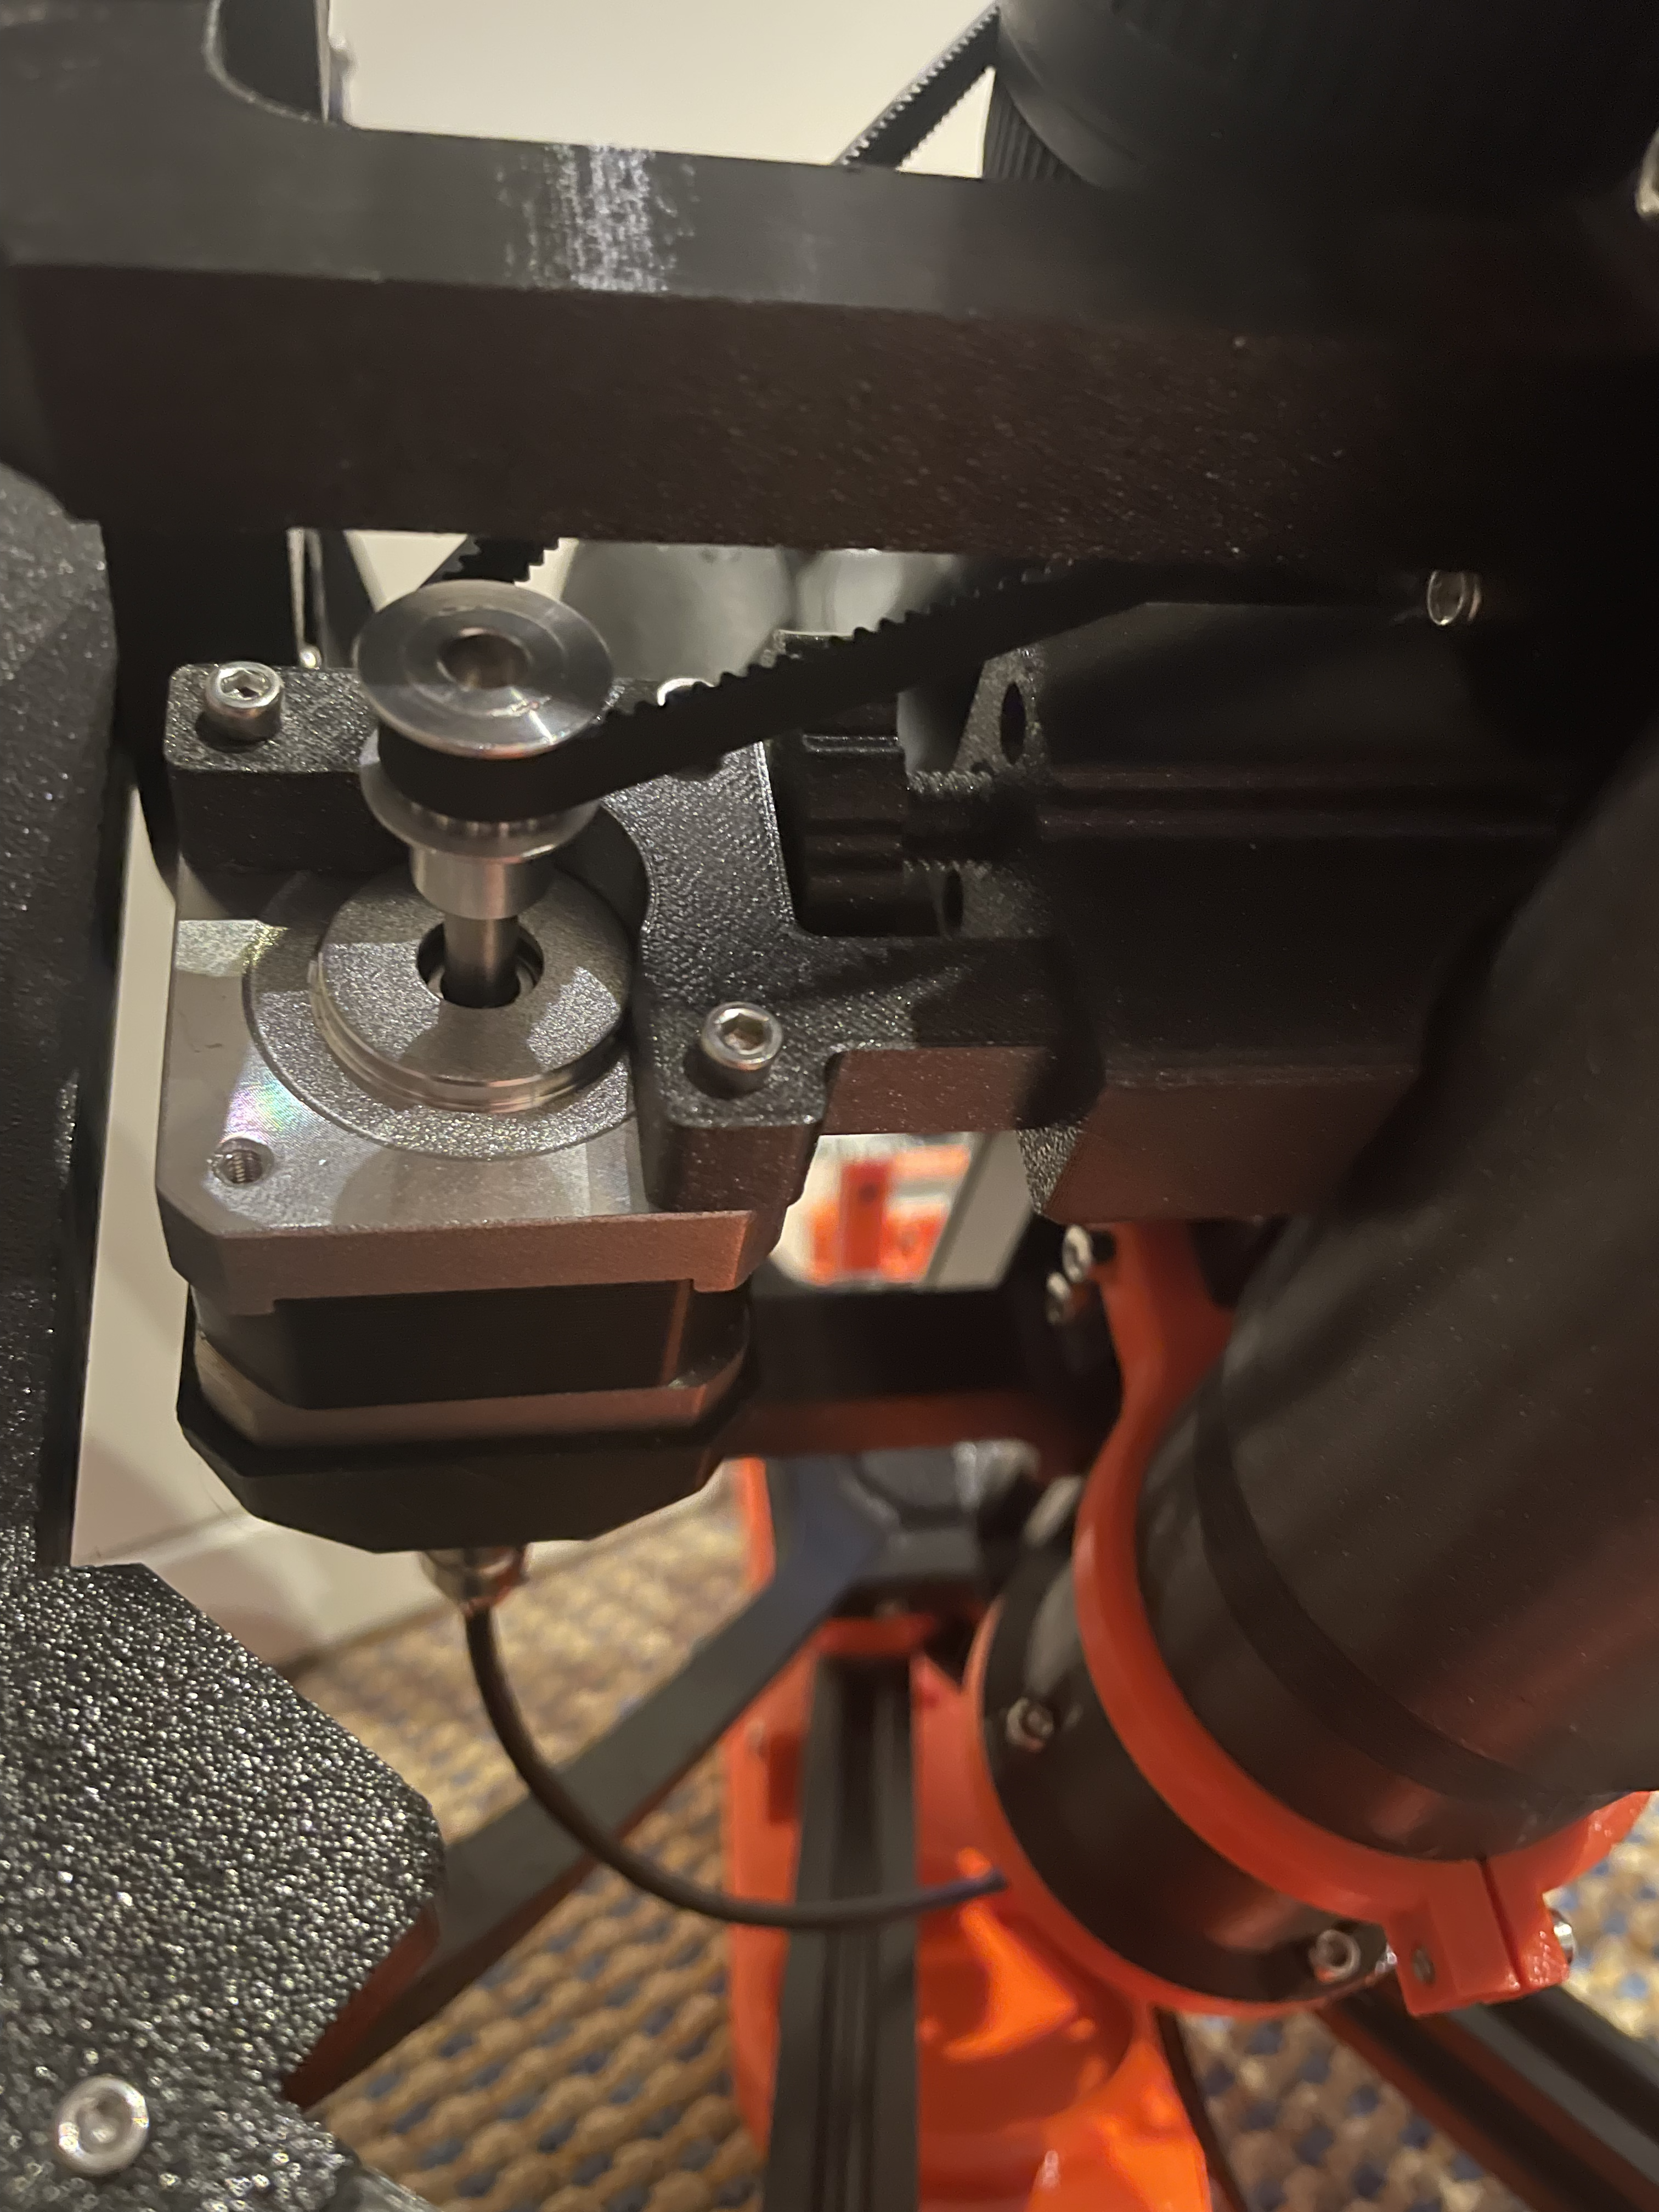
<p>This is a focuser for use with the OpenAstroTracker - allowing you to focus your camera lens remotely from the controller or controller attached computer (the lens & camera will be set to manual focus, and this assembly will allow adjustments without upsetting the OAT Mount)</p><p>All parts can be printed without supports - I used 30% infil on a .2 layer height; my parts where printed in prusament galaxy black PETG, and the attached .gcode is for this settings.</p><p>You will need a Nema17 stepper motor with a long shaft, a 16 tooth GT2 timing belt pulley to fit the stepper shaft, five M3x12 cap head screws, two M3 t-nuts and a suitable length of 6mm GT2 timing belt.</p><p>Attach the FocusMountV4 to the 2020 extrusion with two M3 screws and the t-nuts so it sits below the lens. The threaded hole should be ‘up’, and the square hole ‘down’. Don't tighten the screws yet.</p><p>Attach the Nema17 to the FocusStepper using the remaining M3 screws, and attach the pull to the motor shaft so that the belt will pass the printed part without rubbing.</p><p>Slide the long square shaft into the square hole on the mount - the point on the side of the FocusStepper should be up and in line with the threaded hole. Once in, slide the whole assembly up or down the extrusion until it lines up with the focusing ring on the lens you are using. Tighten the right hand screw (when looking from the side) to lock the position. remove the motor and then tighten the left hand screw to fully secure. </p><p>Screw in the FocusTensionV3 into the threaded hole in the mount. This should be easy enough, but a bit of silicon grease may help here. Screw it all the way in, and then replace the motor. The conical point should marry up with the matching depression in the tension.</p><p>Loop the belt around the pull and the lens focuser ring, joining both ends with the OnePieceConnector. Get it as close as possible as being in contact with both the pulley and the ring. </p><p>Finally, tension the belt by screwing the tensioner to back it out of the hole, pushing the motor outward to take out the slack.</p><p>You will obviously need to connect the motor back to the OAT controller and define the focuser in the controller firmware. There are details on how to do this on the OAT wiki here:</p><p><a href="https://wiki.openastrotech.com">https://wiki.openastrotech.com</a></p><p>If you want a clean, robust & detachable connection may I suggest my nema17 stepper caps?</p><p><a href="https://www.prusaprinters.org/prints/134922-nema-17-gx12-socket-end-caps">https://www.prusaprinters.org/prints/134922-nema-17-gx12-socket-end-caps</a></p><p> </p><p> </p>
With this file you will be able to print OpenAstroTracker Focuser with your 3D printer. Click on the button and save the file on your computer to work, edit or customize your design. You can also find more 3D designs for printers on OpenAstroTracker Focuser.