Openbuilds v-slot z axis for Lulzbot Taz 4/5 Printers
thingiverse
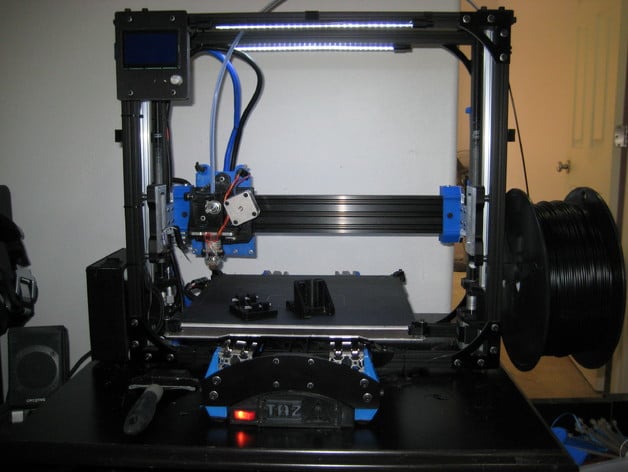
This modification replaces existing Lulzbot Taz 4 or 5 smooth Z rod with Openrail extrusions. I will soon post a parts list. This basically needs eight mini wheels, four mini wheel eccentrics, and four six millimeter spacers. Extrusions are twenty by twenty millimeters, five hundred millimeters open rail stock. You also need some T slot nuts (m5), recommended is the Dropin ones for this. Additionally, you will require four spacers and longer m5 bolts to move the control box out from the frame to clear the wheels, and several longer m3 bolts. This project has an option to replace the existing stock heat set insert based Z endstop with a full on micrometer body, which I highly recommend. Edit: uploaded a new version of the bearing carriage, with sufficient clearance to work with my new anti wobble nut project. If you do not intend to fit that project, the older version is fine. The anti wobble Z nut mount project may be found here: http://www.thingiverse.com/thing:1089626 Edit 2: wobble clearance block with passthrough slot for the Z endstop cable now uploaded. Edit 3: cable routing top cover option now uploaded, mainly useful for adding lightbars or sensors on top of the gantry. Print settings: Rafts are not needed. Supports are also unnecessary. The resolution printed was with a .50 millimeter nozzle and infill is eighty five percent. Post-printing instructions: The custom section shows an apparent Thingiverse ate my original instructions, so I will need to rebuild it later. For now here's the Bill of materials: Z axis bill of materials includes 6 M5 heat set inserts. The inserts may be sourced from http://www.mcmaster.com/#94180a361/=zhts4o Four 3/16 inch by one and three-fourths inches long steel shafts (may be locally sourced) are needed along with eight igus flanged bearings, eighteen twelve millimeter long threaded nylon spacers and several bolts that fit the spacers. Eight xtreme mini v wheels kits may also be required: http://openbuildspartstore.com/xtreme-mini-v-wheel-kit/, 8 thirty millimeter low profile head m5 bolts from this same store. Additionally you will need twenty by twenty millimeters by five hundred millimeters openbuilds V slot extrusions from the same link: http://openbuildspartstore.com/v-slot-linear-rail/. Also needed are four six millimeter eccentic spacers from http://openbuildspartstore.com/eccentric-spacer/ along with several M3 cap head bolts for a new Z axis mount project. Please see this project's instructions for proper use and application of these materials
With this file you will be able to print Openbuilds v-slot z axis for Lulzbot Taz 4/5 Printers with your 3D printer. Click on the button and save the file on your computer to work, edit or customize your design. You can also find more 3D designs for printers on Openbuilds v-slot z axis for Lulzbot Taz 4/5 Printers.