Optocoupler PCB For Laser Etching For ABL
thingiverse
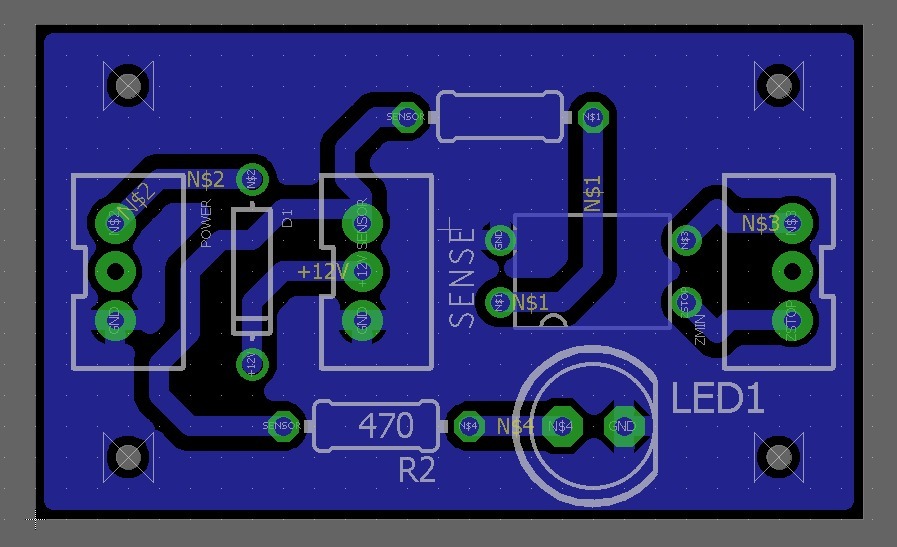
My new capacitive ABL kits are now available on eBay at https://www.ebay.com/itm/233183828678 with a competitive price of $39.99, featuring pre-configured firmware for Ender 3/3 Pro, CR-10 Series, and other non-Creality printers using a 2-wire normally closed Z endstop. Setup is incredibly easy: simply mount the probe (OEM Bracket), plug in power and the Z end stop connector, upload the ready-to-flash firmware, and calibrate! The kits come with Vanilla Marlin firmware that includes support for SD cards and thermal runaway protection. UPDATE 2/11/2019: I've added a "calibration coin" .stl file to help position the sensor offset when mounting. Detailed setup documentation will be available soon. I've also included my CR-10S Marlin source with various features enabled, such as original Creality boot and status screens, PID control, auto-temp, bilinear ABL, 4-corner ABL, babystepping, LCD-adjustable preheat, EEPROM store/load/failsafe, and LCD-adjustable software endstops. UPDATE 2/5/2019: I've added gerber files (eagle.zip) for Excellion machines, which should be supported by many board houses. I use OSH Park for my PCBs. I've edited the .bmp file to get the focus just right for laser etching and experimenting. The .jpg can be used for photo-resist etching or toner transfer methods. Watch this YouTube video to see the capacitive sensor in action: https://www.youtube.com/watch?v=8vNrOkRvHPQ UPDATE 2/4/2019: I'm about to try laser etching the first board using Laser Etch software (link below). I've tested the capacitive sensor and it works perfectly. Future mods include a jumper for 12V/24V operation to prevent damaging the optocoupler's internal diode, and possibly adding a DC barrel jack. IMPORTANT: For 24V power, replace resistors with 1k ohm value. Also, check your Z endstop with a volt meter. The CR-10S was reversed from the Ender 3, so on the Ender and CR-10 series printers, the Z endstop is active HIGH. The optocoupler PCB design is for use with capacitive proximity sensors. I've tested it on a CR-10S with auto leveling enabled, and it triggers the Z end stop perfectly. It runs on 9 to 12 volts from your PSU or external power source. More on this project as it progresses, but the PCB does work. I've tested it on a Creality Ender 3 Pro and CR-10S with a 2-wire Zmin cable. PCB Dimensions: 33.96mm x 20.31mm (available in .dxf file format) Here's the etching software I use for PCBs: Laser Etch (https://jtechphotonics.com/?product=laser-etch-bw-image-engraving-sw-license). Simply open the image, adjust your settings, and the PCB image will be the correct size. Sensor: NPN Type / Normally Open (available on Amazon at https://www.amazon.com/gp/product/B0746FYF5S/ref=ppx_yo_dt_b_asin_title_o00__o00_s00?ie=UTF8&psc=1) BOM: * 1 x screw terminal or Molex connector for power input * 2 x molex JST connector for sensor and endstop * 2 x 470 ohm resistors (use 1k ohm for 24V operation) * 1 x LED * 1 x general purpose reverse protection diode * 1 x PC817 or EL817 optocoupler
With this file you will be able to print Optocoupler PCB For Laser Etching For ABL with your 3D printer. Click on the button and save the file on your computer to work, edit or customize your design. You can also find more 3D designs for printers on Optocoupler PCB For Laser Etching For ABL.