Orange Pi Zero 2 case for Octoprint
thingiverse
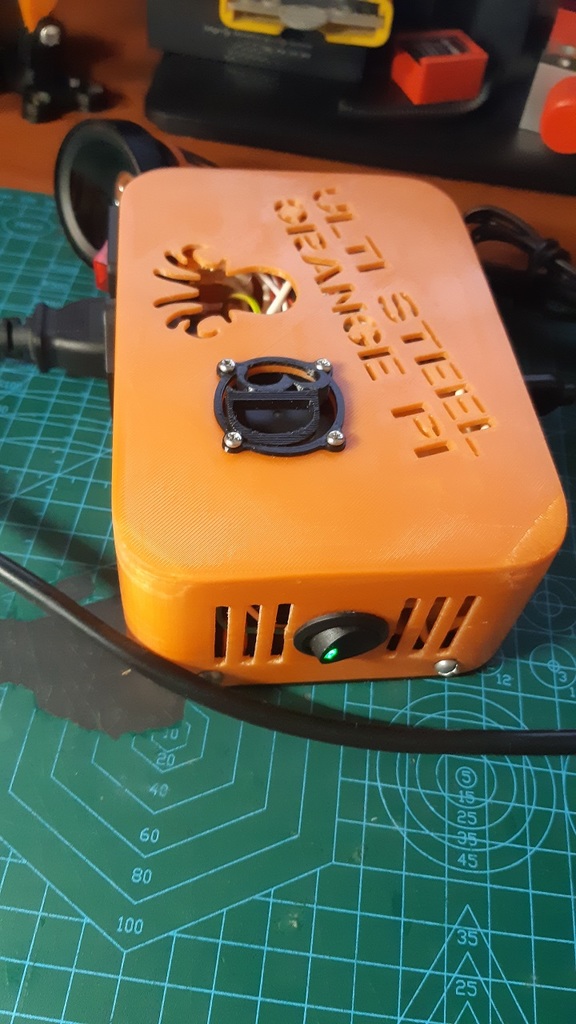
<h1>RU</h1> Это корпус для сервера Octoprint. В нем установлены: - Одноплатный компьютер Orange Pi zero 2 - Твердотельное реле - Розетки 220 В для ввода питания и подключения 3D принтера - Выключатель для включения/выключения принтера без участия ПО сервера Octoprint - Вентилятор охлаждения 30x30 5V - Два дополнительных разъема USB (для подключения веб камеры и резервный) - Дежурный блок питания 5V 2А (я использовал блок питания от старого смартфона) Входное переменное напряжение 220 В через твердотельное реле подключено к разъему питания принтера и напрямую к дежурному блоку питания. GPIO контакт одноплатного компьютера (я использовал pin 14) управляет твердотельным реле через оптопару. Реле также можно включить выключателем с подсветкой. Про подключение нагрузки через оптопару можно прочитать <a href="https://alexgyver.ru/lessons/arduino-load">тут</a> Для удобства монтажа я использовал плату коммутации, на которой установлена оптопара и разъемы для подключения компонентов. Джампер используется для переключения вентилятора в "тихий" режим ( 5V - 3.3 V) Плата коммутации изготовлена по технологии <a href="http://easyelectronics.ru/tag/lut">ЛУТ</a>. Она установлена над блоком питания на стойках. В корпусе использованы вплавляемые гайки M3 (крепление платы, одноплатного компьютера и USB разъемов) и M4 для крепления твердотельного реле и крышки корпуса. Разъемы USB закреплены в держателях двумя каплями клея. Крепления WiFi антенны тоже приклеены к основанию. Я не стал публиковать кронштейн крепления блока питания, поскольку вы вряд ли найдете точно такой же блок питания. Так же я не стал делать в основании места для вплавляемых гаек крепления стоек платы коммутации. Вполне возможно обойтись и без нее, используя навесной монтаж или макетную плату. <s>После доставки магнитов, я опубликую крепление, которое будет приклеено на основание и корпус можно будет легко установить на металлический корпус принтера.</s> Непонятно как долго будет длиться доставка магнитов от наших китайских друзей в нынешних условиях. Мне надоел корпус висящий на проводах - я напечатал пластину крепления, приклеил ее дихлорэтаном к основанию и привинтил к шкафу саморезами. <h1>EN</h1> This is a case for the Octoprint server. It has: - Single board computer Orange Pi zero 2 - Solid state relay - 220 V sockets for power input and for connecting a 3D printer - Switch to turn on/off the printer without Octoprint server software - Cooling fan 30x30 5V - Two additional USB connectors (for connecting a webcam and reserved) - Power supply 5V 2A (I used the power supply from an old smartfone) Input AC voltage 220 V through a solid state relay is connected to the printer's power connector and directly to the standby power supply. The GPIO pin of the single board computer (I used pin 14) controls the solid state relay through an optocoupler. Relays can also be switched on by switches with backlight. For ease of installation, I used a switching board on which an optocoupler is installed and connectors for connecting components. The jumper is used to switch the fan to "quiet" mode ( 5V - 3.3V) The switching board is made according to the technology <a href="http://easyelectronics.ru/tag/lut">LUT</a>. It is installed above the power supply on racks. M3 fused nuts are used in the case (fixing the board, single-board computer and USB connectors) and M4 for attaching the solid state relay and housing cover. USB connectors are fixed in holders with two drops of glue. The WiFi antenna mounts are also glued to the base. I didn't public the power supply mounting bracket because you are unlikely to find exactly the same power supply. Also, I did not begin to make places at the base for fused nuts for fastening the racks of the switching board. It is quite possible to do without it using a hinged installation. <s>After the magnets are delivered, I will publish a mount that will be glued to the base and the body can be easily installed on the metal body of the printer.</s> It is not clear how long the delivery of magnets from our Chinese friends will last in the current situation. I got tired of the case hanging on wires - I printed a mounting plate, glued it with dichloroethane to the base and screwed it to the cabinet with self-tapping screws. <h3>Used materials</h3> <ul> <li><a href="https://clck.ru/dqZtv">Fan 5V </li> <li><a href="https://clck.ru/dqavw">Power socket 220V</li> <li><a href="http://www.orangepi.org/Orange%20Pi%20Zero2">Prange Pi Zero 2</li> <li><a href="https://clck.ru/e4xcR">Solid state relay</a></li> <li><a href="https://clck.ru/dqhWX">Switch 12V</a></li> </ul>
With this file you will be able to print Orange Pi Zero 2 case for Octoprint with your 3D printer. Click on the button and save the file on your computer to work, edit or customize your design. You can also find more 3D designs for printers on Orange Pi Zero 2 case for Octoprint.