Orbiter Micro (Mini Microcentrifuge)
thingiverse
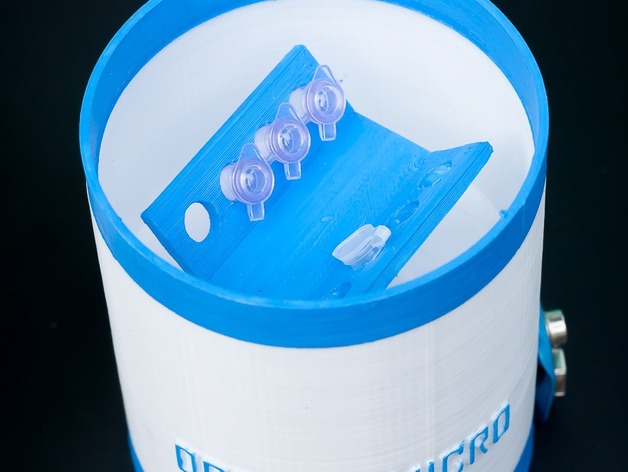
The Spinner is a super compact mini-centrifuge that fits in the palm of your hand! It's designed with a fully 3D-printed frame and rotor, no screws needed. It runs on either battery or DC power adapter, so you can take it anywhere! This tool is very useful for spinning down PCR mixes in tubes, as well as other applications that don't require high speeds and precision speed control. The current rotors are compatible with 10-gear 9V DC motors (like the one included in the Arduino starter kit) and SC motors with 8mm x 2mm DC motor shafts. Note: Some round-cap tubes may not fit into the original rotor. You can try printing the uploaded version with slightly larger holes, or the universal fit version. UPDATES: 06/30/2016 Uploaded 0.2 ml x 8 placer version 1 (enclosed version: main body with dedicated holes): - Spinner Micro_0.2x8 placer_Bottom Cover - Spinner Micro_0.2x8 placer_Main Body - Spinner Micro_0.2x8 placer_Rotor this is for for 10 gear DC motor shaft - Spinner Micro_0.2x8 placer_Rotor (for larger diameter tubes) this is for for 10 gear DC motor shaft - Spinner Micro_0.2x8 placer_Top Cover 07/04/2016 Uploaded rotor version for the more common size 130 DC motors with shaft size of 8mm length x 2mm diameter: - Spinner Micro_0.2x8 placer_Rotor (universal fit)(for 8mm x 2mm DC motor shaft) Bill of materials: Stranded copper wire Push-button switch 9V DC motor 9V power supply (and/or 9V battery) 9V battery connector (optional, if you want to have a battery option) Compatible female DC Power Jack supply socket (if you're using a power supply) HOW TO ASSEMBLE (0.2ml x 8-placer version): Print the files and insert the rotor onto the DC motor shaft (this may require a bit of force). Insert the DC motor (shaft upwards) into the central cavity of the main body. Thread the wires out of the bottom slots. Wire the switch, motor, 9V battery connector, and jack. Refer to the schematic for the connections. Use the photos as guides on where to place the components. You may need to sand some of the holes to fit some components. Glue the 9V connector to the side of the Main body (if using). Place the bottom cover and glue it in place (optional) Plug in the power source (9V power supply or battery... use only one!). Place your tubes and put on the top cover. Hold the centrifuge body with one hand ...and start spinning! CAUTION: Centrifuges are dangerous especially when using high power motors. Always wear eye protection if using centrifuges with no rotor covers. Make sure that the rotor fits tightly onto the DC motor. Also, make sure that the loads on either side of the rotor are balanced. CURRENT FILES: 0.2 ml x 8 placer version 1 (enclosed version: main body with dedicated holes): - Spinner Micro_0.2x8 placer_Bottom Cover - Spinner Micro_0.2x8 placer_Main Body - Spinner Micro_0.2x8 placer_Rotor (for 10 gear DC motor shaft) this is for for 10 gear DC motor shaft - Spinner Micro_0.2x8 placer_Rotor (for larger diameter tubes) this is for for 10 gear DC motor shaft - Spinner Micro_0.2x8 placer_Rotor (universal fit)(for 8mm x 2mm DC motor shaft) 0.2 ml x 16 placer version 1 (open version, for those who want to run more than 8 tubes at once): - Spinner Micro_16 placer rotor for 0.2ml tubes_10Gv1 - Spinner Micro_Base v1 Future updates: Separate version for 2ml microcentifuge tubes Variable speed control Print Settings Printer Brand: RepRap Printer: Wanhao i3v2 Rafts: No Supports: Doesn't Matter Infill: 50% Notes: You may need to scale the files by 1000% if using Craftware (I highly recommend slicing this using Craftware, as this is the one I used). Print using 0.4mm nozzles. Print the rotor with vertical shell offset to ensure that it fits the motor gear shaft (-0.15 for the 10-gear version, and - 0.07mm for the 8x2 mm version). For the main body, top cover, and bottom cover, print with -0.05 vertical shell offset.
With this file you will be able to print Orbiter Micro (Mini Microcentrifuge) with your 3D printer. Click on the button and save the file on your computer to work, edit or customize your design. You can also find more 3D designs for printers on Orbiter Micro (Mini Microcentrifuge).