Orbiter Remix for e3d tool changer
thingiverse
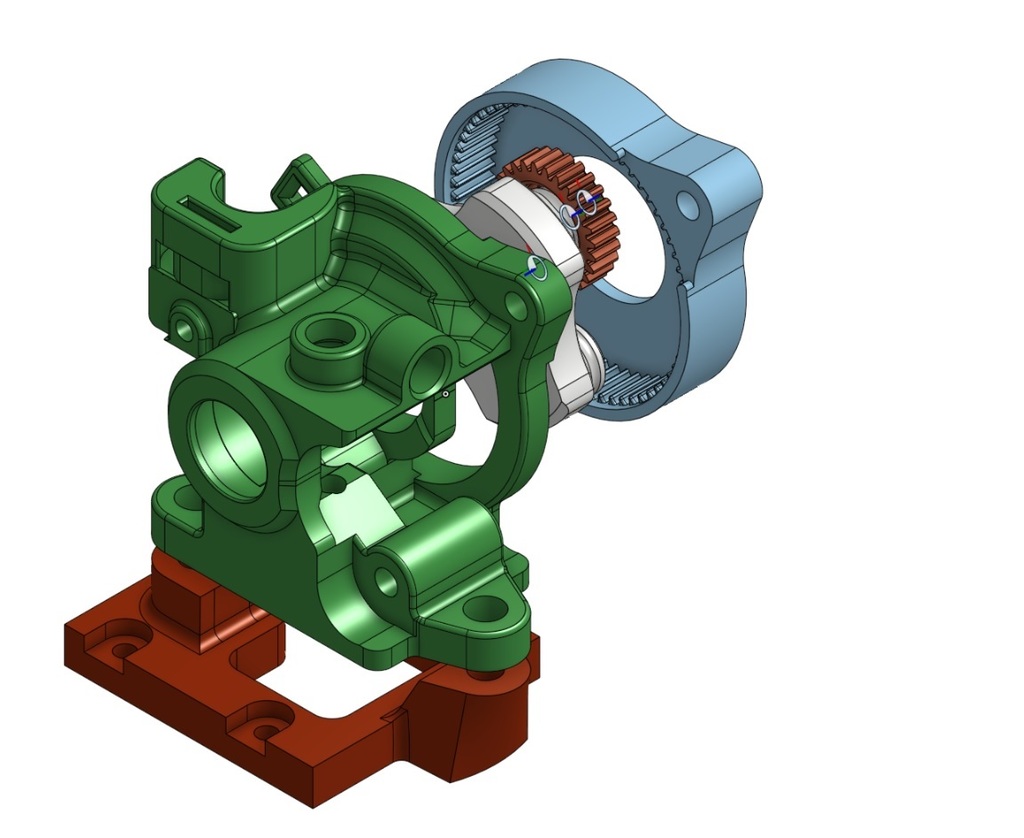
UPDATE: Jan 2, 2021: I noticed the first 2 images are of the original extruder, not the mirrored version. The mirrored version fits on the tool changer bowden tool better than the original non-mirrored version. I will fix the pictures eventually! UPDATE: Jan 1, 2021, Experimental versions of hub housing and ring gear I added V4c hubhousing as an alternative for v4b. The surfaces which mate with the latch's left and right edges are now more symmetric which might help with any misalignment of the extruder gears when the latch is closed. Misalignment can occur if the latch holes are elongated (can happen when printing the holes vertically). The ring gear with the tapered bottom is an alternative because I found that my printed versions tended to bow inward after being in use for some hours. Grinding down the inside of the previous version made them fit properly after the bowed inward from use. (I an using Matterhacker's nylonX; this might not be an issue with a different material) UPDATE: This is the version that is more compact. It was made possible by the designer of the orbiter creating a mirrored version for use on the CR-10 (which became the design I slightly modified here). Small refinements have also been made to the parts based on feedback from my experience printing the parts in Matterhacker's NylonX. I have one other minor change I will make when I have the time (small modification to the ring gear that should help with deformation that occurred in used (the bottom bowed in slightly, increasing the internal friction). UPDATE: If you want to make this for the e3d tool changer and haven't yet, it might be worthwhile to wait a little longer. I am working on a version that uses @lorinczorby 's mirrored CR-10 design. The result is a smaller tool with a shorter filament path between the extruder and the hot end. This is a remix of the Orbiter extruder and is definitely a work in progress. The base adapter is for the e3d tool changer v6 bowden tool. The changes to the extruder are in the housing and the drive train. In the housing I made the following changes: 1) The heat break part is being used - it works better Remember to grind down the tip of the part if you want to get a close fit with the extruder gears. 2) The M3 heat set insert that holds the latch closing screw in place was made larger to have what I had in stock. I will update this with its' dimensions and try to put a link to the item in Amazon. 3) The filament entrance to the extruder supports use of a very lightweight plastic locking collet (the same part that e3d uses with their extruders) which will hold a PTFE 4mm .o.d. tube in place. This allows using tubing to guide the filament from the spool to the extruder. I use it with a dry box so that the filament is only exposed to the ambient air inside the extruder itself. 4) Integrated e3d tool changer style wiring harness and harness guide mounting point. There are provisions for 3 zip lock ties to hold the wiring in place and a slot for a flat steel "wiring harness guide". If you want to understand this set up, please look at e3d's v6 bowden tool for their tool changer. Even if you are not using e3d's tool changer, it's nice to have a place to anchor the extruder wiring harness. In the drive train: I wanted a way to be able to print as much of the drive train as possible. I modified the drive shaft/spider to support press on gears (no bearings needed). I modified the spur gears to match the drive shaft. The spur gears have also been modified to minimize the effect of "elephant foot" and with chamfers on the gear teeth. I have printed my first set in Matterhacker's NylonX (PA-12 with additives and carbon fiber). So far, they are working very well. The have stood up to the break in and several hours of use so far. A note: if using a 0.4mm nozzle, set the extrusion width significantly smaller when printing out the gears. The 0.4 mm nozzle will allow the use of carbon fiber or glass fiber reinforced plastic. The smaller extrusion width should give a more accurate gear tooth profile. When pressing the spur gears onto the drive shaft, the inside of the gears and the stubs they will be mounted on must be heavily lubricated (synthetic or silicon grease with PTFE added) prior to being pressed on. I use a bench vice to carefully apply pressure. The drive shaft stubs where the spur gears are mounted are large enough to not break under use. If you have pressed them in too hard (such that they refuse to turn), they can be carefully pried about 1 mm away. Do this for all 3 spur gears. There are two steps to breaking in the drive train / gears. 1) Initially, to break them in, use a power drill or bench drill press. Chuck up the drive shaft with the gears pressed on and put the assembly into a heavily lubricated ring gear . Slowly spin the driveshaft for the first 20 revolutions or so. It should become much easier to turn pretty quickly. (If you are wondering how robust this is, you can let the drill press run for an hour or more as long as the lubrication stays in place. Because heat can be generated, don't leave it unattended. 2) Now add the stepper motor to the assembly so that its gear engages the printed spur gears. The complete assembly may be difficult to turn. Run a power drill slowly (like in the first step) for about 20 turns. It should now turn easier. You can continue to use a hand power drill to break it in. The stepper motor may get quite hot so be careful holding it.
With this file you will be able to print Orbiter Remix for e3d tool changer with your 3D printer. Click on the button and save the file on your computer to work, edit or customize your design. You can also find more 3D designs for printers on Orbiter Remix for e3d tool changer.