Orca 0.2 linear bearing lm8uu x-carriage
thingiverse
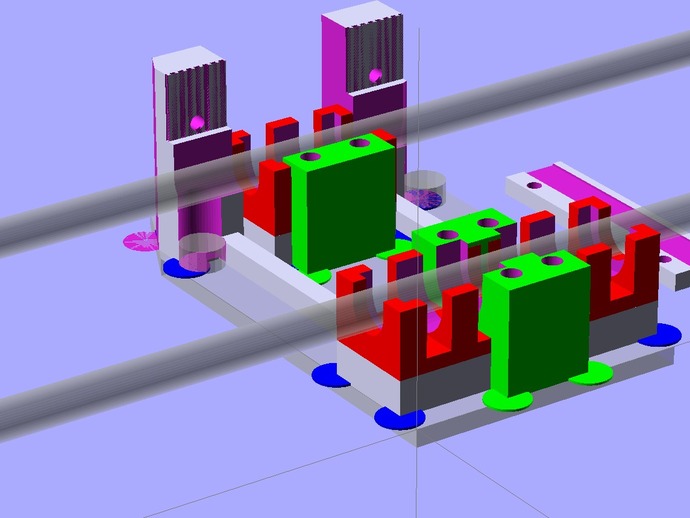
LM8UU x-carriage for Orca 0.2, created with OpenSCAD. Printed and tested. Inspired by: "Orca Series linear bearing lm8uu x-carriage - better/newest version" Created by raggie: http://www.thingiverse.com/thing:15420 Uses: "Parametric teardrop script" Created by mattroberts: http://www.thingiverse.com/thing:9810 "Lm8uu Y axis Holder" Created by GregFrost: http://www.thingiverse.com/thing:9871 UPDATE May-2013, version V3 GT2: changed the design to fit GT2 belts greatly improved belt holder stability improved lm8uu holder Instructions Print Clean, if printed with pads, remove pads Insert LM8UU, if printed with PLA it may be necessary to warm the holder to avoid breakage. (3a. Optional, but recommended: Put a little glue under each LM8UU before insertion) Remove old x-carriage Insert new x-carriage, attach base plate, longer screws may be necessary: Front: Replace screws with 2x M4x40 and 2x M4x35 Back: Countersunk screws M4x30 may still fit, but M4x35 would be better Check if print bed is still level. The carriage has the same height as the original x-carriage, only minimal re-leveling of the print bed is necessary. The belt should hold without screws, if not 2x M3 screw can be used. Comments/suggestions are appreciated. P.S.: If you use my "Orca v.2 40mm print fan mount" http://www.thingiverse.com/thing:12549 you need the new "print_fan_mount_2.stl" and M4x45 screws.
With this file you will be able to print Orca 0.2 linear bearing lm8uu x-carriage with your 3D printer. Click on the button and save the file on your computer to work, edit or customize your design. You can also find more 3D designs for printers on Orca 0.2 linear bearing lm8uu x-carriage.