Origin Locator
prusaprinters
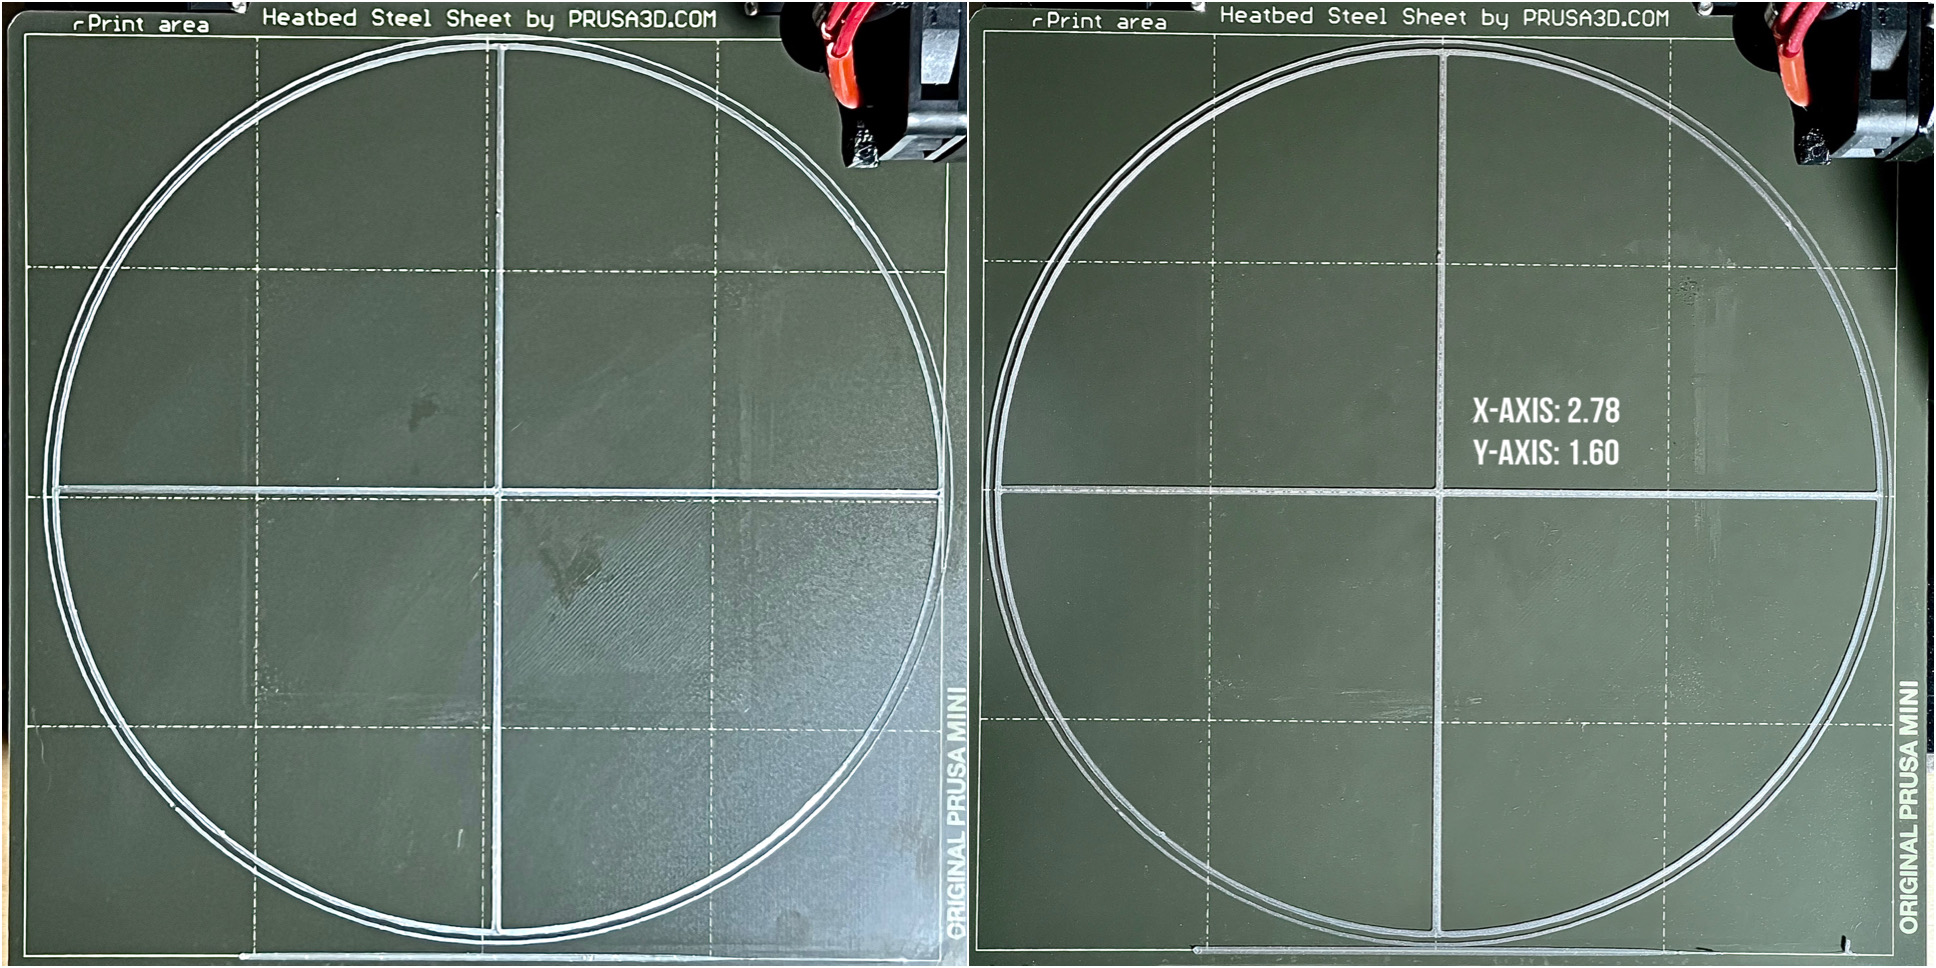
<p>Due to mechanical tolerances, print beds won't be exactly zeroed to the assembly. 99% of the time this isn't an issue, but if your printing something that maxes out the build volume or if your OCD just can't stand seeing off-centered parts printed, this origin locator will help fix it.</p><p>Steps to use: </p><ol><li>Slice and print the origin locator. Note: you'll need to set the skirt to 1mm distance. </li><li>Measure the x and y offsets using calipers. Mine was 2.78x, 1.60y. Yours will be different!</li><li>In PrusaSlicer, go to Printer Settings > Bed Shape and set the Origin to the measured values.</li><li>You'll now lose the Plater image of the build plate. While still in Bed Shape, load the texture and model for the mini - on Windows it's found here: C:\Program Files\Prusa3D\PrusaSlicer\resources\profiles\PrusaResearch</li><li>Do CNTRL+P to open preferences and check “auto-center parts”. This will automatically center your model at the new origin, which should be offset from the original center (90,90) by your measured amount (87.22,88.4) for my case (everyone's will be different!). </li><li>Slice the model again using the new origin and print it. Sometimes it takes a couple measurements to get it just right! </li></ol>
With this file you will be able to print Origin Locator with your 3D printer. Click on the button and save the file on your computer to work, edit or customize your design. You can also find more 3D designs for printers on Origin Locator.