Original Prusa i3 - Bear Upgrade - Spool Holder
thingiverse
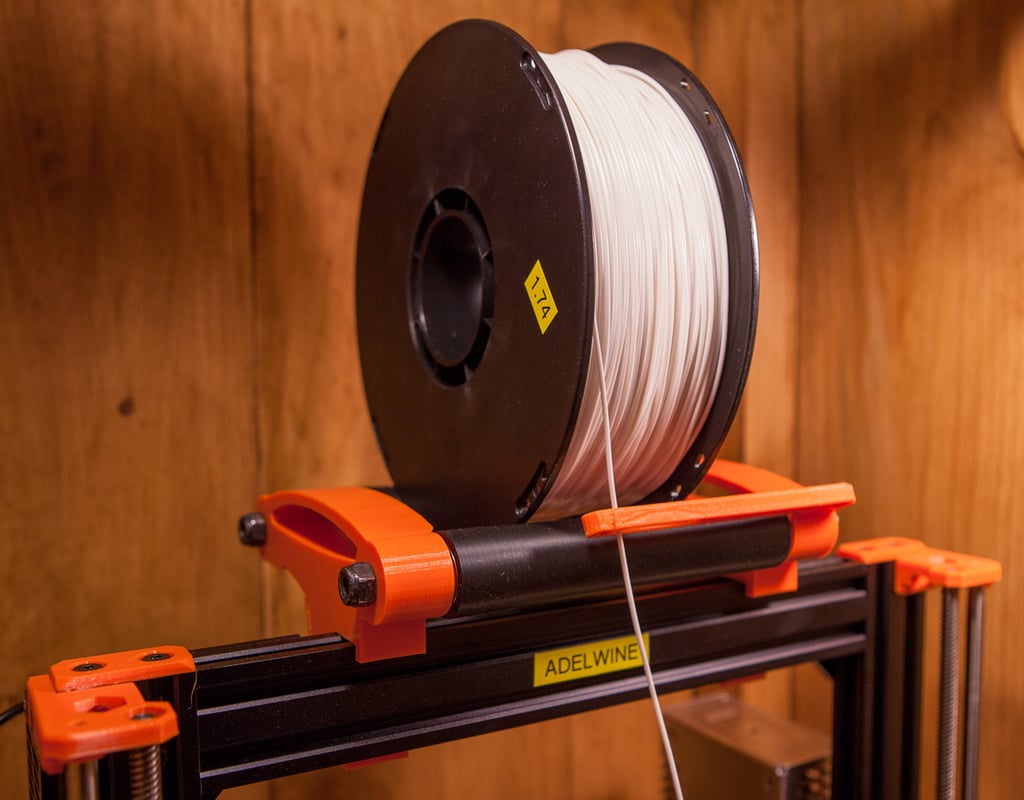
This is a rolling spool holder designed for any full upgrade version of the Prusa i3 Bear Upgrade. It mounts to the top aluminum extrusion bar via clasps that are secured with m3 bolts. It's easy to quickly mount and unmount (without fear of breaking plastic). The spool holder is a remix of IsmaelPR1’s “New Prusa i3 MK1 & MK2 Spool Holder V2 - Quick Change” https://www.thingiverse.com/thing:1768975 which worked beautifully for me on my prusa MK2S. There are a few pieces of hardware needed for this design: x2 - 5/16 inch (or M8) Threaded Rods (between about 205 to 210 mm long each) x2 - 5/16 inch (or M8) Nuts x2 - 5/16 inch (or M8) Lock Nuts x4 - 608 Skateboard Bearings (I bought these: https://www.amazon.com/gp/product/B01M7TT32W/ref=oh_aui_search_asin_title?ie=UTF8&psc=1) x2 - M3 x 18 bolts x2 - M3 knurled threaded inserts (I used these: https://www.amazon.com/gp/product/B01IYWUUH8/ref=oh_aui_search_asin_title?ie=UTF8&psc=1) SOME INSTRUCTIONS: ROLLERS - Print two. - (ONE RECOMMENDATION: PRINT ABOUT 15MMS OF ONE OF THE ROLLERS AND SEE IF ONE OF YOUR SKATE BOARD BEARINGS FITS SNUGGLY INTO IT. If it doesn't fit at all, take some measurements, scale the model accordingly, and print another test.). KNURLED THREADED INSERTS - The knurled inserts are inserted into the small cavities located at the bottom of each of the big main side brace "legs" (see included photo). These (after they have been heat inserted) will accept the M3 bolts that tighten the bottom clasps to the main assembly. -- If you are new to using heated inserts here are general instructions: Place the brass insert on top of the cavity it is designed to melt into and then apply a heated soldering iron to the insert. If possible heat the tip of the soldering iron to the same temperature you would set your 3D printer's hot end to for the plastic you are using for this project. After a moment, the insert will melt the surrounding plastic and, with the help of a tiny bit of steady pressure applied by gently pressing down on the soldering iron, the insert will slowly press into the plastic. DO NOT TOUCH THE INSERT after you've applied heat. - - I like to use brass stand offs (see included photos). I will thread a standoff into the knurled insert and then when I apply the soldering iron tip to the female end of the standoff, the heat transfers into the knurled insert and the standoffs male end helps keep melted plastic from sneaking up inside the insert and gumming up the threads. After you have inserted the knurled insert into the plastic, allow a good 10-15 minutes for the brass standoff to cool down and then unscrew it. (M3 BRASS STAND OFFS: https://www.amazon.com/gp/product/B00AO40QTW/ref=oh_aui_search_asin_title?ie=UTF8&psc=1) MAIN ROLLER SECTION ASSEMBLY: The skateboard bearings fit into each end of each roller. The threaded rods then fit through the main side braces/printer mounts and through the bearings and the rollers, assembling the whole thing together (with the exception of the bottom clasps, of course, which we'll get to below). Secure each threaded rod with a lock nut on one end and a standard nut on the other. Tighten the standard nuts until the whole roller assembly fits snuggly together - but not so tight that the rollers themselves can not spin freely. CLASP ASSEMBLY: Place the main roller assembly on top of the Bear Upgrade's top bar. Secure the bottom clasps with M3 Bolts.
With this file you will be able to print Original Prusa i3 - Bear Upgrade - Spool Holder with your 3D printer. Click on the button and save the file on your computer to work, edit or customize your design. You can also find more 3D designs for printers on Original Prusa i3 - Bear Upgrade - Spool Holder.