Original U.S.S. Enterprise NCC-1701 model parts
thingiverse
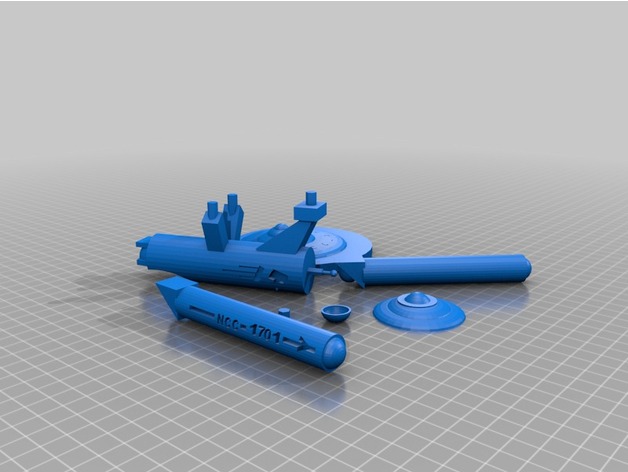
This thing was made with Tinkercad. Edit it online https://www.tinkercad.com/things/eyB5RZ6LXM0 Needs to be printed with a 0.2mm nozzle. Requires assembly after printing. See image for assembly tips. Assembled model is 94mm X 210mm X 69.99mm Print Settings Rafts: Doesn't Matter Supports: Yes Notes: Use a 0.2mm nozzle, at least on the saucer. If you don't, the text on the saucer won't print. Multiple print batches will be required to print all parts. The hexagonal prism that is separate from the rest of the parts is extra. There are two of them in the U.S.S. Constitution part set. Post-Printing Step 1: Painting Paint the ship's name and number in black over where they are on the parts. You will need a thin brush with long bristles that stay semi-rigid when you dip the brush in water and then wipe off the excess water for the numbering on the nacelles. I recommend using the tip of a needle file for the text on the saucer. Make sure to paint the text and triangles on the bottom of the saucer as well. You will have to try to add in parts of the exterior decorative pennants on the engineering hull using the same brush that you used for the nacelles. You may want to refer to an image of the Enterprise to help you. Paint the deflector dish and the post for it on the front of the engineering hall in either bronze, very light beige or the color that I used, which is called 'buttermilk'. You can either try to mix up a paint color for the front ends of the nacelles, like I did on my print of my Constitution model, or go over the ends in red sharpie and then rub off some of the sharpie with your finger to end up with a sort of dark pinkish color, like I did with the other three of these ships that I actually printed. If you print the model parts for the U.S.S. Defiant from lime filament, use an ultra-fine tipped red sharpie on the nacelle ends and rub off some of that with your finger. For the bridge and phaser banks, go over the domes on the ends of those parts with a yellow highlighter and then rub some of the color off with your finger. If you print the Defiant parts, paint these parts light beige or buttermilk. Closeup on Constellation nacelles to show color work. Note also the nacelle placement posts, which show up in the next step. I apologize for the terrible quality of this photograph taken with an old, simple, poor-quality digital camera. Step 2: Assembly Before I go into the details of assembling each area of the ship, I need to make recommendations for the gluing steps. I recommend using a good model cement such as what I used, which is called Duco Cement. If that doesn't work, use hot glue, but only let it heat to the point when it starts coming out of a hi-temp glue gun or just use a low-temp glue gun. Epoxy would probably work as well, but I can't personally verify that since I didn't use it. Nacelles: File down the placement posts so that the nacelles snap onto them via the hole on the bottom of each nacelle. You will not need glue on the nacelles unless you break the placement posts, in which case you have to cut off the remains of the placement posts and glue the nacelles directly to the nacelle arms or whatever you want to call them. Refer to the image of the nacelles and posts on my U.S.S. Constellation model (the only one of the ships that I printed on which I didn't break one or both of the placement posts) if you are confused as to which parts are the placement posts. Saucer: Glue the lower saucer section part onto the underside of the main saucer part between the black triangles. Snap the placement post off the top of the engineering section and glue the saucer onto it. Deflector dish: Slide the deflector disk onto its post with the open side facing outwards and glue in place. This should give you an idea of what the finished model should look like if you end up breaking both nacelle placement posts (U.S.S. Enterprise shown). Again, I apologize for my poor-quality camera.
With this file you will be able to print Original U.S.S. Enterprise NCC-1701 model parts with your 3D printer. Click on the button and save the file on your computer to work, edit or customize your design. You can also find more 3D designs for printers on Original U.S.S. Enterprise NCC-1701 model parts.